Categoría: How-To Guides

  • Flooring Installation Tips for DIY Homeowners

    Flooring Installation Tips for DIY Homeowners

    Table of Contents

    Last Updated: October 9, 2026

    Flooring Installation Tips for DIY Homeowners: What to Know First

    Flooring installation is the process of preparing a subfloor, measuring a room, and locking, gluing, or nailing new planks or tiles into place. Most homeowners can handle a single room themselves. The job rewards patience more than skill.

    This guide from Viva Floors & More covers the full process, from moisture checks to the last transition strip.

    Here is the short version: prep work decides whether your floor lasts. Skip it and planks separate, edges lift, and you redo the job.

    Below, we walk through subfloor prep, tools, timing, and the mistakes we see most often.

    How to Prepare a Subfloor for Flooring

    Subfloor preparation is the work of cleaning, leveling, and testing the surface under your new floor. It is the least fun part of the project and the one that matters most. A floor is only as flat and as dry as what sits beneath it.
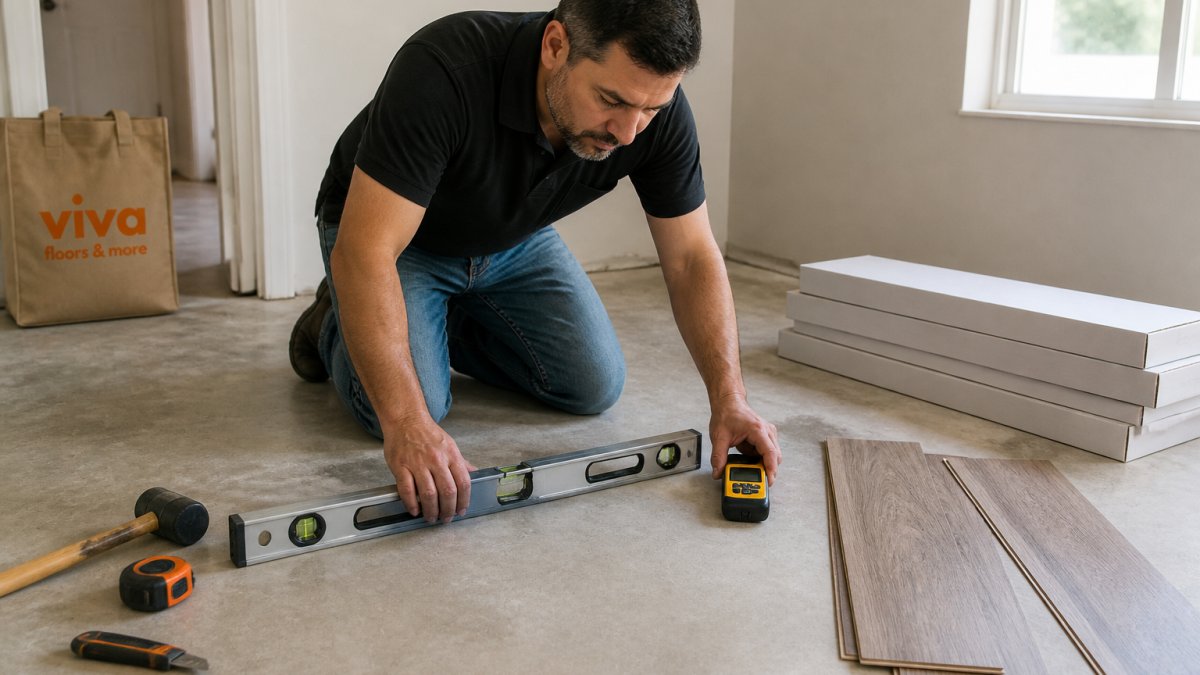
    Homeowner checking concrete subfloor with a level and moisture meter during flooring installation
    Homeowner checking concrete subfloor with a level and moisture meter during flooring installation

    Start by pulling up old carpet, tack strips, staples, and adhesive. Any bump or grit will telegraph through vinyl plank flooring within months, and a single staple left behind can create a visible pucker in a plank that never lays flat.

    Checking Moisture and Flatness Before You Start

    Moisture is the silent killer of DIY flooring. Concrete slabs wick water vapor from below, and trapped moisture warps laminate and wood flooring.

    Testing moisture on a concrete slab:

    • Plastic sheet test (qualitative): Tape a 2-foot by 2-foot square of clear plastic sheeting to the slab with duct tape on all four sides. Wait 24 hours. If condensation forms on the underside of the plastic or the concrete beneath it darkens, moisture is present and you need a vapor barrier or a sealer before installing.
    • Calcium chloride test (quantitative): Kits are sold at most home centers. You weigh a dish of calcium chloride before and after exposure to measure how much moisture vapor the slab emits. This gives a number you can compare against your flooring manufacturer’s limit.
    • Moisture meter: Pin-type meters work on wood subfloors; pinless meters work on concrete. Take readings in several spots, not just one, because slabs dry unevenly.

    Wood subfloors need checking too. A moisture content difference of more than a few percentage points between the subfloor and the new flooring can cause gaps or buckling as the materials equalize.

    Checking flatness:

    Flatness matters just as much as dryness, and it is the step most DIYers underestimate. The National Wood Flooring Association installation guidelines call for flatness within a set tolerance over a set distance, and most manufacturers print their own number on the box.

    A practical way to check:

    1. Lay a long straightedge or a 6- to 8-foot level across the floor in several directions.
    2. Slide a tape measure or a feeler gauge under the low spots to measure the gap.
    3. Mark high and low spots with painter’s tape so you can see the pattern.
    4. Walk the whole room in a grid, not just the center.

    Low spots get patched with a self-leveling or patching compound. High spots get ground down with a concrete grinder or a belt sander on wood.

    Watch Out Laying planks over a damp slab traps moisture underneath. The planks cup, the edges lift, and the warranty is void. Always test first, and always check the manufacturer’s moisture limit before you buy the flooring.

    Matching the Prep to the Room

    Not every room needs the same prep. A bathroom or basement slab holds moisture differently than a bedroom over a wood subfloor. Concrete slabs on or below grade wick more vapor than slabs above grade, so they usually need a vapor barrier or a sealer. Bathrooms and laundry rooms see splash and humidity, so a waterproof underlayment or a fully waterproof flooring product makes sense there.

    When in doubt, test, then read the box. The product instructions for temperature, humidity, and installation conditions take precedence over general advice, including the advice in this guide.

    DIY Flooring Installation Tools You Actually Need

    You do not need a truckload of tools. A basic kit handles most vinyl, laminate, and wood flooring jobs. But the tools you skip are often the ones that decide whether the floor looks professional or looks like a weekend experiment.

    DIY Vinyl Plank Flooring Installation

    A Thousand Generations Offgrid Homestead

    The core kit:

    • Tape measure and pencil
    • Utility knife and extra blades (buy more blades than you think you need; dull blades tear vinyl instead of cutting it)
    • Pry bar and hammer
    • Tapping block and pull bar
    • Spacers for expansion gaps
    • Safety glasses and knee pads
    • Moisture meter and long level
    • Miter saw or jamb saw for door casings
    • Chalk line for layout
    • Floor scraper for adhesive and old underlayment

    Tools worth renting or borrowing for one job:

    • Concrete grinder for high spots on a slab
    • Floor roller for glue-down installations
    • Oscillating multi-tool for undercutting door jambs cleanly

    Acclimation, Waste Allowance, and Product-Specific Requirements

    This is the part most DIY guides skip, and it is where projects go wrong before a single plank is laid.

    Waste allowance. Measure the room’s length and width, then multiply to get square footage. Add 10 percent for cuts and waste on a simple rectangular room.

    Product-specific requirements. Read the box before you buy anything else. Different products have different rules:

    • Some vinyl plank requires an underlayment; some has it attached and adding more voids the warranty.
    • Some laminate needs a foam or combination underlayment for sound and moisture.
    • Glue-down products need a specific adhesive and a specific trowel notch size.
    • Peel-and-stick tiles need a clean, smooth, fully cured substrate and often a primer.
    • Some products require a vapor barrier over concrete; others have one built in.

    If the box and the store clerk disagree, the box wins. The manufacturer’s instructions are what the warranty is built on.

    Measuring, Layout, and Cutting Essentials

    Measure the room at its widest and longest points, not just at the walls, because rooms are rarely perfectly square. Snap a chalk line down the room’s center and dry-lay a row of planks to see how the layout lands.

    For cutting, score vinyl plank with a utility knife and snap it. Use a saw for angles around door jambs and vents. Cut with the finished side down to avoid chipping. For laminate and wood, use a miter saw or a flooring cutter, and always cut on a scrap piece or a sacrificial board.

    Pro Tip Undercut door casings with a jamb saw so planks slide underneath. It hides the cut edge and looks like the floor was always there. Lay a scrap piece of flooring on the subfloor as a height guide when you set the saw depth.

    Budgeting Time and Money

    A single 12×12 room typically takes one weekend for a first-timer, including prep, layout, and cleanup. Two people cut the time roughly in half. Budget for the tools you do not own, the underlayment the product requires, and the transition strips for doorways.

    Request Estimate →

    Plan for a full weekend if you are working alone. If the subfloor needs leveling or the old floor is glued down, add a day.

    U.S. Environmental Protection Agency guidance on indoor air quality during renovations

    How Long Does Flooring Installation Take?

    A single 12×12 room typically takes one weekend for a first-timer. That includes prep, layout, and cleanup.

    Here is a realistic breakdown:

    Phase Time Notes
    Tear-out and cleanup 2-4 hours Longer with glued carpet
    Subfloor prep 2-6 hours Depends on leveling needs
    Acclimation 24-72 hours Check the box for your product
    Layout and cutting 2-3 hours First room only
    Plank installation 4-8 hours A 12×12 room
    Transitions and trim 1-2 hours Doorways and edges

    Acclimation is the step most people skip. Vinyl plank and laminate need to sit in the room for a day or more so the material adjusts to your home’s temperature and humidity. The manufacturer’s instructions on the box tell you exactly how long.

    Plan for a full weekend if you are working alone. Two people cut the time roughly in half.

    U.S. Environmental Protection Agency guidance on indoor air quality during renovations

    Flooring Installation Mistakes to Avoid

    The biggest mistake is rushing prep. A clean, smooth, dry surface prevents almost every problem that shows up later.

    Other common errors we see:

    • Installing over a dirty or uneven subfloor
    • Skipping the moisture test on concrete
    • Forgetting expansion gaps at the walls
    • Cutting planks too tight around door frames
    • Mixing planks from different boxes without checking dye lots

    Dye lots matter. Two boxes of the same product can vary slightly in shade. Open several boxes and mix planks as you go so the floor looks uniform.

    Also, do not walk on freshly glued flooring too soon. Give adhesive the full cure time on the label.

    Key Takeaway Prep, moisture testing, and expansion gaps cause most flooring failures. Get those three right and the rest is straightforward.

    Transitions, Expansion Gaps, and Door Clearances

    Expansion gaps are small spaces left between the flooring and any fixed object, like walls and door frames. Floors expand and contract with temperature and humidity. Without a gap, planks buckle.

    Leave a gap the width the manufacturer specifies, usually a quarter inch or so, and cover it with baseboard or shoe molding. Never caulk a floor tight against a wall.

    Transitions cover the seam where two floors meet or where flooring ends at a doorway. Common types:

    • T-molding for two floors of equal height
    • Reducer for a height difference
    • Threshold for doorways
    • Stair nose for steps

    Check door clearances before you install. A new floor raises the finished height, and a door that used to clear the carpet may drag. Trim the door bottom if needed.

    When to Hire a Professional Flooring Installer

    Call a pro when the job involves structural problems, large areas, or materials you have never worked with. Some situations are not worth the risk.

    Hire out if you find:

    • Soft or rotted subfloor sections
    • Significant moisture problems
    • A large room with complex angles
    • Natural stone or tile that needs a wet saw and mortar bed
    • Stairs, which are hard to get right

    A pro also makes sense if you simply do not have the time. One weekend project can stretch into three when life gets in the way.

    For everything else, a DIY install is very doable. The key is picking the right material first.

    Stop by one of our showrooms in Pharr or Brownsville to see and feel the product in person.

    Frequently Asked Questions

    How much extra flooring should you buy for a DIY installation?

    Plan on 10% extra for a standard rectangular room and up to 15% for rooms with lots of angles, closets, or doorways. The extra covers cut waste, miscuts, and future repairs if a plank gets damaged. Keep at least one full box unopened after the job so you have a matching piece on hand. Running short mid-project is one of the most common flooring installation mistakes, especially when a dye lot sells out.

    What tools do you need to install flooring yourself?

    For click-lock vinyl or laminate, you need a tapping block, pull bar, spacers, a utility knife or vinyl cutter, a jigsaw or miter saw for door casings, a pry bar, a mallet, and a tape measure. Add a moisture meter and a 6-foot level or straightedge for subfloor checks. A chalk line helps with layout in large rooms. Most of these are inexpensive and reusable, so the DIY flooring installation tools list stays short.

    How long does flooring installation take for a typical room?

    A 200-square-foot bedroom in click-lock vinyl plank usually takes one person six to ten hours, including prep and trim. A 500-square-foot open living area can run two full days. Add time for acclimation, which most manufacturers require for 24 to 48 hours before installation. How long flooring installation takes depends mostly on subfloor condition, room shape, and how many doorways and obstacles you have to cut around.

    When should you hire a professional flooring installer?

    Call a pro if the subfloor is uneven beyond the manufacturer’s tolerance, if you find moisture problems under a slab, or if the job involves stairs, herringbone patterns, or glue-down hardwood. Whole-home installs over 1,500 square feet also go faster with a crew. If you are unsure about the flooring material or installation method, a showroom consultation can confirm whether your room is a good DIY candidate before you buy.


    Most flooring problems trace back to a rushed prep job or the wrong material for the room. Viva Floors & More takes the guesswork out of both. We offer expert consultation, one of the largest flooring selections in South Texas, and options for every room and budget. Get started with Viva Floors & More and install a floor you will be proud of for years.
  • How to Transition Between Different Floors: 2026 Guide

    How to Transition Between Different Floors: 2026 Guide

    Table of Contents

    Last Updated: September 18, 2026

    Flooring Transition Strips Types: T-Molding, Reducer, and Threshold

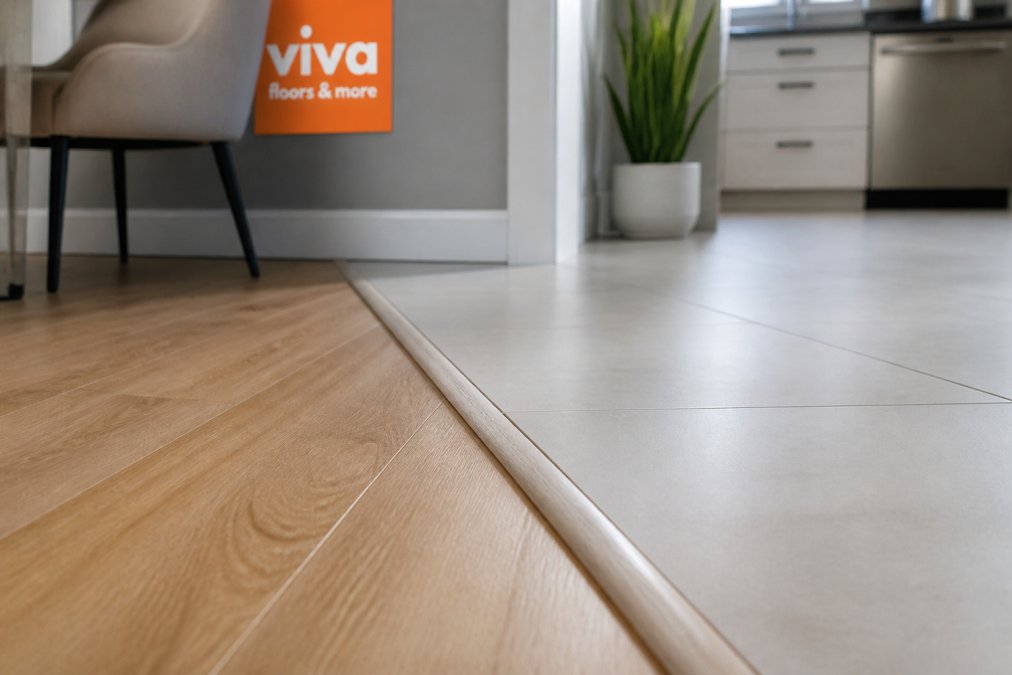
    Learning how to transition between different floors starts with picking the right strip. A transition strip is a thin piece of trim that bridges the gap between two flooring surfaces. It hides the cut edge, covers the expansion gap, and removes the tripping hazard at the seam.

    Three types cover nearly every job:

    • T-molding bridges two floors of equal height.
    • Reducer ramps down from a taller floor to a shorter one.
    • Threshold caps a doorway or an exterior entry.

    Get the type wrong and the strip will rock, pop loose, or leave a lip you stub your toe on every morning.

    T-Molding for Equal-Height Floors

    T-molding is the right pick when both floors sit at the same height. It has a flat top and a rib underneath that slides into the gap between the two surfaces.

    Use it for:

    • Hardwood meeting laminate at the same level
    • Vinyl plank meeting tile over one shared subfloor
    • Two rooms with the same floor height but different materials

    The rib centers the strip over the gap. That keeps the seam tight and lets both floors expand and contract without buckling.

    Reducer Strips for Height Differences

    A reducer strip slopes from the taller floor down to the shorter one. It turns a hard step into a gentle ramp.

    Picture a hallway with thick hardwood meeting a bathroom with thin vinyl. The hardwood sits higher. A reducer bridges that drop so feet, carts, and wheels glide across instead of catching.

    Reducers come in different height ratios. Match the strip to your actual height difference, or the slope will feel steep and awkward.

    Thresholds for Doorways and Exterior Transitions

    A threshold covers the seam at a doorway or where flooring meets an exterior door. It is wider and flatter than a T-molding.

    Use a threshold when:

    • A door sits between two rooms with different floors
    • You need to seal out drafts, water, or pests at an entry
    • The gap is wider than a standard T-molding can cover

    Thresholds take more foot traffic than any other strip. Choose a hard material that will not dent under constant stepping.

    How to Fix Uneven Floor Height Between Rooms

    You have two options when floors do not match: level the subfloor or bridge the gap with a strip. The right call depends on how big the difference is and what caused it.

    Small differences, usually under a quarter inch, are a job for a transition strip. Bigger differences often point to a subfloor problem that a strip alone will not fix.

    Measuring the Height Difference Accurately

    Measure at the seam, not in the middle of the room. Floors can slope, so the number that matters is the gap right where the two surfaces meet.

    Here is how to get a clean measurement:

    1. Set a straightedge across the seam so it rests on both floors.
    2. Slide a tape or ruler under the low side until it touches.
    3. Read the gap. That is your height difference.
    4. Measure at three points along the seam and use the largest number.

    A common mistake is measuring once and ordering a strip that is too short. Always take the biggest gap.

    When to Level the Subfloor vs. Use a Transition Strip

    Level the subfloor when the difference is large or the floor feels soft and spongy underfoot. A spongy spot often means moisture damage or a low joist, and a strip will just hide a growing problem.

    Request Estimate →

    Use a transition strip when:

    • The gap is small and consistent along the seam
    • Both floors are solid and flat
    • The height difference comes from flooring thickness, not a structural issue
    Watch Out Never bridge a difference of an inch or more with a standard strip. A steep ramp becomes a tripping hazard and a strip that tall will not stay put. Fix the subfloor first.

    Best Tools for Installing Flooring Transitions

    You do not need a full workshop. A short list of tools handles almost every transition job.

    • Tape measure for the seam length and height gap
    • Miter saw or handsaw for clean, square cuts
    • Pry bar and hammer for lifting old trim
    • Drill for pilot holes in hardwood
    • Nail set to sink nails below the surface
    • Caulk gun for adhesive
    • Sanding block to soften sharp cut edges
    • Utility knife to trim adhesive and clean the gap

    A miter saw gives the cleanest cut. If you do not own one, a fine-tooth handsaw works, but take your time. A ragged cut shows at the seam.

    Step-by-Step: Installing a Transition Strip

    Total Time: 45 to 90 minutes Difficulty: Beginner to intermediate

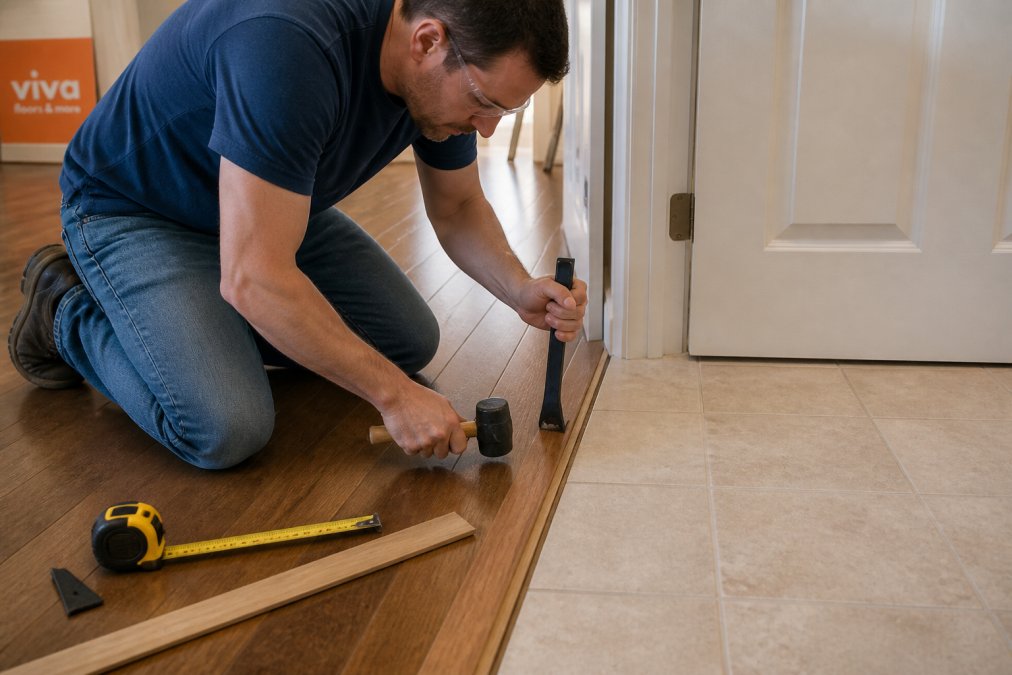
    Homeowner using a pry bar and hammer to install a T-molding strip, showing how to transition between different floors
    Homeowner using a pry bar and hammer to install a T-molding strip, showing how to transition between different floors

    Here is the full process, from prep to final tap.

    Step 1: Prep the Subfloor and Measure

    Clear the gap between the two floors. Vacuum out dust, old adhesive, and any loose debris.

    Check that both floor edges are flat and solid.

    Step 2: Cut and Fit the Strip

    Cut the strip a hair longer than the seam, then trim to a snug fit. For doorways, cope the ends around the door jamb so the strip tucks under the trim.

    Step 3: Secure with Adhesive or Nails

    You have two ways to lock the strip down:

    • Adhesive: Best for concrete subfloors and floating floors. Run a bead, press the strip in, and weight it until it sets.
    • Nails or screws: Best for wood subfloors. Drill pilot holes, then drive fasteners into the subfloor, not the flooring.
    • Both: The strongest hold for high-traffic doorways. Glue the base and nail the ends.

    Set nails below the surface with a nail set, then fill the holes with matching putty.

    Pro Tip Never nail through a floating floor. Fasteners pin the planks and stop them from expanding. On floating floors, glue the strip to the subfloor and let the planks move underneath it.

    Choosing the Right Material for Your Transition

    Match the strip material to the floors it touches and the traffic it takes. A strip that looks right but wears fast is a false economy.

    Material Best For Watch Out For
    Wood Hardwood and laminate seams Swells with moisture
    Laminado Color-matched laminate floors Can chip at sharp edges
    Vinyl Vinyl plank and damp rooms Fades in direct sun
    Metal Doorways and high traffic Dents if too thin
    Stone or marble Azulejo to tile transitions Cracks if unsupported

    Robot Vacuum Compatibility and Accessibility: What Most Guides Miss

    Most guides stop at installation. They skip the two things that decide whether you will actually like the result: your robot vacuum and your household’s mobility needs.

    • Keep the height change under about half an inch where possible
    • Choose a reducer over a sharp square edge
    • Avoid metal strips with a raised lip
    Key Takeaway A transition strip is not just trim. It decides whether a robot vacuum can clean the whole floor and whether someone with a walker can cross the room safely.

    DIY vs. Professional Installation: Cost and Time Breakdown

    Doing it yourself saves labor, but only if you have the tools and the patience. Hiring a pro saves time and lowers the risk of a bad cut.

    Factor DIY Professional
    Time per transition 45 to 90 minutes Same day, batched
    Tools needed Saw, drill, pry bar Pro brings all
    Risk Miscut or loose strip Low
    Best for One or two seams Whole-home jobs

    Visual Troubleshooting: Fixing Gaps, Tripping Hazards, and Squeaks

    Most transition problems have a simple cause and a simple fix. Here is how to read the symptom and solve it.

    Problem Likely Cause Fix
    Gap at the seam Strip cut too short Replace with a longer strip
    Strip rocks Uneven subfloor Sand high spot or shim
    Tripping hazard Steep or tall strip Switch to a reducer
    Squeak Loose fastener Add adhesive or reset nails
    Strip pops up Adhesive failed Clean and re-glue

    Frequently Asked Questions

    What is the best way to transition between different height floors?

    The best method depends on the height difference. For gaps under 1/2 inch, a reducer strip creates a gentle slope. For differences between 1/2 and 1 inch, a threshold or ramp works well. If the height difference exceeds 1 inch, you may need to level the subfloor or build a custom transition. Always measure the gap at multiple points, as floors can vary. For safety and a professional look, match the transition material to the higher-traffic flooring.

    Do you need a transition strip between rooms?

    Yes, in most cases. Transition strips serve three purposes: they cover the expansion gap required by floating floors, protect floor edges from chipping, and create a safe walking surface. Without them, you risk tripping hazards and moisture damage. However, if two rooms share the same flooring and are installed continuously, a strip may not be needed. Always check manufacturer guidelines.

    How do you transition hardwood to tile?

    Hardwood to tile transitions usually require a reducer or T-molding, depending on height. Tile is often thicker than hardwood, so a reducer that slopes from tile down to wood is common. Measure the height difference, then choose a strip that bridges it smoothly. Use construction adhesive for a secure bond, and consider a color that matches the hardwood for a seamless look. For large gaps, a threshold may be better.

    What can I use instead of transition strips?

    If you prefer a strip-free look, you can use a flush transition by installing a thin underlayment to equalize heights, or by using a caulk line for small gaps. However, these methods are less durable and may not meet code. For floating floors, skipping a transition strip can void your warranty. In most cases, a low-profile T-molding or a custom wood reducer is the best alternative to a standard strip.

  • How to Match Flooring to Home Lighting: A 2026 Guide

    How to Match Flooring to Home Lighting: A 2026 Guide

    Table of Contents

    Last Updated: September 20, 2026

    Why Your Flooring Looks Different at Home Than in the Showroom

    Flooring that looked perfect under showroom lights can turn muddy, yellow, or washed out at home. That is not a defect, it is lighting.

    Understanding the Impact of Color Temperature on Flooring

    Color temperature is a measure of how warm or cool a light source appears, expressed in kelvin (K). It is the single biggest factor in how your flooring reads once installed.

    Reading the Kelvin Scale for Rooms

    Most homes use a mix of these ranges:

    • 2,700K to 3,000K: Warm white. Common in living rooms and bedrooms. Brings out red and orange undertones in wood.
    • 3,500K to 4,000K: Neutral to cool white. Common in kitchens and offices. Keeps colors closer to true.
    • 5,000K and above: Daylight white. Common in garages and workspaces. Can make warm floors look orange or flat.

    Matching your flooring to the light you already have beats changing every bulb in the house.

    How CRI Changes What You See

    Color Rendering Index (CRI) is a score from 0 to 100 measuring how accurately a light source shows true colors. A low-CRI bulb can make a rich brown floor look dull or gray.

    How to Test Flooring Samples at Home in Real Lighting

    Testing samples at home is the only way to know how a floor will truly look. Showroom lighting is engineered to flatter products; your home has its own mix of bulbs, windows, and shadows. The goal is not the prettiest sample, it is the one that stays consistent across the conditions you actually live in.

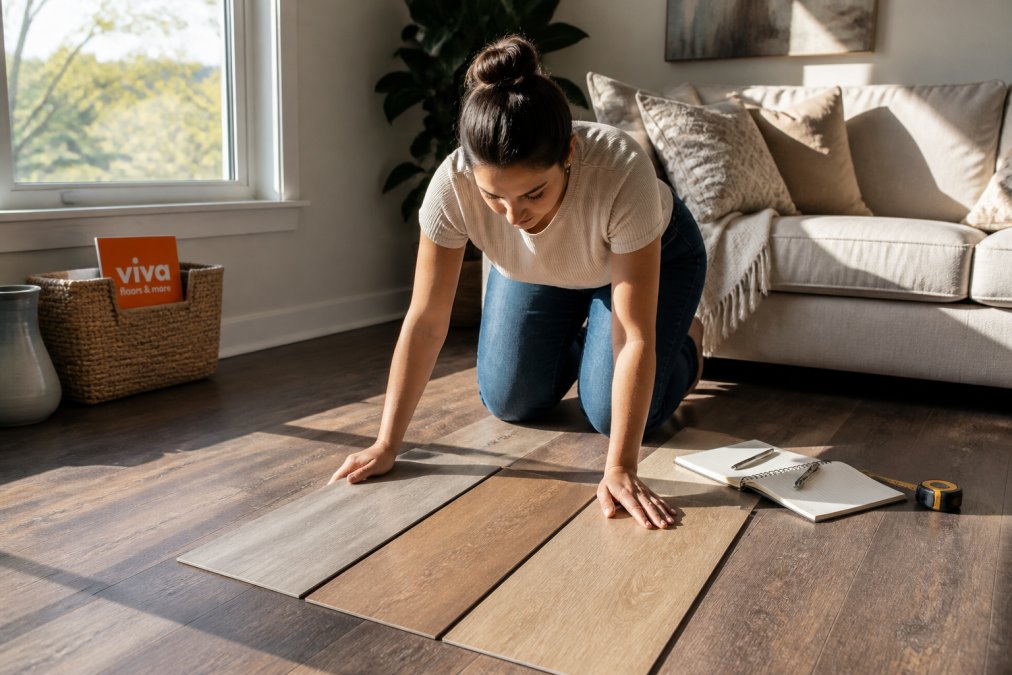
    Homeowner testing flooring samples in afternoon sunlight to learn how to match flooring to home lighting.
    Homeowner testing flooring samples in afternoon sunlight to learn how to match flooring to home lighting.

    Set Up the Test Correctly

    Before you start, control the variables that most buyers ignore:

    • Get a full-size sample, not a chip. A 2-inch chip hides grain and sheen. Ask for a plank or tile at least 12 inches long, ideally the installed width.
    • Test at least three samples side by side. Color judgment is relative. A floor that looks gray alone can look warm next to a cooler plank.
    • Note your bulb specs first. Write down the kelvin rating and CRI of every bulb in the room. If the label is gone, a $20 light meter app gives a rough kelvin read. You cannot interpret results without knowing what light you tested under.
    • Clean the window glass. Dirty glass shifts daylight warmer and dimmer, throwing off your midday reading.

    A Three-Day Sample Test That Actually Measures Something

    Follow these steps to match flooring to home lighting before you commit:

    1. Day 1, morning (8-10 a.m.): Place samples near the main window, perpendicular to the glass so light rakes across the grain. Note which show grain and which go flat.
    2. Day 1, evening: Turn on every light you normally use and check samples after sunset. This reading matters most, since most households spend waking hours under artificial light.
    3. Day 2, midday: Look at samples in full daylight, your brightest reference point and closest thing to a neutral standard.
    4. Day 2, night: Turn off overheads and test with lamps only. Low-angle lamp light reveals undertones that overhead light washes out.
    5. Day 3, compare across rooms: Move samples to a second room with different lighting, ideally a different window orientation. A north-facing room reads cooler than a south-facing one at the same time of day.
    6. Day 3, decide: Pick the sample that looks best across the most conditions. If it only looks good in one of six readings, it is the wrong floor.

    Read the Results Like a Spec Sheet

    When you compare notes, look for these specific patterns:

    • A sample that shifts warm under 2,700K but stays neutral under 3,500K is a warm-undertone floor: golden in bedrooms and living rooms, truer in kitchens.
    • A sample that goes gray or green under warm light has cool undertones. It will fight any 2,700K fixture in the house.
    • A sample that looks identical in every reading is very neutral or very low-contrast. Neutral floors are safest for open floor plans; low-contrast floors can look flat in large rooms.
    • A sample that shows strong grain under raking window light but disappears under overheads has high texture and low color variation, dramatic in one spot, boring in another.
    Pro Tip A common mistake is testing samples flat on the floor only. Hold each plank upright at eye level too. Vertical light reflection shows undertones that a flat sample hides, and it mimics how you actually see the floor when you walk into a room.

    How the Color Rendering Index is defined and measured

    Matching Warm and Cool Lighting to Wood Undertones

    Wood flooring has undertones that either fight or agree with your lighting, where most mismatches happen.

    • Warm lighting (2,700K-3,000K) pairs well with warm undertones: honey, amber, red oak, and golden maple.
    • Cool lighting (3,500K-4,000K) pairs well with cool undertones: gray, ash, whitewashed, and greige.
    • Neutral lighting works with almost anything, which is why it is the safest pick for open floor plans.

    Best Flooring Colors for Dark Rooms

    Dark rooms need floors that reflect light rather than absorb it, the opposite of what many assume.

    Request Estimate →

    For dark rooms, also consider:

    • Matte finishes over gloss, which reduce glare and spread light more evenly.
    • Lighter wood grain with subtle hue variation, which hides dust and adds texture.
    • Consistent color across the floor, which avoids patchy dark spots.

    Matte vs. Gloss: How Finish Changes Color Under Light

    Finish controls how light leaves the surface, which changes perceived color. Two floors with the same stain can look completely different based on sheen alone.

    • Matte finish: Scatters light. Colors read softer and truer. Hides scratches and dust well. Best for busy homes.
    • Semi-gloss: Reflects some light. Colors look slightly brighter and more saturated. Shows smudges more.
    • Gloss finish: Reflects light sharply. Colors look deeper and more intense. Shows every mark and every footprint.
    Watch Out High-gloss floors in rooms with strong directional light create glare that hides the floor’s real color. You may love the sample and dislike the installed result. Test gloss samples in your brightest room before buying.

    Smart Lighting, Metamerism, and Directional Light

    Three lighting factors trip up even careful buyers, and most flooring guides skip them. Understanding them explains why a floor can look different in unexpected ways, and gives you levers to fix it.

    Smart Lighting Lets You Tune the Floor All Day

    Tunable white LED bulbs and smart fixtures let you shift color temperature with an app, schedule, or voice command, an advantage most buyers never use.

    • Morning: Set bulbs to 4,000K-5,000K to mimic daylight. This is when cool-toned floors look their cleanest and warm floors can look slightly orange.
    • Evening: Drop to 2,700K. Warm floors glow; cool gray floors can start to look dingy.
    • Task time: Bump the kitchen or office zone to 3,500K-4,000K so colors stay close to true while you work.

    Metamerism: Why Two Colors Match in the Store and Clash at Home

    Metamerism is when two colors appear to match under one light source but look different under another. Different pigments reflect light in different spectral patterns; the eye averages those patterns into one perceived color, and changing the light source changes the average.

    • Floor and cabinets. A wood floor and a wood cabinet can look identical under showroom fluorescents and clash in a kitchen with warm under-cabinet lighting.
    • Floor and wall paint. A greige wall and a greige floor can read as the same color at noon and as two different colors at 8 p.m.
    • Floor and tile. Natural stone and porcelain tile are especially prone to metamerism because their pigments and surface finishes differ.
    Watch Out Metamerism is not a defect and cannot be corrected with a sealer or a finish. If two materials clash under your home lighting, the fix is to change one of the materials or change the light source, not to hope it resolves after installation.

    Directional Light Changes Grain and Texture

    Directional lighting comes from one strong source, a large window, a single overhead fixture, or an angled recessed can. It creates bright and dark patches across the same floor, changing how grain and texture read.

    • Recessed lighting placed close to a wall throws light down and across the floor at a steep angle, exaggerating grain and making a subtle floor look busier than it did in the showroom.
    • Floor-to-ceiling windows produce raking light parallel to the floor, the most flattering light for wood grain, revealing depth without harsh contrast.
    • A single overhead fixture in the center of a room creates a hot spot in the middle and shadow at the edges. A floor with strong color variation looks patchy under this setup.
    Key Takeaway No single light source tells the whole story. The floor that looks best across morning, midday, evening, and night lighting, and across both diffuse and directional sources, is the one you will be happy with long-term.

    Conclusion

    Matching flooring to your home lighting is not about finding the perfect floor. It is about finding the floor that looks right in your rooms, under your bulbs, at the times of day you actually use them.

    Frequently Asked Questions

    Should flooring be lighter or darker than walls?

    There is no fixed rule, but contrast usually reads best. Light walls with a mid-tone floor create a clean, open feel, while dark walls with a light floor make the room feel taller. When wall and floor tones sit too close together, the space can look flat. Test both directions with samples under your actual lighting before deciding, since color temperature shifts how much contrast you see.

    How does natural light change the appearance of hardwood floors?

    Natural light shifts throughout the day. North-facing rooms receive cooler, bluer light that can make warm woods look gray, while south-facing rooms get warmer light that deepens red and orange undertones. Direct sun also fades some species over time, especially near large windows. This is why a floor that looks perfect at noon may read differently at 7 p.m. under lamps.

    Does artificial lighting affect flooring color differently than sunlight?

    Yes. Sunlight covers the full daylight spectrum, so it shows a floor’s true color. Most bulbs do not. Warm bulbs around 2700K push yellows and reds forward, while cool bulbs around 4000K or higher pull gray and blue tones out of the same plank. Bulbs with a low color rendering index make everything look duller. Checking the Kelvin rating and CRI on your bulbs tells you what your floor will actually look like after dark.

    How do I test flooring samples in different lighting conditions?

    Take samples home and place them flat on the subfloor, not leaning against a wall. Check them at three times: morning, late afternoon, and after dark with your lamps on. Move each sample to a sunny spot and a shaded corner. Keep them down for a few days so your eyes adjust. If a sample looks good in all three lighting conditions, it is a safe pick.