

Índice
- Do Natural Stone Countertops Need Sealing?
- How to Test if Granite Needs Sealing
- Choosing the Best Sealer for Natural Stone Countertops
- Step 1: Prep the Countertop Before You Apply
- Step 2: Apply Sealer in Small Sections
- How Often to Seal Natural Stone Countertops
- Stone Countertop Sealing Mistakes to Avoid
- Preguntas frecuentes
Last Updated: October 18, 2026
Do Natural Stone Countertops Need Sealing?
Not every natural stone countertop needs sealing. At Viva Floors & More, we tell customers: learn how to seal natural stone countertops only after you know whether your stone needs it.
Porosity decides it: porous stone pulls liquid into capillaries; dense stone leaves it on top.
Here is the short version:
- Granite is usually low to medium porosity. Many slabs need sealing, some barely do.
- Marble is softer and more absorbent. It also etches from acids, so sealing helps but does not fix everything.
- Quartzite is dense and hard. Most quartzite resists stains well, though some varieties still benefit from a sealer.
“Granite” covers hundreds of varieties, and two slabs from the same quarry can absorb at different rates.
Which Stones Absorb and Which Resist
- High absorption: marble, limestone, travertine, onyx
- Medium absorption: many granites, some quartzites
- Low absorption: dense granite, soapstone, slate
Absorption is the real test: a stone that soaks up water will soak up red wine, oil, and lemon juice.
A polished finish closes the surface a bit; a honed finish or leathered finish leaves it more open, so those stones want sealer more often.
Ask your stone supplier which specific slab you are buying, not just the stone type. The finish matters as much as the mineral content when you decide whether to seal.
How to Test if Granite Needs Sealing
The water test answers this in about 15 minutes and costs nothing. Learning how to test if granite needs sealing is the most useful skill in countertop care.
- Clean the countertop and let it dry completely.
- Place a few water drops in an out-of-the-way spot.
- Wait 15 to 30 minutes.
- Watch what the water does.
Read the result:
- Water beads up and sits on top: the stone is resisting. You can wait on sealing.
- Water spreads and darkens the stone: the surface is absorbing. Time to seal.
- Water disappears into the stone: high porosity. Seal soon.
Darkening around the drop is the key signal: that dark patch is moisture inside the stone.
Test two or three spots, not one. A kitchen countertop gets uneven wear, and the area by the sink usually tells the truth first.
Do not run this test with oil or vinegar. Oil can leave a permanent mark on unsealed stone, and acid can etch marble. Water only.
Choosing the Best Sealer for Natural Stone Countertops
The best sealer for natural stone countertops is a penetrating sealer matched to your stone’s porosity and finish, not the cheapest bottle on the shelf. Match it and you get years of protection; mismatch it and you get a cloudy mess or a sealer that never bonds.
Most guides stop at “penetrating versus topical.” That is the first decision, not the last: next comes which penetrating sealer family fits your slab, then whether the finish changes the answer.
Penetrating vs. Topical Sealers
Penetrating sealer soaks into the stone and lines the capillaries from the inside, leaving no film so the stone still looks and feels like stone. Most kitchen countertops want this type.
Topical sealer sits on top like a clear finish and can change the sheen. It works on floors and some tiles, but on a kitchen counter it scratches, peels, and traps moisture when it fails.
For a countertop, choose penetrating. Every time.
The Penetrating Sealer Families You Will Actually See
Penetrating products are not interchangeable; they differ in chemistry, carrier, and behavior on a given stone.
- Solvent-based penetrating sealers. The active ingredient rides a fast-flashing solvent. They penetrate dense, polished stone well and dry fast, but fumes are strong and need serious ventilation. Many fabricators favor them for granite and quartzite.
- Water-based penetrating sealers. Lower odor, easier cleanup, longer working time. Common for marble, limestone, and travertine, and for homeowners avoiding fumes. Some need a longer cure before food contact.
- Solvent-free or low-VOC impregnators. Formulated for indoor air-quality concerns. They often need a longer dwell time and a second coat on porous stone.
Generally, solvent-based products suit dense, polished granite and quartzite; water-based products suit softer, absorbent stones and indoor spaces where fumes are a concern. Confirm the stone type on the label and technical data sheet.
Match the Product to the Stone and the Finish
Sealer choice follows porosity and finish, not just the stone name.
- Polished granite and quartzite. The polish closes the surface, so a solvent-based penetrating sealer with a short dwell time is often enough. Wipe off excess thoroughly; dense stone absorbs little.
- Honed or leathered granite. The open finish drinks more product. Expect a longer dwell time and possibly a second coat.
- Marble, limestone, and travertine. Softer and more absorbent, and they etch from acids. Choose a penetrating sealer rated for calcareous stone; sealing slows staining but does not stop etching.
What to Look For on the Label
- Food-safe or food-contact rated. Important for any counter where food is prepared.
- Impregnating sealer. Another name for penetrating.
- Stone-specific rating. Granite sealer for granite, marble sealer for marble, and calcareous-stone ratings for limestone and travertine.
Avoid anything labeled “enhancer” or “wet look” unless you want the stone to darken permanently. Those products add color, not just protection.
Penetrating sealer protects from the inside without changing the surface. Topical sealer sits on top and can peel. Within penetrating products, match the chemistry and carrier to your stone and finish, and read the dwell and cure times before you start.
Never mix brands or layer a topical product over a penetrating sealer on a countertop. The layers can bond poorly, trap moisture, or haze the stone. Pick one product family and follow its instructions.
Step 1: Prep the Countertop Before You Apply
Prep decides the outcome. Sealer bonds to clean stone and fails on dirty stone.
- Clear the counter and remove everything from the surface.
- Clean with a stone-safe cleaner or a few drops of mild dish soap in water.
- Scrub gently with a soft cloth. Skip anything abrasive.
- Rinse with clean water and wipe dry.
- Let the surface dry fully, at least a few hours, ideally overnight.
A dry surface is non-negotiable. Sealer over trapped moisture gets locked out and cannot penetrate.
Check the seams and edges too.
Ventilate before you open the bottle: most sealers carry fumes.
If you are sealing a brand-new install, wait until the fabricator says the stone is ready.
Never seal over a wet countertop. Trapped moisture under a sealer can cloud the stone and leave a haze you cannot wipe away.
Step 2: Apply Sealer in Small Sections
Work in small sections, roughly 2 to 3 square feet at a time. This is where most DIY jobs go wrong.
- Pour a small amount onto the counter or onto your applicator.
- Spread it with a clean cloth, a soft brush, or a sealer applicator pad.
- Keep the coat thin and even.
- Move to the next small section and repeat.
A thin layer beats a heavy pour. Extra product does not add protection. It just makes a sticky film you have to scrub off.
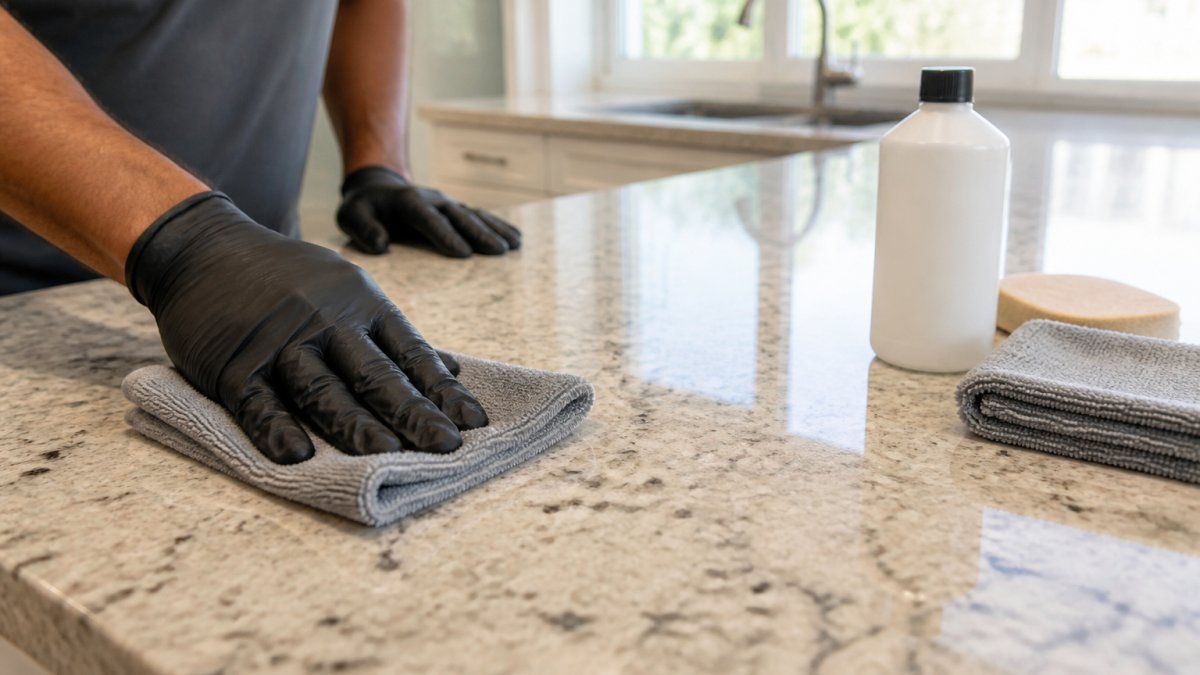
Keep a dry cloth nearby for drips. Wipe them immediately, not later.
Let It Penetrate, Then Wipe Off the Excess
Watch the surface after you spread the sealer: the stone looks wet, then starts to dull as it absorbs.
Most products want 5 to 15 minutes of contact time.
Then wipe off the excess. Use a clean, dry cloth and buff the surface until it feels dry to the touch.
Do not let excess sealer dry on the stone.
Some dense stones absorb almost nothing, so you will wipe off nearly everything you applied.
If the sealer starts to feel tacky under your cloth, you waited too long. Wipe it off now and buff hard. Tacky sealer that dries becomes a haze.
How Often to Seal Natural Stone Countertops
Most stone countertops need resealing every 6 to 12 months, but that range is a starting point, not a schedule. Busy kitchens, porous stones, and honed finishes push toward 6 months; dense stone in a light-use kitchen can stretch to a year or more. The reliable answer comes from the stone, not the calendar.
A Repeatable Resealing Decision Method
The water-drop test is the standard field check, but most guides skip the details that make it repeatable. Follow this protocol so results are comparable each time.
- Pick fixed test spots. Choose two or three out-of-the-way locations and mark them mentally or with a small piece of painter’s tape nearby. The area near the sink and the area near the cooktop usually wear fastest.
- Clean and dry the spot. Wipe with a stone-safe cleaner and let it dry fully. Residual cleaner or moisture skews the result.
- Place three water drops about the size of a dime, spaced an inch apart.
- Start a timer and observe at 5, 10, 15, and 30 minutes. Note what each drop does at each interval.
- Record the result in a phone note with the date. Comparing this month’s result to last quarter’s is what turns a single test into a trend.
Reading the Result
- Water beads and sits on top for 30 minutes. The sealer is intact. Recheck in 2 to 3 months.
- Water spreads slowly and darkens the stone within 10 to 15 minutes. The sealer is thinning. Plan to reseal within a few weeks.
- Water darkens the stone within 5 minutes or soaks in fast. The sealer is failing or absent. Reseal this week.
Why Results Vary by Stone and Finish
Two counters sealed on the same day can need resealing months apart. The variables:
- Porosity. Marble, limestone, and travertine absorb faster than dense granite, soapstone, and slate, so they usually need resealing sooner.
- Finish. A polished surface sheds water longer than a honed or leathered surface of the same stone.
- Use. A kitchen with daily cooking, citrus, and oil exposure wears sealer faster than a bathroom vanity or a butler’s pantry.
Stone-Specific Starting Intervals
Use these as starting points, then let the water test adjust them:
- Marble, limestone, travertine, onyx: check every 3 to 6 months; reseal when the test darkens within 15 minutes.
- Many granites and some quartzites: check every 6 to 12 months.
- Dense granite, soapstone, slate: check every 12 months; many will not need sealer at all.
Habits That Extend the Interval
- Wipe spills promptly, especially wine, oil, and citrus.
- Use a stone-safe cleaner, not vinegar or bleach.
- Use trivets and cutting boards.
Photograph the water drops at the 15-minute mark each time you test. Side-by-side photos from six months apart make the resealing decision obvious and take the guesswork out of how often to seal natural stone countertops.
Do not reseal on a calendar alone, and do not seal stone that does not need it. Over-sealing builds residue, and repeated coats on dense stone just sit on the surface.
Stone Countertop Sealing Mistakes to Avoid
These stone countertop sealing mistakes show up in almost every failed DIY job we hear about. Each one is easy to prevent.
- Sealing a dirty counter. Dirt and grease block the sealer from bonding. Clean first, always.
- Sealing a wet counter. Trapped moisture clouds the stone.
- Flooding the surface. More product is not more protection. Thin coats win.
If your stone is already stained or etched, sealing will lock the problem in. Address stains and etching before you seal, or call a stone professional.
If you are unsure which product fits your slab, bring a photo and your stone name to a showroom. Our team at Viva Floors & More helps homeowners and contractors match sealers to the stone they actually bought, not the label on a sample chip.
Sealing a natural stone countertop is a weekend job anyone can handle, as long as you test first, prep properly, and work in small sections. Viva Floors & More stocks countertop solutions from trusted brands like MSI and offers expert consultation at our Pharr and Brownsville showrooms, so you can confirm your stone type before you start.
Preguntas frecuentes
What is a good sealer for natural stone countertops?
A penetrating sealer is the usual choice for granite, marble, and quartzite because it soaks into the capillaries below the surface instead of sitting on top. Look for a solvent-based or water-based impregnating sealer labeled for the specific stone you own, and check whether it is food-safe for kitchen use. Topical sealers form a film that can scratch or peel, so they suit floors more than countertops. When in doubt, test a small hidden spot first.
How do you test whether a stone countertop needs sealing?
Place a few water drops on the surface and leave them for 15 to 30 minutes, then wipe them away. If the stone darkens under the drops or the water soaks in instead of beading, the surface is absorbing and needs sealer. If the drops sit on top and wipe off cleanly, the existing sealer is still working. Repeat the water test every few months, especially on high-use areas near the sink and cooktop.
How long should stone sealer sit before you wipe it off?
Most penetrating sealers need 5 to 15 minutes of dwell time so the product can soak into the capillaries. Read the stone-specific instructions on the label, because porous stones may want a second coat while dense stones need less. Wipe off excess sealer before it dries, or it can leave a sticky film that is hard to remove. Full cure typically takes 24 to 72 hours, so keep water off the countertop during that window.
How many coats of sealer should you apply to a stone countertop?
Start with one thin coat and let it penetrate fully. If the water test still shows absorption after the first coat cures, apply a second thin layer. Two coats is typical for porous stones like some granites, while dense quartzite may only need one. More coats is not better: too much product sits on the surface and creates haze. Always follow the manufacturer’s stone-specific instructions rather than adding extra layers.