Author: admin

  • Preventing Height Gaps in Flooring Transitions

    Preventing Height Gaps in Flooring Transitions

    Table of Contents

    Last Updated: September 27, 2026

    Why Height Gaps Happen in Flooring Transitions

    Preventing height gaps in flooring transitions starts with one fact: no two flooring materials are the same thickness. A typical hardwood plank runs about 3/4 inch thick, while many vinyl planks sit closer to 5 millimeters. That difference has to go somewhere, and if you ignore it, you get a lip at the doorway that catches socks, trips feet, and collects dirt for years.

    So why do transitions fail?

    • Thickness variance between materials that meet at a doorway
    • Subfloor that isn’t flat, level, or both
    • Expansion gaps that get filled too tight, forcing planks to lift
    • Missing or wrong transition strip for the height change
    • Seasonal movement that opens seams as indoor humidity swings

    How to Level Subfloor for Different Flooring Heights

    The best way to level a subfloor for different flooring heights is to measure each finished floor height, find the difference, and build up the lower side to match. You are not leveling the subfloor to the horizon. You are leveling it to the height of the thicker floor next door.

    Measuring Thickness Variance Between Materials

    Start with real numbers, not guesses. Measure the actual installed thickness of each material, including underlayment and adhesive.

    • Laminate flooring: measure plank plus foam underlayment
    • Vinyl plank: often 4mm to 8mm, check the box
    • Hardwood installation: 3/4 inch is common for solid; engineered runs thinner
    • Tile: tile thickness plus thinset plus backer board
    • Carpet: pile height plus pad, measured compressed

    Calculated Subfloor Buildup for a Flush Transition

    Here’s the method most guides skip. Say your tile assembly finishes at 1 inch and your vinyl plank finishes at 1/4 inch. You need 3/4 inch of buildup under the vinyl side.

    • Under 1/4 inch: leveling compound or a thicker underlayment
    • 1/4 to 3/4 inch: plywood sheets cut to fit, screwed down
    • Over 3/4 inch: framed buildup or a reducer transition instead

    Flooring Transition Strips Types and How to Choose

    The right transition strip depends on the height difference and the two materials meeting. Pick the profile first, then the finish. Most guides stop at a table. The problem is that a table tells you what exists, not what to grab off the shelf for your specific doorway. Use the decision logic below instead.
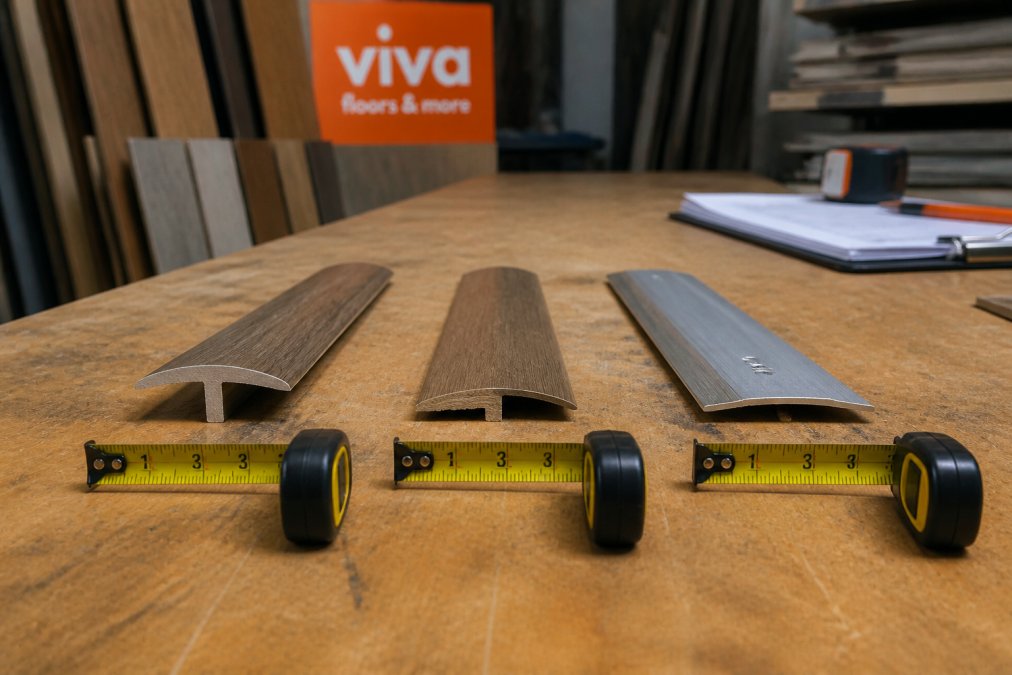
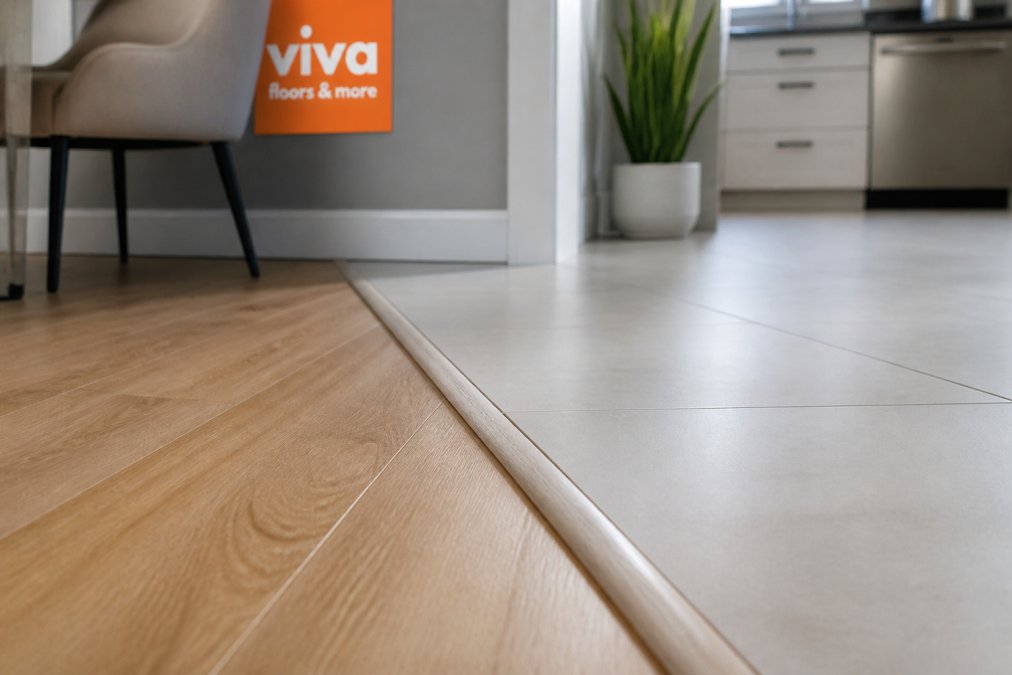
    Diagram comparing T-molding, reducer, and threshold flooring transitions with measured dimensions on a workbench.
    Diagram comparing T-molding, reducer, and threshold flooring transitions with measured dimensions on a workbench.
    Strip Type Best For Height Difference Typical Profile Width
    T-molding Two floors at the same height 0 to 1/16 inch 1-3/4 to 2 inches
    Reducer One floor lower than the other 1/8 to 1/2 inch 1-1/2 to 2-1/4 inches
    Threshold plate Doorways, tile-to-wood 1/4 to 1 inch 2 to 4 inches
    End cap Carpet to hard surface Varies by pile 1-1/4 to 1-3/4 inches
    Stair nose Step-down edges Full step 1-1/4 to 2 inches

    A Visual Decision Path for Choosing the Right Profile

    Work through these questions in order. The first “yes” is your answer.

    1. Is the height difference 1/16 inch or less? → T-molding. It bridges two surfaces of equal height and hides the seam without a slope.
    2. Is the difference between 1/8 and 1/2 inch? → Reducer. It slopes from the higher floor down to the lower one, so feet don’t catch an edge.
    3. Is the difference between 1/4 and 1 inch, and the seam sits in a doorway? → Threshold plate. Flat and wide, it spans the gap and takes foot traffic without flexing.
    4. Is one side carpet? → End cap. The profile tucks the carpet edge and meets the hard surface flush.
    5. Is one side a step-down? → Stair nose. It wraps the edge and gives a finished look.

    Matching Strip Material to the Floor It Touches

    Match the strip material to the floor it touches. A wood reducer against vinyl plank looks off. A metal threshold in a carpeted bedroom feels cold. Here’s the practical pairing:

    • Wood or wood-look strips against hardwood, laminate, and engineered plank
    • Metal (aluminum or brass) against tile, stone, and commercial-grade vinyl
    • Vinyl or PVC strips against luxury vinyl plank and sheet vinyl
    • Carpet-friendly end caps with a metal or wood face and a carpet tuck channel

    Height Delta Cheat Sheet by Material Pair

    Use these common finished heights to estimate your delta before you measure. Actual numbers vary by product, so verify with a tape measure.

    • Solid hardwood (3/4 inch) meeting vinyl plank (5mm, about 3/16 inch): delta near 9/16 inch → reducer
    • Tile with thinset and backer board (about 1 inch) meeting laminate with underlayment (about 1/2 inch): delta near 1/2 inch → reducer or threshold plate
    • Engineered hardwood (1/2 inch) meeting carpet with pad (about 3/4 inch compressed): delta near 1/4 inch → end cap or reducer
    • Two vinyl plank floors of the same thickness: delta near 0 → T-molding
    Pro Tip Measure the finished height of each floor at the doorway, not in the middle of the room. Subfloor dips and humps change the delta by as much as 1/8 inch over a few feet.

    T-Molding vs. Reducer vs. Threshold Plate

    T-molding bridges two surfaces of equal height. It has a T-shaped moulding profile that sits in the gap and covers both edges.

    Installation Steps to Prevent Gaps

    Follow these steps in order. Skipping one is how gaps come back.

    1. Measure the height differential at three points across the doorway
    2. Level or build up the subfloor until surfaces are within 1/16 inch
    3. Leave the expansion gap at each wall and edge, per the flooring maker’s spec
    4. Dry-fit the transition strip before cutting
    5. Cut with a miter saw for a clean, square edge
    6. Set the strip with adhesive or a track system
    7. Weight or tape it down for the full cure time

    Adhesive vs. Track Systems

    Construction adhesive gives a permanent bond. It works well for threshold plates and reducers that won’t move. The downside: removal later means prying and scraping.

    What to Do If Flooring Planks Start Separating in Winter

    Planks that separate in winter are usually drying out, not failing. Indoor humidity drops when heaters run, wood and laminate shrink, and seams open at the ends. The same shrinkage that opens plank seams can also open the gap under a transition strip, because the strip is anchored to a floor that is moving.

    Why Winter Gaps Open, The Mechanism

    Wood and laminate are hygroscopic. They absorb moisture from the air and release it as humidity falls. When indoor relative humidity drops from a summer 50% to a winter 25%, a plank can shrink across its width by roughly 1/32 inch per foot of width. On a 6-inch-wide plank, that’s small. Across a 20-foot room, the cumulative movement at the perimeter can be 1/4 inch or more, enough to pull a transition strip loose or open a visible seam at the doorway.

    Humidity Targets That Prevent Winter Gaps

    • Aim for 35% to 55% relative humidity year-round. Most flooring manufacturers specify this range in their warranty terms.
    • Measure with a hygrometer, not a guess. Inexpensive digital hygrometers are widely available.
    • Run a humidifier in the driest rooms. Whole-home humidifiers tied to the HVAC system hold the range better than portable units.
    • Avoid over-humidifying. Above 60%, planks can swell and buckle at the seams.

    What to Do When Gaps Appear

    1. Check the indoor humidity first. If it’s below 35%, that’s your cause.
    2. Run a humidifier and give the floor two to four weeks to re-acclimate.
    3. Do not caulk the seams shut. The floor needs to move back. Caulk traps stress and causes buckling when humidity returns.
    4. Do not force planks together with putty or filler. Same reason.
    5. Wait for spring. Many gaps close on their own as humidity returns.
    6. If gaps stay open past spring, call a pro to check for a subfloor or acclimation problem.

    When a Winter Gap Is Actually a Transition Problem

    A gap at the doorway is not always seasonal. Distinguish between the two:

    • Seasonal gap: opens in winter, closes in summer, runs along plank ends or edges, and follows the humidity curve.
    • Transition gap: stays open year-round, appears at the seam between two flooring materials, and often shows a loose or rocking strip.
    Watch Out Never fill a seasonal plank gap with wood filler or caulk. The floor will swell in summer and buckle against the filler, causing a bigger repair than the original gap.

    Preventing Next Winter’s Gaps

    • Acclimate flooring to the home’s average humidity before installation, per the manufacturer’s spec.
    • Leave the expansion gap at walls and transitions. A tight strip plus a shrinking floor equals a lifted seam.
    • Keep humidity stable through the heating season with a humidifier and a hygrometer.
    • Re-check transition strips each fall before the dry season starts, and tighten track screws or re-adhere loose profiles.

    review humidity and acclimation guidance from the National Wood Flooring Association

    Long-Term Maintenance and Moisture Control

    Transitions last when the floor under them stays stable. Keep these habits going:

    • Re-seal or re-tape thresholds every few years in high-traffic doorways
    • Wipe up spills at transitions fast, especially near tile and wood
    • Check for movement each season and tighten track screws if needed
    • Add acoustic underlayment under floating floors to cut noise transfer between rooms
    • Use a moisture barrier over concrete slabs before any hard surface goes down

    Frequently Asked Questions

    What is the best way to transition between different height floors?

    The best method depends on the height difference. For gaps under 12 mm, a transition strip like T-molding or a reducer often works. Larger gaps may need subfloor leveling compound or a custom ramp. Always measure the exact height differential first, then choose a moulding profile that bridges it without creating a trip hazard. If you are unsure, a flooring professional can recommend the right strip for your specific materials.

    Can you use subfloor leveling compound to fix height gaps?

    Yes, self-leveling compound can correct minor subfloor unevenness, but it is not a substitute for structural fixes. If the height difference between two flooring materials is more than a few millimeters, leveling compound alone will not solve the transition gap. You may need to add a plywood underlayment or use a thicker transition strip. Always check the compound’s maximum thickness rating and let it cure fully before installing flooring.

    When should you use a T-molding versus a reducer?

    Use T-molding when two floors are nearly the same height (within 3-5 mm) and you need a seamless transition. Choose a reducer when one floor is noticeably higher, as it creates a gradual slope that prevents tripping. For large height differences over 12 mm, a threshold plate or custom ramp may be necessary. Matching the moulding profile to your flooring thickness ensures a flush, professional finish.

    What causes flooring planks to separate in winter?

    Winter air is dry, so wood and laminate planks lose moisture and shrink. If they were installed tight without an expansion gap, the shrinking pulls seams apart. To fix it, you can try a humidifier to stabilize indoor humidity, or gently tap planks back together if the gap is small. For persistent separation, a flooring professional may need to reinstall the affected rows with proper expansion space.


    Height gaps in flooring transitions come down to math, moisture, and matching the right strip to the job. Get the subfloor buildup right, leave room for movement, and pick a profile that fits the height difference. If you’d rather not guess, Viva Floors & More offers expert consultation, a huge in-stock selection from trusted brands, and help for both DIYers and contractors. Request an estimate and get your transitions right the first time.

  • Stain Resistant Tile for Kitchens: Best Options in 2026

    Stain Resistant Tile for Kitchens: Best Options in 2026

    Table of Contents

    Last Updated: September 25, 2026

    Why Stain Resistant Tile Matters in Busy Kitchens

    A kitchen floor takes more abuse than any other surface in the house, coffee, olive oil, tomato sauce, and muddy footprints can all land on it in one afternoon. For Rio Grande Valley homeowners, that daily punishment makes stain resistant tile for kitchens a practical necessity.

    Family cooking in a bright kitchen with red wine spilled on stain resistant tile near a golden retriever
    Family cooking in a bright kitchen with red wine spilled on stain resistant tile near a golden retriever
    Key Takeaway Stain resistant tile is tile engineered with low porosity and a hard, sealed surface that resists absorbing liquids, oils, and pigments. Porcelain and glazed ceramic both qualify when the glaze is intact and the grout is properly sealed.

    Porcelain vs Ceramic Kitchen Tile: Which Handles Stains Better?

    Porcelain wins on stain resistance in most kitchens: it’s denser, fired hotter, and absorbs very little water, leaving stains nowhere to settle. Ceramic works for many homes but needs more care in wet, messy zones.

    Porosity and Water Absorption Rates

    Porosity is the best predictor of how a tile handles spills. Porcelain tile is pressed from denser clay and fired hotter, making it nearly impermeable. Ceramic tile is softer and more absorbent, so unglazed or chipped ceramic can soak up liquids over time.

    Durability and High-Traffic Performance

    Foot traffic wears finishes faster than expected. Porcelain holds its texture and glaze under constant use, which matters in entryways opening into the kitchen. Ceramic handles moderate traffic but shows wear sooner in busy households with pets and kids.

    Feature Porcelain Tile Ceramic Tile
    Water absorption Very low, near impermeable Higher, needs sealing
    Stain resistance Excellent Good when glazed
    Durability High-traffic ready Moderate traffic
    Best for Kitchens, mudrooms Bathrooms, light use
    Pro Tip A common mistake is judging tile by color alone. Run your fingernail across the surface: if it catches or feels chalky, the glaze is soft and will stain faster than a smooth, vitrified finish.

    Slip Resistant Kitchen Tile Options for Safety

    Safety and stain resistance often pull in opposite directions: glossy tile cleans easily but turns slick when wet. The fix is a textured matte finish with a slip-resistant rating, which grips underfoot while repelling spills.

    How to Clean Kitchen Floor Tiles Without Damaging the Surface

    The right routine protects the finish for years. Most damage comes from harsh cleaners and abrasive tools, not from normal wear.

    • Sweep or vacuum daily to lift grit before it scratches the glaze
    • Mop with warm water and a pH-neutral cleaner
    • Wipe spills promptly, especially oil, wine, and tomato
    • Skip steel wool and abrasive powders that dull the surface
    • Avoid bleach-heavy cleaners on colored grout

    Choosing the Right Finish: Matte vs Glossy for Stain Resistance

    Finish is the most misunderstood variable in stain-resistant tile. Homeowners assume glossy means easier to clean, but finish affects how stains behave, how visible they are, and how slippery the floor gets when wet, getting it wrong is a common reason kitchen floors disappoint.

    How Finish Affects Stain Behavior

    A glazed tile has a thin, glass-like layer fired onto the body. That glaze resists stains and can be glossy, satin, or matte; the chemistry is similar across finishes, the difference is texture and light reflection.

    • Glossy (polished) finishes have a smooth, highly reflective surface. Liquids bead up and wipe away easily, and there’s nowhere for pigment to hide. The downside is visibility: every streak, water spot, footprint, and smear of grease shows under kitchen lighting, especially on dark colors.
    • Matte finishes have a micro-textured surface that scatters light instead of reflecting it. That texture hides smudges, water spots, and light scratches far better than gloss. The trade-off is that some matte glazes are slightly more porous at the surface, so prompt cleanup still matters, and textured surfaces can hold onto fine dust.
    • Satin finishes sit in the middle, a soft sheen that reflects some light but hides more than gloss. For most busy kitchens, satin is the practical sweet spot.

    Slip Resistance and the Coefficient of Friction

    Finish and slip resistance are linked: polished or glossy tile turns slick when wet, a real concern near the sink, dishwasher, and refrigerator, the three spots where water lands most often.

    Where Each Finish Belongs in a Kitchen

    Finish should match the job, not the showroom lighting.

    • Kitchen floors: matte or satin, textured enough for grip, in a mid-tone color that hides crumbs and dust between cleanings. This is where stain resistance and safety have to coexist.
    • Backsplashes: glossy works well here. A backsplash takes splatter and steam but no foot traffic, so slip resistance is irrelevant, and the easy-wipe surface is an advantage. Glossy also reflects light and makes a small kitchen feel brighter.
    • Countertops: if you’re using tile, a honed or matte finish hides etching and knife marks better than polished, though it requires more careful sealing depending on the material.

    Color, Lighting, and the Stain-Visibility Trap

    Finish and color interact in surprising ways. Glossy dark tile shows every water spot and dust particle; matte light tile hides smudges but shows dark crumbs and pet hair. A matte mid-tone, warm gray, greige, or stone-look, is the most forgiving combination in a working kitchen.

    Key Takeaway For a busy kitchen floor, the safest combination is a matte or satin porcelain tile in a mid-tone color with a DCOF of 0.42 or higher. Save the glossy finish for the backsplash, where it cleans easily and never gets walked on.

    Cleaning Implications by Finish

    Glossy tile rewards a quick squeegee or microfiber wipe, streaks show instantly, so dry as you go. Matte tile forgives a damp mop and air-drying, but texture traps fine dust, so a vacuum with a hard-floor attachment beats a broom. Neither finish should see abrasive powders, steel wool, or acidic cleaners, which dull the glaze.

    Request Estimate →

    Grout, Sealing, and Chemical Resistance: What Competitors Miss

    Grout is where most kitchen tile stain problems begin. The tile is usually innocent, porcelain and glazed ceramic resist liquids well, but cement-based grout is porous by design and grabs grease, coffee, wine, and tomato sauce if unprotected. Most buying guides skip this, and it’s why a floor that looked spotless at installation can look dingy within a year.

    Epoxy Grout vs. Cementitious Grout for Stain Prevention

    The two main grout families behave very differently in a kitchen.

    • Cementitious (cement-based) grout is the traditional option. It’s made from Portland cement, sand, and pigments, mixed with water. It’s inexpensive, widely available, and easy for a installer to work with. The trade-off is porosity: even polymer-modified versions absorb liquids, and once grease or red wine soaks in, the pigment can shift permanently. Cementitious grout needs sealing and periodic resealing to stay stain resistant.
    • Epoxy grout is a two-part resin system, typically an epoxy resin and a hardener, that cures into a dense, non-porous surface. It doesn’t absorb water or oils the way cement grout does, so it resists staining far better and generally doesn’t need sealing. It costs more per square foot and is less forgiving to install, especially on vertical surfaces, but for a busy kitchen it’s the more durable choice.
    • Urethane grout sits between the two. It’s pre-mixed, flexible, and more stain resistant than cement grout, though not quite as impervious as epoxy. It’s a reasonable middle option for homeowners who want better stain performance without the epoxy price or installation complexity.

    Sealing Schedules and What Actually Works

    Sealing isn’t one-time. A penetrating sealer soaks into cement grout and blocks liquid from the pores, but it wears down with daily mopping and foot traffic. Most practitioners recommend resealing cement grout every 12 to 18 months in a busy kitchen, and more often in front of the sink or stove.

    Watch Out Skipping grout sealing is the number one reason kitchen floors look dirty within a year. Once grease soaks into unsealed cement grout, no amount of scrubbing brings the original color back, the stain is inside the grout, not on it.

    How to Test Tile and Grout for Chemical Resistance

    Kitchen spills are mildly acidic or oily and can etch a glaze or dull a finish over time. Test a spare tile or sample before you commit, using the substances your kitchen actually produces.

    1. Lemon juice and vinegar. These are weak acids. Place a few drops on the tile surface and on a grout sample, let sit for 15 to 30 minutes, then wipe clean. A quality glazed or porcelain tile should show no change. If the surface dulls or the grout lightens, that material is a poor fit for a kitchen where you cook with citrus or vinegar regularly.
    2. Red wine and tomato sauce. These combine acid with pigment, the worst combination for porous surfaces. Apply, let sit, wipe, and check for a ghost stain. This is the single most useful test for a kitchen tile.
    3. Cooking oil. Oil doesn’t etch, but it penetrates unsealed cement grout and darkens it. A drop of oil on grout left for an hour will show you how the grout will age.
    4. Your actual cleaners. Check the tile manufacturer’s guidance on which cleaners are safe. Acidic cleaners, including many bathroom and hard-water products, can etch a glaze or damage grout over repeated use. pH-neutral cleaners are the safe default for everyday mopping.
    Pro Tip Ask your supplier for a sample tile and a grout sample before you buy. Testing both with lemon juice, wine, and oil takes an afternoon and tells you more than any showroom display.

    Matching Grout Color to Stain Reality

    Grout color is a stain-management decision, not just design. Light grout shows every spill and bit of grease; dark grout hides stains but can look heavy against light tile. A mid-tone, warm gray, taupe, or matched to the tile, is most forgiving in a working kitchen. If you love white grout, epoxy is the only version that holds up to a busy household without constant resealing.

    Kitchen Flooring vs Backsplash: Different Requirements for Stain Resistant Tile

    Floors and backsplashes face different enemies. Kitchen floor tile must handle foot traffic, dropped utensils, and standing water. A backsplash deals with splatter, steam, and heat, but almost no wear.

    Conclusion

    Picking kitchen tile balances stain resistance, durability, and how a surface actually lives in your home. The wrong choice shows up fast, and replacing a floor costs far more than choosing well the first time.

    Frequently Asked Questions

    What type of tile is best for kitchens?

    Porcelain tile is generally the best choice for kitchens because of its low porosity and high stain resistance. It handles spills, grease, and heavy foot traffic well. Ceramic tile works for lighter use, but porcelain’s density and vitrified surface make it more durable for busy cooking areas. For a kitchen with kids and pets, porcelain is the safer bet.

    Is porcelain or ceramic tile better for kitchen floors?

    Porcelain outperforms ceramic in kitchens due to its lower moisture absorption rate, usually under 0.5%. Ceramic absorbs more water and may need sealing. Porcelain also resists scratches and stains better under heavy use. If your kitchen sees daily cooking and foot traffic, porcelain is the stronger option. Ceramic can work for low-traffic kitchens or as a backsplash.

    Do I need to seal stain-resistant kitchen tiles?

    Most porcelain tiles with a vitrified surface do not need sealing because they are impermeable. Ceramic tiles with a glossy glaze also resist stains without sealing. However, the grout lines between tiles are porous and should be sealed or treated with epoxy grout. Sealing grout prevents stains from oil, wine, and sauces from soaking in. Always check the manufacturer’s recommendation for your specific tile.

    How do I remove stubborn stains from kitchen floor tiles?

    For stubborn stains on kitchen floor tiles, start with a paste of baking soda and water for grease or oil. For wine or juice, use a diluted hydrogen peroxide solution. Avoid abrasive cleaners on glossy glaze, as they can scratch the surface. For grout stains, a soft brush with oxygen bleach works well. Always test on a small area first. Regular spill cleanup prevents most stains from setting.

    What color tile is the easiest to keep clean?

    Mid-tone colors like beige, greige, and warm gray hide crumbs and light stains better than white or black. White shows every speck of dirt, while black highlights dust and water spots. A matte finish in a mid-tone shade with a subtle pattern is the most forgiving for busy kitchens. Textured surfaces also camouflage daily messes better than smooth, glossy tiles.

  • Find a Flooring Showroom Near Me: 2026 Buyer’s Guide

    Find a Flooring Showroom Near Me: 2026 Buyer’s Guide

    Table of Contents

    Last Updated: September 23, 2026

    What to Look for in a Local Flooring Showroom

    Finding a flooring showroom near me used to mean flipping through a phone book and hoping for the best. Today, the search is faster but the stakes are higher: flooring is one of the few home purchases where you genuinely need to touch the product before you buy. At Viva Floors & More, we’ve watched homeowners walk in with three online samples and walk out with a completely different choice once they saw how a plank looked under real light.

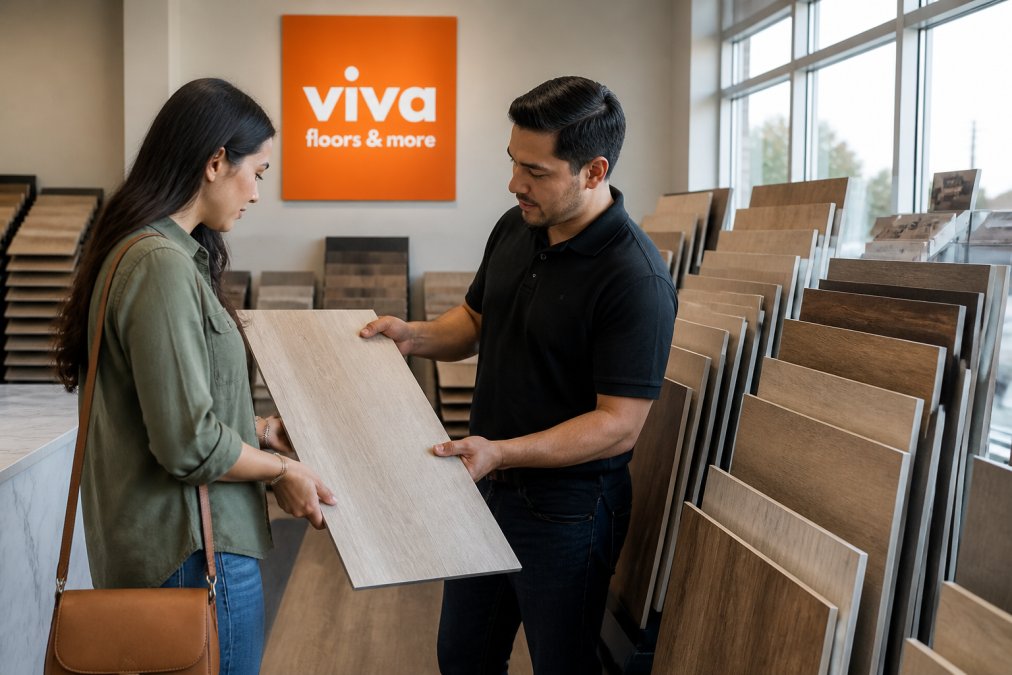
    Customer feeling a hardwood plank sample while exploring a local flooring showroom with a sales associate.
    Customer feeling a hardwood plank sample while exploring a local flooring showroom with a sales associate.

    Material Selection: Hardwood, Laminate, Vinyl, Tile, and Carpet

    Each material solves a different problem. Hardwood and laminate bring warmth but react to humidity, which matters in South Texas. Vinyl and resilient flooring handle moisture and heavy traffic with far less fuss. Ceramic and porcelain tile win in wet rooms and entryways. Carpet remains the quietest, softest option for bedrooms.

    How a Dealer Locator and Showroom Visit Save You Money

    A dealer locator tool points you to nearby retailers, but the real savings happen once you’re inside. You avoid return shipping on wrong orders, catch clearance and remnant stock, and get accurate square footage estimates before you commit. Staff can also flag subfloor preparation needs you’d never spot online, which prevents costly rework later.

    Pro Tip Bring photos of your room, its natural light, and your existing paint or furniture colors. Showroom lighting flatters everything; your hallway at 7 a.m. does not.

    The Flooring Showroom Consultation Checklist

    Walking in without a plan is how people end up with flooring they regret. Use this checklist to make one visit count.

    • Measure each room and write down square footage, including closets
    • Photograph the room in daylight and at night
    • Note moisture-prone areas: bathrooms, kitchens, laundry rooms
    • List who lives there: pets, kids, heavy foot traffic
    • Set a realistic budget for material and installation separately
    • Ask about warranty terms in writing
    • Request a take-home sample of your top two choices
    • Confirm current local inventory and lead times

    Questions to Ask About Durability, Warranty, and Moisture Resistance

    Ask directly: “How does this hold up with two dogs and three kids?” A good consultant answers with specifics about wear layers, scratch resistance, and moisture resistance ratings, not vague reassurance.

    Watch Out Skipping subfloor preparation is the single most common cause of premature flooring failure. A floor installed over an uneven or damp subfloor can cup, gap, or peel within the first year, and most warranties won’t cover it.

    Cost of Professional Flooring Installation in 2026

    The cost of professional flooring installation in 2026 depends on material, room size, subfloor condition, and whether old flooring needs removal.

    Typical Installed Cost Ranges by Material

    Pricing depends on quantity, dates, and delivery. Your quote will vary with region, subfloor, and layout, so treat these as budgeting anchors, not quotes.

    Material Typical Installed Cost per Sq Ft Notes
    Carpet $2-$8 Lowest material cost; pad and stretch-in labor add up
    Luxury vinyl plank (LVP) $3-$10 Waterproof options sit at the top of the range
    Laminate $3-$8 Click-lock installs are the cheapest labor
    Engineered hardwood $5-$12 Glue-down or float; moisture barriers add cost
    Solid hardwood $6-$14 Nail-down only; refinishable for decades
    Ceramic / porcelain tile $7-$20 Large-format and patterned layouts push the high end

    What Actually Moves Your Number

    • Square footage. Labor is priced per square foot, but most installers have a minimum job charge (often the equivalent of 100-200 sq ft) even for a powder room.
    • Old flooring removal. Tear-out and disposal typically adds $1-$3 per sq ft. Carpet is cheap to pull; glued-down tile and hardwood are not.
    • Subfloor prep. Leveling compound, plywood patching, and moisture barriers commonly add $1-$4 per sq ft. This is the line item most online quotes omit.
    • Layout complexity. Diagonal runs, herringbone, stairs, and many doorways add labor hours. A simple rectangular bedroom is the cheapest possible install.
    • Trim and transitions. Baseboard removal/reinstall and transition strips at doorways are frequently billed separately.
    • Timing.

    Estimate Your Own Project in Four Steps

    1. Measure each room in feet and multiply length by width. Add 5-10% for cuts and waste, more for diagonal or patterned layouts.
    2. Multiply by the material range above to get a rough material-plus-labor band.
    3. Add tear-out and prep if you have existing flooring or an uneven slab.
    4. Compare against a written, itemized estimate, not a single lump-sum number. A real estimate lists material, labor, removal, prep, and trim as separate lines.
    Pro Tip Ask for the estimate in writing with square footage and unit prices shown. If a quote is a single number with no breakdown, you cannot tell whether subfloor prep is included, and that is where surprise charges live.
    Watch Out A quote that is dramatically lower than expected usually means one of three things: no subfloor prep, no tear-out, or uninsured labor. Get proof of insurance and a written scope before you sign.

    Request an estimate from Viva Floors & More with your measurements in hand, and you will get an itemized figure tied to your actual rooms instead of a national average that never matches your project.

    Flooring Installation Timeline: From Sample to Final Walkthrough

    Most residential flooring projects move through five stages. The flooring installation timeline typically runs one to three weeks from sample selection to final walkthrough, depending on material availability and room count.

    1. Sample selection – take home two or three options and view them in your own light
    2. Measurement and estimate – confirm square footage and subfloor needs
    3. Material order and delivery – confirm local inventory to avoid long waits
    4. Installation – most single rooms finish in a day; whole homes take several
    5. Final walkthrough – inspect seams, transitions, and trim before final payment

    DIY vs. Professional Installation: Which Fits Your Project?

    DIY makes sense for small, simple rooms with forgiving materials like click-lock laminate or vinyl plank. Professional installation makes sense for tile, hardwood, stairs, and anything involving moisture or uneven subfloors.

    Eco-Friendly Flooring Options and Long-Term Maintenance

    Sustainability and longevity go hand in hand. Look for flooring made with recycled content, low-emission adhesives, and responsibly sourced wood. Bamboo, cork, and reclaimed hardwood appeal to buyers who want a lighter footprint, while durable vinyl and laminate reduce replacement frequency over time.

    Maintenance extends the life of any floor:

    Request Estimate →

    • Vacuum or sweep weekly to remove abrasive grit
    • Use felt pads under furniture legs
    • Wipe spills promptly, especially in kitchens and baths
    • Keep indoor humidity stable to prevent hardwood movement
    • Follow the manufacturer’s cleaning product recommendations

    Design Style and Room-by-Room Selection

    Most showroom guides tell you to “match material to room.” That is true but can be overwhelming when you are standing in front of many samples. Pick your style first, then let the room and lifestyle filter the material.

    Start With a Named Style, Not a Color

    Flooring trends in 2026 cluster around a handful of recognizable looks. Naming your style narrows the field fast:

    • Warm modern. Wide-plank white oak or engineered oak in a matte, low-sheen finish. Pairs with warm whites and natural wood furniture.
    • Coastal / light and airy. Light blonde oak, whitewashed LVP, or pale porcelain tile. Reflects light in smaller rooms.
    • Farmhouse. Distressed or hand-scraped hardwood, wide planks, visible grain. Often paired with shiplap and matte black fixtures.
    • Industrial. Polished concrete-look tile, wide gray LVP, or dark stained hardwood. Hides wear well in high-traffic homes.
    • Transitional. Mid-tone oak or greige LVP. The safest resale choice because it does not lock you into a trend.

    The Room-by-Room Filter

    Once you have a style, let function decide the material:

    Room Best Material Fit Why
    Bathroom Porcelain or ceramic tile, or waterproof LVP Standing water and humidity destroy wood and standard laminate
    Kitchen Tile, LVP, or engineered hardwood Spills, dropped items, and frequent mopping
    Living room Almost anything; prioritize durability Highest traffic, most visible
    Bedroom Carpet, or warm hardwood/LVP Comfort and quiet matter more than water resistance
    Laundry / mudroom Tile or waterproof LVP Leaks and grit
    Basement Waterproof LVP or engineered hardwood over a moisture barrier Below-grade humidity swings

    The Lifestyle Overlay

    • Dogs and cats. Scratch resistance matters more than hardness. LVP with a thick wear layer and matte-finished tile hide claw marks; high-gloss hardwood shows every scratch.
    • Kids. Skip anything that dents easily. Engineered hardwood and LVP tolerate dropped toys better than solid wood.
    • Allergies. Hard surfaces beat carpet. If you want carpet in bedrooms, choose a low-pile option and vacuum with a HEPA filter.
    • Entertaining. Wider planks and larger tiles mean fewer seams and a more open look.
    • Resale in mind. Mid-tone, matte, wide-plank LVP or engineered oak is the safest bet across most markets.
    Key Takeaway Pick a style name, filter by room, then filter by lifestyle. That three-step sequence turns a wall of samples into two or three real contenders, and it is the fastest way to avoid buying a floor you will want to replace in five years.

    Bring your style name, room list, and lifestyle notes to your showroom visit. It is the difference between shopping and deciding.

    Frequently Asked Questions

    What should I look for when visiting a local flooring showroom?

    Look for a broad product catalog covering hardwood, laminate, vinyl, tile, carpet, and resilient flooring so you can compare materials side by side. Check whether the showroom stocks flooring samples you can take home to test under your own lighting. Ask about local inventory, installation services, curbside pick-up, and warranty terms. A good showroom also offers a flooring showroom consultation checklist and can answer questions about subfloor preparation and moisture resistance before you commit.

    How much does it cost to install 1000 sq ft of flooring?

    The cost of professional flooring installation depends on the material you choose, the condition of your subfloor, room layout, and labor rates in your area. Because pricing varies by project, ask your flooring contractor for a written estimate based on square footage, material selection, and any subfloor preparation needed. Request an estimate from Viva Floors & More for current project pricing.

    Is it better to buy flooring from a big-box store or a local showroom?

    A local showroom typically offers expert consultation, a wider selection of trusted brands, and faster access to local inventory. Big-box stores may carry limited stock and offer less guidance on material selection for specific rooms. A local retailer can walk you through durability, moisture resistance, and warranty details, and often supports both in-store shopping and curbside pick-up. For renovations in the Rio Grande Valley, a family-owned showroom often provides more personalized service.

    What is the Rule of 3 for flooring?

    The Rule of 3 for flooring means ordering at least 3 extra boxes (roughly 10% over your measured square footage) to cover cuts, waste, and future repairs. Flooring installation always generates offcuts, especially in rooms with closets, angles, or doorways. Keeping spare planks or tiles on hand lets you replace damaged sections later without mismatched dye lots. Your flooring contractor can calculate the exact overage based on your room layout and material.

    How long does a professional flooring installation take?

    A typical flooring installation timeline runs 1 to 3 days for a single room and 3 to 7 days for a whole-home project, depending on square footage, material, and subfloor preparation. Tile and hardwood take longer than laminate or vinyl because of drying and acclimation time. Add 1 to 2 weeks before installation for sample selection, ordering, and delivery. Ask your retailer for a written schedule so you can plan around furniture moves and household routines.

    Do I need to prepare my home before a professional flooring installation?

    Yes. Clear furniture and personal items from the rooms being worked on, remove wall hangings, and arrange for pets and children to stay elsewhere during installation hours. If old flooring must be removed, confirm whether that is included in your quote. Check that the subfloor is dry and level, since moisture issues can void a warranty. Your installer will confirm the final prep list, and many showrooms provide a pre-installation checklist during the consultation.

    What are eco-friendly flooring options for a home renovation?

    Eco-friendly flooring options include bamboo, cork, reclaimed hardwood, and laminate or vinyl made with low-VOC materials and recycled content. These choices reduce indoor air emissions and often pair with sustainable harvesting certifications. For high-traffic homes, look for durable, low-maintenance options like luxury vinyl plank with recycled backing. Ask your flooring showroom which products carry environmental certifications and how they compare on durability and warranty coverage.

  • Best Pet Friendly Flooring for Homes: 2026 Guide

    Best Pet Friendly Flooring for Homes: 2026 Guide

    Table of Contents

    Last Updated: September 21, 2026

    Quick Comparison: Best Pet Friendly Flooring for Homes

    The best pet friendly flooring for homes comes down to four materials that handle claws, accidents, and heavy traffic. Waterproof luxury vinyl plank (LVP) wins for most pet owners, followed by porcelain tile, then laminate, with engineered hardwood as the premium option for lighter-shedding households.

    Material Scratch Resistance Waterproof Best For Watch Out For
    Luxury vinyl plank High Yes Most pet households Can dent under heavy furniture
    Porcelain tile Very high Yes Large dogs, accidents Cold, hard underfoot
    Laminate Medium No Budget rooms, light pets Swells if water seeps in
    Engineered hardwood Low-medium No Senior pets, light traffic Needs rugs and quick cleanup

    Waterproof Luxury Vinyl Plank: The Top Pick for Pet Owners

    Waterproof luxury vinyl plank is the best all-around choice for pet owners: its core resists moisture completely and its wear layer shrugs off claw marks, so a dog skidding across the room leaves no trail behind.

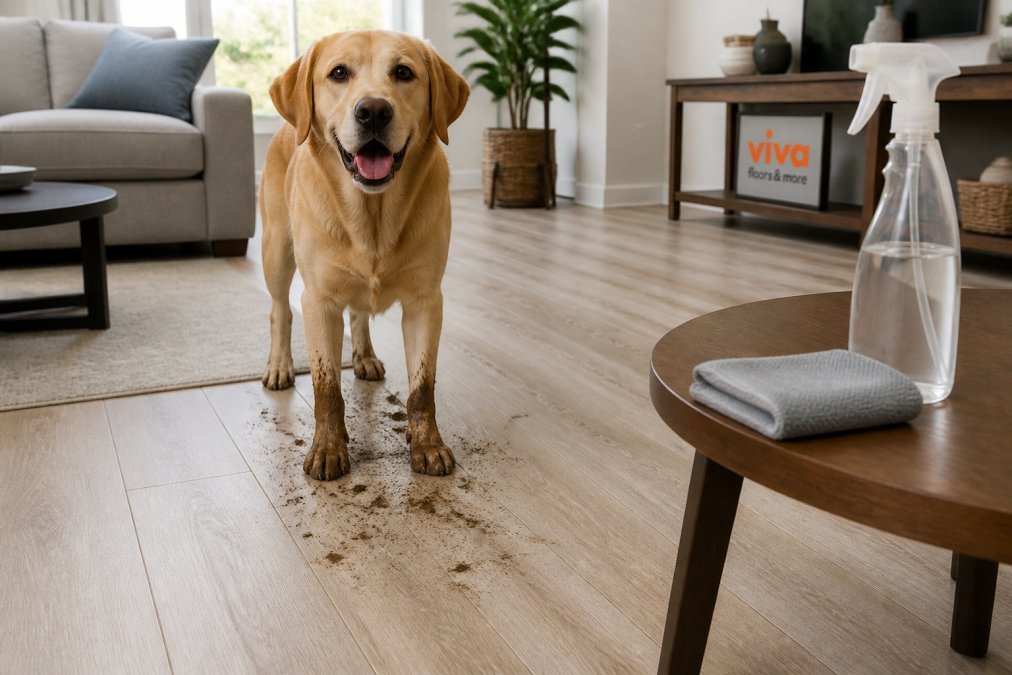
    Infographic showing how to clean muddy paw prints off waterproof pet friendly flooring using simple tools.
    Infographic showing how to clean muddy paw prints off waterproof pet friendly flooring using simple tools.
    Pro Tip Run your fingernail across a plank sample before you buy. If it leaves a visible mark, that wear layer is too thin for a household with large dogs. Ask for the wear layer thickness in millimeters, not just “heavy duty.”

    Wear Layer and Waterproof Core

    The wear layer is the clear topcoat that takes abuse; the core keeps water out. For homes with dogs, look for a high-traffic wear layer and a fully waterproof core, not just moisture-resistant.

    Scratch Resistant Flooring for Dogs: Materials That Hold Up

    Porcelain tile and high-wear luxury vinyl plank are the most scratch resistant flooring for dogs, with tile leading on durability and LVP on comfort. Both resist claw marks far better than wood or standard laminate.

    Watch Out Skip glossy, high-shine finishes if you have pets. They show every scratch, paw print, and dust mote. A matte or low-sheen surface finish hides wear far better.

    Porcelain Tile and Engineered Hardwood

    Porcelain tile is non-porous, so pet accidents and odors don’t soak in and cleaning is simple. Engineered hardwood offers real wood looks but needs more care, since standing water and claw marks can damage the surface.

    Pros and Cons of Laminate vs Vinyl for Pets

    The pros and cons of laminate vs vinyl for pets come down to water. Vinyl is waterproof and forgiving; laminate is not, and one soaked accident can swell the core permanently.

    Factor Laminate Vinyl (LVP)
    Water resistance Low Waterproof
    Scratch resistance Medium High
    Repair if damaged Hard Plank-by-plank
    Best for Dry rooms, light pets Whole-home pet use

    Acoustic Impact, Senior Pet Mobility, and Indoor Air Quality

    Most flooring guides stop at scratch and water resistance. The three factors below are what pet owners actually complain about after move-in, and what big-box guides rarely address.

    Noise: Why Hard Floors Amplify Claws

    Sound transmission has two parts: impact noise (claws clicking, a dog jumping off the couch) and airborne noise (barking, TV). Hard surfaces like tile, laminate, and glue-down vinyl reflect impact noise into the room below, a 60-pound dog trotting across upstairs tile can sound like a drum solo beneath it.

    Pro Tip If noise is your top concern, ask the retailer for the underlayment’s impact insulation class (IIC) rating. Higher is quieter. A cork underlayment typically outperforms thin foam on this measure.

    Senior Pet Mobility and Traction

    Older dogs, dogs with arthritis, and dogs recovering from surgery struggle on slick surfaces. The problem is coefficient of friction: polished tile or high-gloss LVP gives paws almost nothing to grip, and a dog that slips once in a hallway often becomes afraid of it.

    What actually helps:

    • Textured or embossed surfaces. A registered emboss (the texture follows the wood grain) grips better than a smooth finish. Matte and low-sheen surfaces outperform high-gloss every time.
    • Area rugs and runners. The cheapest, fastest fix. Put a runner down the main traffic path and a rug at the bottom of stairs. Use a non-slip pad underneath so the rug itself doesn’t slide.
    • Stair treads. Bare hardwood or tile stairs are the single most dangerous surface for a senior dog. Carpet runners or adhesive tread strips make stairs navigable again.
    • Ramps over steps. For dogs that can no longer do stairs at all, a low-angle ramp to the couch or bed removes the jump entirely.

    Indoor Air Quality and VOCs

    New flooring can release volatile organic compounds (VOCs) from adhesives, finishes, and the core itself. The smell of a freshly installed floor is largely off-gassing, lingering for days to weeks depending on ventilation and product chemistry.

    Request Estimate →

    What to look for:

    • Low-VOC or zero-VOC adhesives. Glue-down installations use the most adhesive, so this matters most there. Ask the installer what adhesive they plan to use and whether a low-VOC alternative is available.
    • FloorScore and GREENGUARD certifications. These are third-party programs that test flooring and adhesives for VOC emissions. A product carrying either has been independently verified, which is more meaningful than a manufacturer’s own “low-VOC” claim.
    • Solid vs. engineered vs. synthetic. Solid hardwood and tile have minimal off-gassing once installed. Engineered wood, laminate, and vinyl rely on binders and wear layers that can emit for a period after installation.
    • Ventilation during and after install. Open windows, run fans, and if possible keep pets out of the room for the first 24 to 72 hours. The EPA’s resources on volatile organic compounds explain what VOCs are and why indoor concentrations can exceed outdoor levels.
    Key Takeaway Noise, traction, and air quality are the three factors that separate a floor that merely survives pets from one that actually works for them. Underlayment controls noise, texture controls traction, and certification controls what you breathe.

    Installation and Maintenance for Pet-Friendly Floors

    Daily maintenance is simple: sweep or vacuum to lift grit, then damp-mop with a pet-safe cleaner. Grit is the enemy, trapped sand acts like sandpaper under paws and dulls the surface finish.

    Here’s a maintenance schedule that works:

    • Sweep or vacuum high-traffic areas daily
    • Damp-mop with a pH-neutral, pet-safe cleaner weekly
    • Wipe accidents immediately, even on waterproof floors
    • Trim pet nails every few weeks to reduce scratching
    • Place mats at doors and water bowls
    • Inspect seams and edges monthly for lifted planks
    Key Takeaway The single biggest maintenance mistake is using too much water or harsh cleaners. Both dull the finish and void many warranties. A damp mop and a pet-safe product are all you need.

    Repairability: What Happens When Accidents Occur

    Durability tells you how long a floor lasts; repairability tells you what happens on the day it doesn’t. For pet owners, this separates a floor you live with for 15 years from one you resent for 10.

    How Each Material Actually Repairs

    Luxury vinyl plank (floating install). The most repairable pet floor: floating LVP clicks together at the edges, so one damaged plank can be removed and replaced without disturbing the rest. Score and cut out the center of the damaged plank, pry the pieces free, trim the locking tabs off the replacement, and glue it into the gap. A pro can do this in under an hour.

    The Spare-Box Rule

    Dye lots change. A plank bought three years from now won’t match today’s floor, even with an identical SKU, and manufacturers discontinue colors without warning. The rule: buy 5 to 10 percent extra square footage at install and store it flat in a climate-controlled space. For a 500-square-foot room, that’s roughly one to two extra boxes, the cheapest insurance you’ll ever buy on a floor.

    Watch Out Do not store spare planks in a garage, attic, or shed. Extreme heat and humidity can warp them before you ever need them, and a warped spare is useless.

    When to Repair vs. Replace

    • One or two damaged planks in a floating LVP floor. Repair. This is exactly what the material is designed for.
    • A swollen laminate plank. Replace the affected area. There is no repair.
    • A cracked tile in a high-traffic spot. Repair, and keep spares for the next one.
    • Widespread water damage across a room. Replace the affected section. Trying to salvage individual planks in a saturated floor usually fails.
    • Surface scratches only. Often refinishable or concealable with a color-matched filler pen, depending on material.

    Pet owners often discover the repairability question only after the first accident, when the spare boxes are gone and the color is discontinued. Ask about repair method and spare availability before you buy, not after.

    Key Takeaway Floating LVP is the clear winner on repairability because a single plank can be swapped without touching the rest of the floor. Laminate is the loser because a swollen core cannot be fixed. Whatever you choose, buy spare boxes now and store them properly.

    Frequently Asked Questions

    What type of flooring is most pet-resistant?

    Waterproof luxury vinyl plank (LVP) and porcelain tile are the most pet-resistant options. LVP handles pet accidents, claw marks, and high-traffic areas when it has a wear layer of 20 mil or higher. Porcelain tile is nearly scratch-proof and completely waterproof. Both are non-porous, so they resist stains and odors. For homes with dogs and cats, LVP offers the best balance of durability, comfort, and realistic wood looks.

    Is LVP or laminate better with dogs?

    LVP is generally better with dogs because its core is waterproof, while most laminate cores are moisture-resistant but not waterproof. Dog pee can seep into laminate seams and cause swelling. LVP also tends to be softer underfoot and quieter. Laminate can work in low-moisture areas and often costs less, but for homes with puppies or senior dogs prone to accidents, waterproof LVP is the safer long-term choice.

    Will dog pee ruin vinyl plank flooring?

    No, waterproof luxury vinyl plank will not be ruined by dog pee if it is cleaned up within a reasonable time. The waterproof core prevents moisture from reaching the subfloor. However, urine can discolor the surface if left for days, and it may seep into seams if the planks are not tightly locked. Wipe accidents promptly with an enzymatic cleaner to protect the wear layer and keep odors from setting in.

    How do I choose flooring that won’t scratch from pet claws?

    Look for a scratch-resistant flooring with a hard surface finish, such as a polyurethane coating with aluminum oxide or a ceramic bead topcoat. For LVP, choose a wear layer of at least 20 mil. Porcelain tile with a matte or textured finish also resists claw marks. Avoid soft woods like pine and high-gloss finishes that show every scratch. Ask for samples and test them with a key or coin before buying.

  • How to Match Flooring to Home Lighting: A 2026 Guide

    How to Match Flooring to Home Lighting: A 2026 Guide

    Table of Contents

    Last Updated: September 20, 2026

    Why Your Flooring Looks Different at Home Than in the Showroom

    Flooring that looked perfect under showroom lights can turn muddy, yellow, or washed out at home. That is not a defect, it is lighting.

    Understanding the Impact of Color Temperature on Flooring

    Color temperature is a measure of how warm or cool a light source appears, expressed in kelvin (K). It is the single biggest factor in how your flooring reads once installed.

    Reading the Kelvin Scale for Rooms

    Most homes use a mix of these ranges:

    • 2,700K to 3,000K: Warm white. Common in living rooms and bedrooms. Brings out red and orange undertones in wood.
    • 3,500K to 4,000K: Neutral to cool white. Common in kitchens and offices. Keeps colors closer to true.
    • 5,000K and above: Daylight white. Common in garages and workspaces. Can make warm floors look orange or flat.

    Matching your flooring to the light you already have beats changing every bulb in the house.

    How CRI Changes What You See

    Color Rendering Index (CRI) is a score from 0 to 100 measuring how accurately a light source shows true colors. A low-CRI bulb can make a rich brown floor look dull or gray.

    How to Test Flooring Samples at Home in Real Lighting

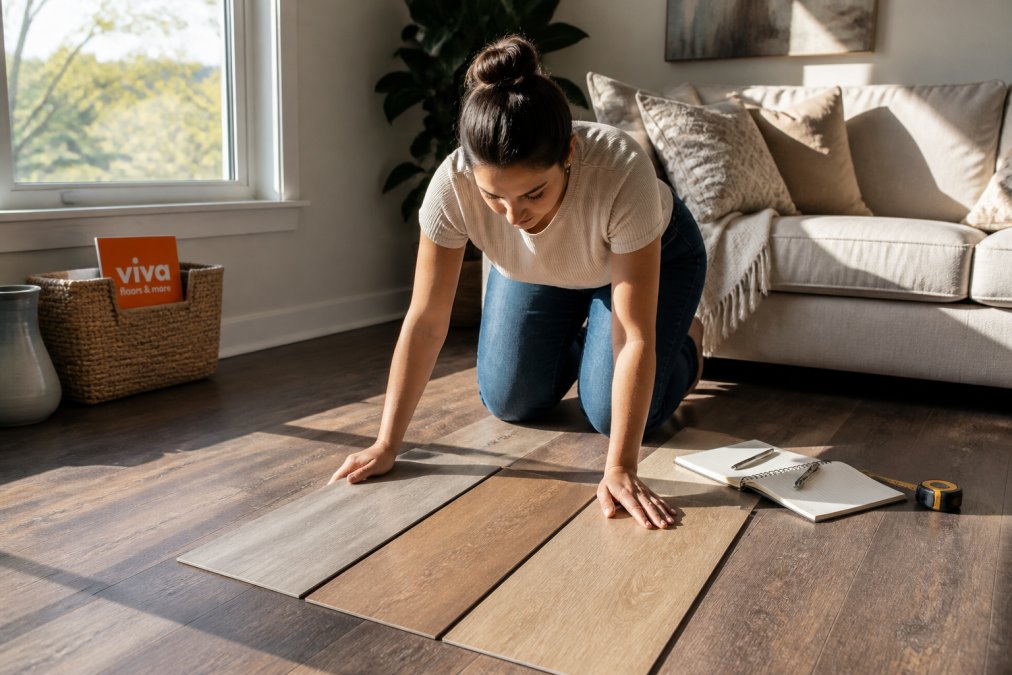
    Testing samples at home is the only way to know how a floor will truly look. Showroom lighting is engineered to flatter products; your home has its own mix of bulbs, windows, and shadows. The goal is not the prettiest sample, it is the one that stays consistent across the conditions you actually live in.

    Homeowner testing flooring samples in afternoon sunlight to learn how to match flooring to home lighting.
    Homeowner testing flooring samples in afternoon sunlight to learn how to match flooring to home lighting.

    Set Up the Test Correctly

    Before you start, control the variables that most buyers ignore:

    • Get a full-size sample, not a chip. A 2-inch chip hides grain and sheen. Ask for a plank or tile at least 12 inches long, ideally the installed width.
    • Test at least three samples side by side. Color judgment is relative. A floor that looks gray alone can look warm next to a cooler plank.
    • Note your bulb specs first. Write down the kelvin rating and CRI of every bulb in the room. If the label is gone, a $20 light meter app gives a rough kelvin read. You cannot interpret results without knowing what light you tested under.
    • Clean the window glass. Dirty glass shifts daylight warmer and dimmer, throwing off your midday reading.

    A Three-Day Sample Test That Actually Measures Something

    Follow these steps to match flooring to home lighting before you commit:

    1. Day 1, morning (8-10 a.m.): Place samples near the main window, perpendicular to the glass so light rakes across the grain. Note which show grain and which go flat.
    2. Day 1, evening: Turn on every light you normally use and check samples after sunset. This reading matters most, since most households spend waking hours under artificial light.
    3. Day 2, midday: Look at samples in full daylight, your brightest reference point and closest thing to a neutral standard.
    4. Day 2, night: Turn off overheads and test with lamps only. Low-angle lamp light reveals undertones that overhead light washes out.
    5. Day 3, compare across rooms: Move samples to a second room with different lighting, ideally a different window orientation. A north-facing room reads cooler than a south-facing one at the same time of day.
    6. Day 3, decide: Pick the sample that looks best across the most conditions. If it only looks good in one of six readings, it is the wrong floor.

    Read the Results Like a Spec Sheet

    When you compare notes, look for these specific patterns:

    • A sample that shifts warm under 2,700K but stays neutral under 3,500K is a warm-undertone floor: golden in bedrooms and living rooms, truer in kitchens.
    • A sample that goes gray or green under warm light has cool undertones. It will fight any 2,700K fixture in the house.
    • A sample that looks identical in every reading is very neutral or very low-contrast. Neutral floors are safest for open floor plans; low-contrast floors can look flat in large rooms.
    • A sample that shows strong grain under raking window light but disappears under overheads has high texture and low color variation, dramatic in one spot, boring in another.
    Pro Tip A common mistake is testing samples flat on the floor only. Hold each plank upright at eye level too. Vertical light reflection shows undertones that a flat sample hides, and it mimics how you actually see the floor when you walk into a room.

    How the Color Rendering Index is defined and measured

    Matching Warm and Cool Lighting to Wood Undertones

    Wood flooring has undertones that either fight or agree with your lighting, where most mismatches happen.

    • Warm lighting (2,700K-3,000K) pairs well with warm undertones: honey, amber, red oak, and golden maple.
    • Cool lighting (3,500K-4,000K) pairs well with cool undertones: gray, ash, whitewashed, and greige.
    • Neutral lighting works with almost anything, which is why it is the safest pick for open floor plans.

    Best Flooring Colors for Dark Rooms

    Dark rooms need floors that reflect light rather than absorb it, the opposite of what many assume.

    Request Estimate →

    For dark rooms, also consider:

    • Matte finishes over gloss, which reduce glare and spread light more evenly.
    • Lighter wood grain with subtle hue variation, which hides dust and adds texture.
    • Consistent color across the floor, which avoids patchy dark spots.

    Matte vs. Gloss: How Finish Changes Color Under Light

    Finish controls how light leaves the surface, which changes perceived color. Two floors with the same stain can look completely different based on sheen alone.

    • Matte finish: Scatters light. Colors read softer and truer. Hides scratches and dust well. Best for busy homes.
    • Semi-gloss: Reflects some light. Colors look slightly brighter and more saturated. Shows smudges more.
    • Gloss finish: Reflects light sharply. Colors look deeper and more intense. Shows every mark and every footprint.
    Watch Out High-gloss floors in rooms with strong directional light create glare that hides the floor’s real color. You may love the sample and dislike the installed result. Test gloss samples in your brightest room before buying.

    Smart Lighting, Metamerism, and Directional Light

    Three lighting factors trip up even careful buyers, and most flooring guides skip them. Understanding them explains why a floor can look different in unexpected ways, and gives you levers to fix it.

    Smart Lighting Lets You Tune the Floor All Day

    Tunable white LED bulbs and smart fixtures let you shift color temperature with an app, schedule, or voice command, an advantage most buyers never use.

    • Morning: Set bulbs to 4,000K-5,000K to mimic daylight. This is when cool-toned floors look their cleanest and warm floors can look slightly orange.
    • Evening: Drop to 2,700K. Warm floors glow; cool gray floors can start to look dingy.
    • Task time: Bump the kitchen or office zone to 3,500K-4,000K so colors stay close to true while you work.

    Metamerism: Why Two Colors Match in the Store and Clash at Home

    Metamerism is when two colors appear to match under one light source but look different under another. Different pigments reflect light in different spectral patterns; the eye averages those patterns into one perceived color, and changing the light source changes the average.

    • Floor and cabinets. A wood floor and a wood cabinet can look identical under showroom fluorescents and clash in a kitchen with warm under-cabinet lighting.
    • Floor and wall paint. A greige wall and a greige floor can read as the same color at noon and as two different colors at 8 p.m.
    • Floor and tile. Natural stone and porcelain tile are especially prone to metamerism because their pigments and surface finishes differ.
    Watch Out Metamerism is not a defect and cannot be corrected with a sealer or a finish. If two materials clash under your home lighting, the fix is to change one of the materials or change the light source, not to hope it resolves after installation.

    Directional Light Changes Grain and Texture

    Directional lighting comes from one strong source, a large window, a single overhead fixture, or an angled recessed can. It creates bright and dark patches across the same floor, changing how grain and texture read.

    • Recessed lighting placed close to a wall throws light down and across the floor at a steep angle, exaggerating grain and making a subtle floor look busier than it did in the showroom.
    • Floor-to-ceiling windows produce raking light parallel to the floor, the most flattering light for wood grain, revealing depth without harsh contrast.
    • A single overhead fixture in the center of a room creates a hot spot in the middle and shadow at the edges. A floor with strong color variation looks patchy under this setup.
    Key Takeaway No single light source tells the whole story. The floor that looks best across morning, midday, evening, and night lighting, and across both diffuse and directional sources, is the one you will be happy with long-term.

    Conclusion

    Matching flooring to your home lighting is not about finding the perfect floor. It is about finding the floor that looks right in your rooms, under your bulbs, at the times of day you actually use them.

    Frequently Asked Questions

    Should flooring be lighter or darker than walls?

    There is no fixed rule, but contrast usually reads best. Light walls with a mid-tone floor create a clean, open feel, while dark walls with a light floor make the room feel taller. When wall and floor tones sit too close together, the space can look flat. Test both directions with samples under your actual lighting before deciding, since color temperature shifts how much contrast you see.

    How does natural light change the appearance of hardwood floors?

    Natural light shifts throughout the day. North-facing rooms receive cooler, bluer light that can make warm woods look gray, while south-facing rooms get warmer light that deepens red and orange undertones. Direct sun also fades some species over time, especially near large windows. This is why a floor that looks perfect at noon may read differently at 7 p.m. under lamps.

    Does artificial lighting affect flooring color differently than sunlight?

    Yes. Sunlight covers the full daylight spectrum, so it shows a floor’s true color. Most bulbs do not. Warm bulbs around 2700K push yellows and reds forward, while cool bulbs around 4000K or higher pull gray and blue tones out of the same plank. Bulbs with a low color rendering index make everything look duller. Checking the Kelvin rating and CRI on your bulbs tells you what your floor will actually look like after dark.

    How do I test flooring samples in different lighting conditions?

    Take samples home and place them flat on the subfloor, not leaning against a wall. Check them at three times: morning, late afternoon, and after dark with your lamps on. Move each sample to a sunny spot and a shaded corner. Keep them down for a few days so your eyes adjust. If a sample looks good in all three lighting conditions, it is a safe pick.

  • How to Transition Between Different Floors: 2026 Guide

    How to Transition Between Different Floors: 2026 Guide

    Table of Contents

    Last Updated: September 18, 2026

    Flooring Transition Strips Types: T-Molding, Reducer, and Threshold

    Learning how to transition between different floors starts with picking the right strip. A transition strip is a thin piece of trim that bridges the gap between two flooring surfaces. It hides the cut edge, covers the expansion gap, and removes the tripping hazard at the seam.

    Three types cover nearly every job:

    • T-molding bridges two floors of equal height.
    • Reducer ramps down from a taller floor to a shorter one.
    • Threshold caps a doorway or an exterior entry.

    Get the type wrong and the strip will rock, pop loose, or leave a lip you stub your toe on every morning.

    T-Molding for Equal-Height Floors

    T-molding is the right pick when both floors sit at the same height. It has a flat top and a rib underneath that slides into the gap between the two surfaces.

    Use it for:

    • Hardwood meeting laminate at the same level
    • Vinyl plank meeting tile over one shared subfloor
    • Two rooms with the same floor height but different materials

    The rib centers the strip over the gap. That keeps the seam tight and lets both floors expand and contract without buckling.

    Reducer Strips for Height Differences

    A reducer strip slopes from the taller floor down to the shorter one. It turns a hard step into a gentle ramp.

    Picture a hallway with thick hardwood meeting a bathroom with thin vinyl. The hardwood sits higher. A reducer bridges that drop so feet, carts, and wheels glide across instead of catching.

    Reducers come in different height ratios. Match the strip to your actual height difference, or the slope will feel steep and awkward.

    Thresholds for Doorways and Exterior Transitions

    A threshold covers the seam at a doorway or where flooring meets an exterior door. It is wider and flatter than a T-molding.

    Use a threshold when:

    • A door sits between two rooms with different floors
    • You need to seal out drafts, water, or pests at an entry
    • The gap is wider than a standard T-molding can cover

    Thresholds take more foot traffic than any other strip. Choose a hard material that will not dent under constant stepping.

    How to Fix Uneven Floor Height Between Rooms

    You have two options when floors do not match: level the subfloor or bridge the gap with a strip. The right call depends on how big the difference is and what caused it.

    Small differences, usually under a quarter inch, are a job for a transition strip. Bigger differences often point to a subfloor problem that a strip alone will not fix.

    Measuring the Height Difference Accurately

    Measure at the seam, not in the middle of the room. Floors can slope, so the number that matters is the gap right where the two surfaces meet.

    Here is how to get a clean measurement:

    1. Set a straightedge across the seam so it rests on both floors.
    2. Slide a tape or ruler under the low side until it touches.
    3. Read the gap. That is your height difference.
    4. Measure at three points along the seam and use the largest number.

    A common mistake is measuring once and ordering a strip that is too short. Always take the biggest gap.

    When to Level the Subfloor vs. Use a Transition Strip

    Level the subfloor when the difference is large or the floor feels soft and spongy underfoot. A spongy spot often means moisture damage or a low joist, and a strip will just hide a growing problem.

    Request Estimate →

    Use a transition strip when:

    • The gap is small and consistent along the seam
    • Both floors are solid and flat
    • The height difference comes from flooring thickness, not a structural issue
    Watch Out Never bridge a difference of an inch or more with a standard strip. A steep ramp becomes a tripping hazard and a strip that tall will not stay put. Fix the subfloor first.

    Best Tools for Installing Flooring Transitions

    You do not need a full workshop. A short list of tools handles almost every transition job.

    • Tape measure for the seam length and height gap
    • Miter saw or handsaw for clean, square cuts
    • Pry bar and hammer for lifting old trim
    • Drill for pilot holes in hardwood
    • Nail set to sink nails below the surface
    • Caulk gun for adhesive
    • Sanding block to soften sharp cut edges
    • Utility knife to trim adhesive and clean the gap

    A miter saw gives the cleanest cut. If you do not own one, a fine-tooth handsaw works, but take your time. A ragged cut shows at the seam.

    Step-by-Step: Installing a Transition Strip

    Total Time: 45 to 90 minutes Difficulty: Beginner to intermediate

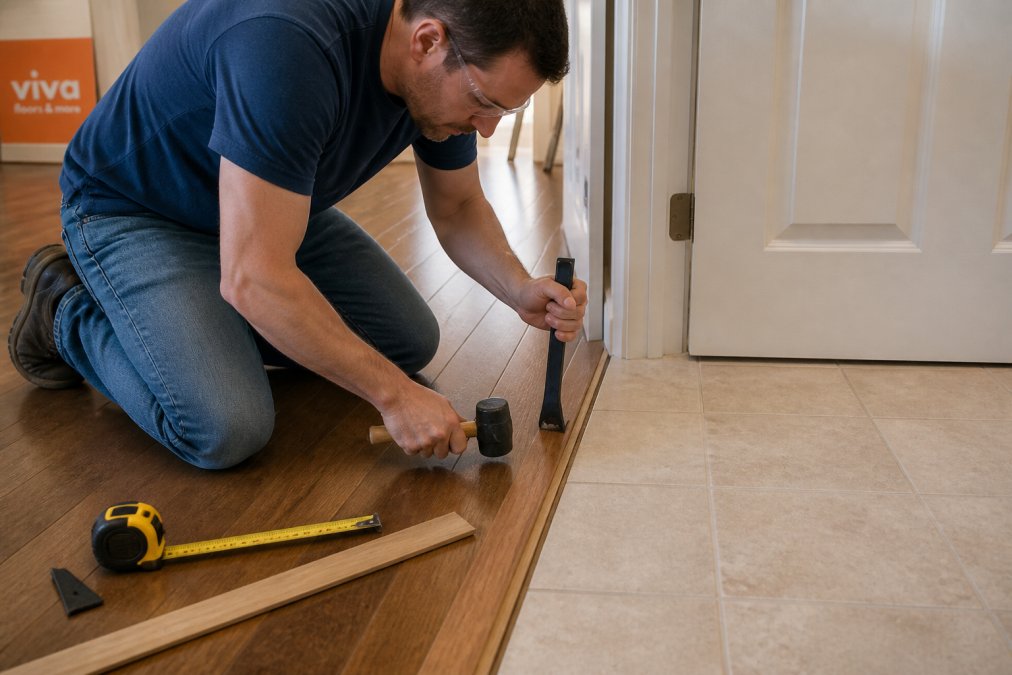
    Homeowner using a pry bar and hammer to install a T-molding strip, showing how to transition between different floors
    Homeowner using a pry bar and hammer to install a T-molding strip, showing how to transition between different floors

    Here is the full process, from prep to final tap.

    Step 1: Prep the Subfloor and Measure

    Clear the gap between the two floors. Vacuum out dust, old adhesive, and any loose debris.

    Check that both floor edges are flat and solid.

    Step 2: Cut and Fit the Strip

    Cut the strip a hair longer than the seam, then trim to a snug fit. For doorways, cope the ends around the door jamb so the strip tucks under the trim.

    Step 3: Secure with Adhesive or Nails

    You have two ways to lock the strip down:

    • Adhesive: Best for concrete subfloors and floating floors. Run a bead, press the strip in, and weight it until it sets.
    • Nails or screws: Best for wood subfloors. Drill pilot holes, then drive fasteners into the subfloor, not the flooring.
    • Both: The strongest hold for high-traffic doorways. Glue the base and nail the ends.

    Set nails below the surface with a nail set, then fill the holes with matching putty.

    Pro Tip Never nail through a floating floor. Fasteners pin the planks and stop them from expanding. On floating floors, glue the strip to the subfloor and let the planks move underneath it.

    Choosing the Right Material for Your Transition

    Match the strip material to the floors it touches and the traffic it takes. A strip that looks right but wears fast is a false economy.

    Material Best For Watch Out For
    Wood Hardwood and laminate seams Swells with moisture
    Laminate Color-matched laminate floors Can chip at sharp edges
    Vinyl Vinyl plank and damp rooms Fades in direct sun
    Metal Doorways and high traffic Dents if too thin
    Stone or marble Tile to tile transitions Cracks if unsupported

    Robot Vacuum Compatibility and Accessibility: What Most Guides Miss

    Most guides stop at installation. They skip the two things that decide whether you will actually like the result: your robot vacuum and your household’s mobility needs.

    • Keep the height change under about half an inch where possible
    • Choose a reducer over a sharp square edge
    • Avoid metal strips with a raised lip
    Key Takeaway A transition strip is not just trim. It decides whether a robot vacuum can clean the whole floor and whether someone with a walker can cross the room safely.

    DIY vs. Professional Installation: Cost and Time Breakdown

    Doing it yourself saves labor, but only if you have the tools and the patience. Hiring a pro saves time and lowers the risk of a bad cut.

    Factor DIY Professional
    Time per transition 45 to 90 minutes Same day, batched
    Tools needed Saw, drill, pry bar Pro brings all
    Risk Miscut or loose strip Low
    Best for One or two seams Whole-home jobs

    Visual Troubleshooting: Fixing Gaps, Tripping Hazards, and Squeaks

    Most transition problems have a simple cause and a simple fix. Here is how to read the symptom and solve it.

    Problem Likely Cause Fix
    Gap at the seam Strip cut too short Replace with a longer strip
    Strip rocks Uneven subfloor Sand high spot or shim
    Tripping hazard Steep or tall strip Switch to a reducer
    Squeak Loose fastener Add adhesive or reset nails
    Strip pops up Adhesive failed Clean and re-glue

    Frequently Asked Questions

    What is the best way to transition between different height floors?

    The best method depends on the height difference. For gaps under 1/2 inch, a reducer strip creates a gentle slope. For differences between 1/2 and 1 inch, a threshold or ramp works well. If the height difference exceeds 1 inch, you may need to level the subfloor or build a custom transition. Always measure the gap at multiple points, as floors can vary. For safety and a professional look, match the transition material to the higher-traffic flooring.

    Do you need a transition strip between rooms?

    Yes, in most cases. Transition strips serve three purposes: they cover the expansion gap required by floating floors, protect floor edges from chipping, and create a safe walking surface. Without them, you risk tripping hazards and moisture damage. However, if two rooms share the same flooring and are installed continuously, a strip may not be needed. Always check manufacturer guidelines.

    How do you transition hardwood to tile?

    Hardwood to tile transitions usually require a reducer or T-molding, depending on height. Tile is often thicker than hardwood, so a reducer that slopes from tile down to wood is common. Measure the height difference, then choose a strip that bridges it smoothly. Use construction adhesive for a secure bond, and consider a color that matches the hardwood for a seamless look. For large gaps, a threshold may be better.

    What can I use instead of transition strips?

    If you prefer a strip-free look, you can use a flush transition by installing a thin underlayment to equalize heights, or by using a caulk line for small gaps. However, these methods are less durable and may not meet code. For floating floors, skipping a transition strip can void your warranty. In most cases, a low-profile T-molding or a custom wood reducer is the best alternative to a standard strip.

  • Best Countertop Materials for Kitchens: 2026 Guide

    Best Countertop Materials for Kitchens: 2026 Guide

    Table of Contents

    Last Updated: September 16, 2026

    What Actually Matters When Choosing Countertop Materials

    The best countertop materials for kitchens balance four things: how they handle heat and scratches, how much upkeep they demand, how they fit your budget, and whether they suit the way you actually cook. At Viva Floors & More, we’ve helped Rio Grande Valley homeowners, builders, and contractors sort through these trade-offs since 1992, and the same pattern shows up again and again: people fall in love with a look online, then discover the maintenance reality after installation.

    Countertop materials are the surfacing products installed over kitchen base cabinets, and they fall into two broad families: natural stone (granite, marble, soapstone) and man-made surfaces (quartz, laminate, solid surfacing, concrete). Each family behaves differently under heat, knives, citrus, and kids.

    Here’s the part most buying guides skip. The material you choose has to match your household, not a showroom photo. A busy family with two dogs and three kids needs a different surface than a couple who cooks twice a week.

    Below, we break down every major option by durability, upkeep, and cost so you can walk into a showroom knowing exactly what to ask for.

    Quartz vs Granite Countertops: Which Engineered Stone Wins?

    Quartz wins on maintenance; granite wins on heat tolerance and one-of-a-kind looks. This is the single most common comparison we field, and the honest answer depends on which trade-off bothers you less.

    Quartz is engineered stone: ground quartz mixed with resin and pigments, then formed into slabs. That manufacturing process makes it non-porous, so it resists stains and never needs sealing. Granite is natural stone, cut from the earth, and every slab carries unique veining and mineral patterns. It’s heat-tolerant and scratch-resistant, but it’s porous, so it needs periodic sealing to block stains and bacteria.

    Factor Quartz Granite
    Porosity Non-porous Porous, needs sealing
    Heat resistance Moderate, use trivets High, heat-tolerant
    Maintenance Wipe-and-go Reseal periodically
    Look Consistent, uniform veining One-of-a-kind natural pattern
    Repairability Professional repair only Can be re-polished
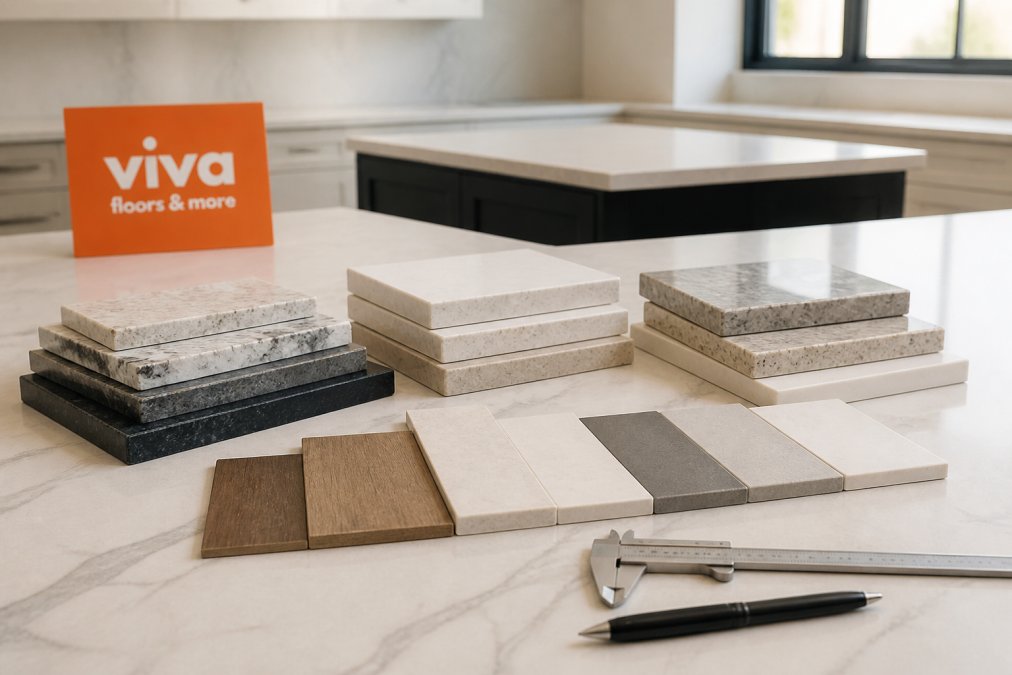
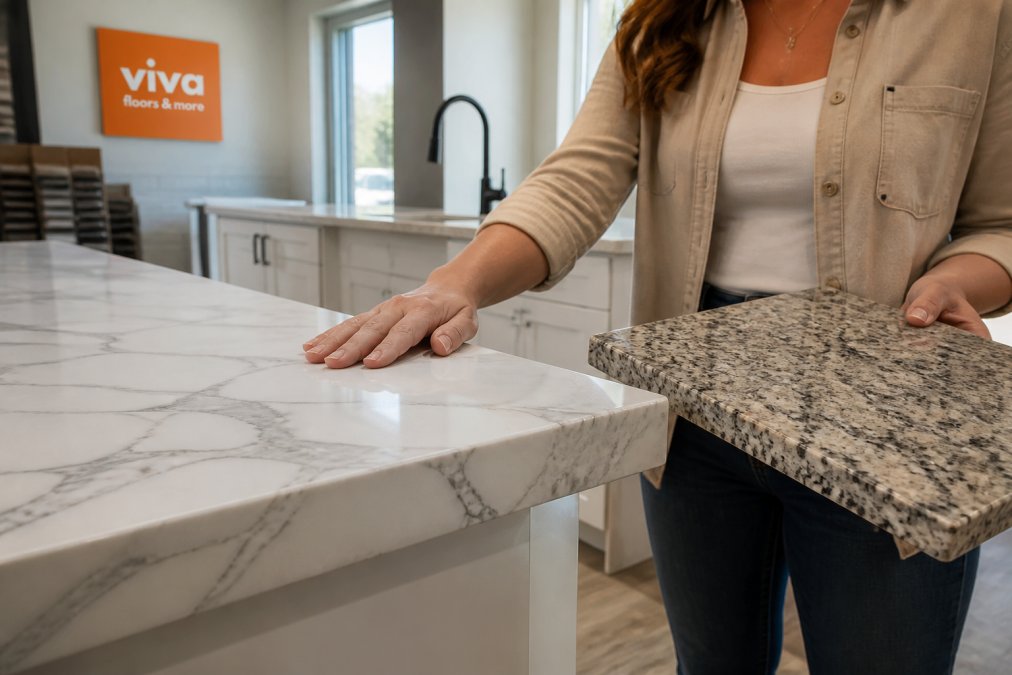
    A bright kitchen with white quartz countertops and gray veining, a homeowner running a hand along the polished edge while comparing it to a granite sample held in the other hand
    A bright kitchen with white quartz countertops and gray veining, a homeowner running a hand along the polished edge while comparing it to a granite sample held in the other hand

    A common mistake is assuming quartz is bulletproof. It isn’t. Leave a hot cast-iron pan on a quartz surface and you can scorch the resin. Granite shrugs that off, which is why serious cooks often lean granite despite the sealing chore.

    Key Takeaway Choose quartz if you want low-maintenance and consistent color. Choose granite if you want heat tolerance and a slab nobody else owns.

    Marble, Soapstone, and Natural Stone: Beauty vs Upkeep

    Marble and soapstone deliver the most striking looks and the highest maintenance demands. Both are natural stone, and both will show their age, though in different ways.

    Marble is famous for its soft veining and honed or polished finishes. It’s also soft and porous, so it etches when acidic foods like lemon or vinegar sit on it. Many homeowners accept the patina as character; others find it maddening. Soapstone is denser and non-porous, with a matte finish that ages gracefully. It scratches, but scratches can be sanded out and oiled over. Its dark gray tone suits farmhouse and industrial kitchens.

    The thing nobody tells you about natural stone is that sealing isn’t a one-time job. It’s a recurring task, and how often you reseal depends on the stone’s porosity and how hard you use the kitchen.

    Watch Out Skipping reseal on a porous natural stone lets oil, wine, and tomato sauce soak in permanently. Once a stain sets, it often requires professional re-polishing to remove.

    Affordable Kitchen Countertop Options That Still Hold Up

    Laminate is the most budget-friendly kitchen countertop option that still performs well, and modern laminate has closed much of the gap with stone. Today’s laminate uses photographic overlays that mimic granite, marble, and quartz convincingly, and the wear layer resists scratches and stains far better than the laminate of twenty years ago. The key mechanism is the melamine wear layer bonded over a decorative paper layer and a particleboard or plywood core; the thicker the wear layer, the better it stands up to daily use.

    Where laminate falls short: it can’t take a hot pan, and seams can lift if water gets underneath. But for rental properties, starter kitchens, and budget remodels, it’s a smart, durable choice that leaves money for flooring and cabinets. A common pattern among fabricators is that laminate edges are the first failure point, so specify a matching edge band rather than a raw cut, and seal the seams around the sink with silicone to keep water out of the core.

    Request Estimate →

    Solid surfacing, often called by brand names like Corian, sits a step up. It’s non-porous, seamless, and repairable, since scratches can be sanded out. It’s also one of the few materials you can custom-cut and integrate a sink into with no visible seam. The trade-off is heat: solid surfacing can scorch or crack under a hot pan, so trivets are non-negotiable.

    A third budget path is butcher block in a limited footprint. It is not the cheapest per square foot, but it is one of the few materials a homeowner can cut, sand, and refinish without a fabricator. That repairability lowers the long-term cost of ownership even when the upfront number is higher than laminate.

    For pricing on any of these, it depends on square footage, edge profiles, and fabrication, so request a current quote rather than trusting a number you saw online. The variables that move the quote most are the number of cutouts (sink, cooktop, outlets), the edge profile, and whether the fabricator has to template on-site. A simple L-shaped laminate run with one sink cutout and a standard edge will sit at the low end; a solid surface island with an integrated sink and a custom edge will sit at the high end.

    Key Takeaway If the goal is the lowest upfront cost, laminate wins. If the goal is the lowest lifetime cost in a busy kitchen, solid surfacing or butcher block in a limited area often wins because damage can be sanded out instead of replaced.

    Consumer information on countertop surface wear and care

    Butcher Block, Solid Surfacing, and Concrete: Niche Picks Worth a Look

    Butcher block, concrete, and solid surfacing each solve a specific problem better than the mainstream options, and each carries a trade-off that most guides gloss over. The unique angle here is repairability and cabinet compatibility: these three materials are where the weight-load and DIY-repair questions actually decide whether the installation succeeds.

    Butcher block brings warmth and a farmhouse feel, and it’s genuinely food-safe and knife-friendly. The trade-off is upkeep: it needs regular oiling and can be damaged by standing water. It’s a strong pick for prep islands and baking stations rather than a full perimeter. The mechanism is simple: wood fibers absorb oil, which keeps water out and slows staining; when the surface dries out, water penetrates and the wood cups or cracks.

    Material Best For Main Drawback Repair Approach
    Butcher block Prep islands, baking Needs oiling, water damage Sand and re-oil
    Concrete Industrial kitchens Heavy, can crack Patch and reseal by fabricator
    Solid surfacing Busy family kitchens Can scorch, softer surface Sand out scratches
    Watch Out Before committing to concrete or a thick natural stone slab, confirm that the cabinet frames and floor can carry the load. Sagging and cracked seams often trace back to support that was never checked before fabrication.

    Kitchen Countertop Maintenance Tips by Material

    Pro Tip Keep a small bottle of pH-neutral stone cleaner under the sink and a stack of felt-backed trivets within arm’s reach. The two habits prevent most countertop damage we see.

    Repairability, Sustainability, and Cabinet Compatibility

    Watch Out Installing a heavy stone slab on cabinets that weren’t built for the load can cause sagging or cracked seams within a year. Confirm support before fabrication, not after.

    For homeowners weighing material availability, note that supply of certain imported slabs fluctuates, so confirm lead times with your supplier early in the project.

    Conclusion

    Choosing among the best countertop materials for kitchens comes down to matching a surface to your household, not chasing a trend.

    Frequently Asked Questions

    What is the most durable countertop material for a kitchen?

    Quartz and granite consistently rank as the most durable countertop materials. Quartz is non-porous and resists scratches, stains, and moisture without sealing. Granite is heat-tolerant and holds up to hot pans, but it is porous and needs periodic sealing. Both handle daily kitchen use for decades with basic care. Soapstone and concrete also wear well but require more attention to patching and resealing over time.

    Which countertop material is best for the money?

    Laminate and butcher block offer affordable upfront costs among kitchen countertop options, and both can be replaced or refinished without a full remodel. Quartz often delivers strong long-term value because it never needs sealing and resists staining. If resale value matters, quartz and granite tend to hold appeal with buyers. Pricing depends on square footage, edge profiles, and fabrication, so request a quote for your layout.

    Which countertop materials do kitchen designers recommend avoiding?

    Designers often steer clients away from marble in busy family kitchens because it etches from acids like lemon juice and stains easily. Polished limestone and some porous natural stones fall into the same category. Very thin laminate with dark colors shows scratches. These materials are not bad, but they demand more care than most households want. If you love the look, use them on a low-traffic island or backsplash instead of the main prep area.

    How do I choose the right countertop material for my renovation?

    Start with three questions: how much cooking happens on that surface, how much upkeep you will realistically do, and what your cabinets can support. Porcelain and quartz are low-maintenance. Granite and soapstone need sealing. Butcher block needs oiling. Match the material to your habits, then confirm thickness and weight with your installer. Bring cabinet and floor samples to your showroom so you can see how the countertop reads under your lighting before you commit.

  • Cost of Professional Flooring Installation 2026

    Cost of Professional Flooring Installation 2026

    Table of Contents

    Last Updated: September 15, 2026

    What Drives the Cost of Professional Flooring Installation in 2026

    The cost of professional flooring installation 2026 comes down to two variables: the material you choose and the condition of the room beneath your feet. This guide from Viva Floors & More breaks down where every dollar goes.

    Square footage sets the baseline: a 200-square-foot bedroom and a 1,200-square-foot open floor plan use the same labor rate but wildly different totals. Most contractors price per square foot, then adjust for complexity.

    Site conditions are where estimates drift. A flat, clean concrete slab is straightforward; an uneven subfloor, a staircase, or a room full of furniture changes the math entirely.

    Material Choice and Square Footage

    Material choice drives the largest single line item. Laminate and luxury vinyl plank sit at the lower end, hardwood and natural stone at the higher end, with ceramic tile and engineered wood in between.

    Square footage multiplies that cost, then adds a waste factor for cuts, mistakes, and future repairs, higher for diagonal layouts and rooms with lots of corners.

    • Straight lay: minimal waste
    • Diagonal lay: more waste
    • Herringbone or complex patterns: the most waste

    Site Conditions and Installation Complexity

    Site conditions determine how much prep the job needs before a single plank goes down. Subfloor preparation, moisture barriers, and leveling compound add labor hours a per-square-foot quote won’t capture.

    Installation complexity matters just as much. Stairs, closets, doorways, and transition strips slow crews down, each transition point is a small job inside the larger one.

    Watch Out Skipping subfloor preparation to save money is a common mistake. A floor installed over an uneven or damp subfloor can cup, crack, or lift within a year, and the warranty usually won’t cover it (nwfa.org).

    Flooring Installation Labor Rates Per Square Foot

    Flooring installation labor rates per square foot range widely by material, region, and installer experience. Labor is usually quoted separately from materials, and it’s the number homeowners most often underestimate.

    Labor-only pricing covers the crew’s time, not the product. You supply the flooring, underlayment, and trim. That saves money if you source well, but shifts the risk of shortages or defects onto you.

    Installation methods affect the rate. Floating floor systems click together quickly and cost less in labor; glue-down and nail-down take longer and require more skill, so they carry higher rates.

    Installation Method Labor Intensity Best Suited To
    Floating floor Low Laminate, luxury vinyl plank
    Glue-down installation Medium Engineered wood, vinyl
    Nail-down installation High Solid hardwood

    How Labor-Only Pricing Works

    Labor-only pricing separates the crew’s fee from the material bill: you buy the flooring, the installer charges for time, skill, and equipment. It works best when you know exactly what you want and can source it reliably.

    The catch: under-order and the crew waits while you pay for the delay; damaged material is your cost. Labor-only pricing rewards prepared homeowners.

    Regional Labor Rate Variations

    Regional labor rates swing based on local demand, cost of living, and how many qualified crews operate nearby. Urban markets with tight labor run higher than rural ones, and construction booms push rates up further.

    Local material availability plays a role too: when flooring must be shipped in, markup and lead times rise. Sourcing locally keeps both labor and material costs steadier.

    Cost to Remove Old Flooring and Dispose of Materials

    The cost of professional flooring installation 2026 includes removal of old flooring, a line item most estimates bury or skip. Tearing out carpet, tile, or glued-down hardwood takes real labor, and the debris has to go somewhere.

    Removal difficulty depends on what’s coming up. Carpet and padding pull up fast; ceramic tile is slow, dusty work that often damages the subfloor; glued-down hardwood takes longest because the adhesive fights every inch.

    Disposal adds a second cost: old flooring is bulky and heavy, and many landfills charge by weight or volume.

    A flooring contractor in work clothes and knee pads pulling up old carpet and tack strips in a residential living room, with a pry bar and debris pile nearby
    A flooring contractor in work clothes and knee pads pulling up old carpet and tack strips in a residential living room, with a pry bar and debris pile nearby

    Disposal Fees and Hauling

    Disposal fees and hauling are usually quoted separately from removal labor. A crew that hauls debris away charges for the dump run, truck, and time; some contractors leave the pile for you, which lowers the quote but adds a chore.

    If you’re renovating on a budget, ask upfront whether haul-away is included. It’s one of the most common surprises on a final invoice.

    Pro Tip Ask your installer to separate reusable material before hauling. Leftover planks from a full box are worth keeping for future repairs, and some materials can be donated rather than dumped.

    Luxury Vinyl Plank Installation Cost: What to Expect

    Luxury vinyl plank installation cost lands in the middle of the range, cheaper than hardwood but above basic laminate. LVP is a favorite for high-traffic homes because it handles moisture and wear well.

    The material varies by thickness and wear layer.

    Hidden Costs: Subfloor Repair, Baseboards, and Transition Strips

    Subfloor Repair and Leveling

    Watch Out Skipping subfloor preparation to save money is a common mistake. A floor installed over an uneven or damp subfloor can cup, crack, or lift within a year, and the warranty usually won’t cover it because the manufacturer can point to a failed substrate.

    Baseboard Removal, Reinstallation, and Painting

    Three common approaches, each with a different cost profile:

    Transition Strips and Trim

    How to Get These Costs Into the Quote Up Front

    The fix is procedural. Before you sign:

    Key Takeaway The most accurate flooring estimate accounts for what’s under the floor, not just what goes on top. Ask any installer to inspect the subfloor before quoting a final number, and get the baseboard and transition scope in writing.

    DIY vs. Professional Installation: A Cost Comparison

    What DIY Actually Costs

    The labor line disappears, but three new lines appear:

    The Warranty and Insurance Angle Most Guides Miss

    Side-by-Side Comparison

    Factor DIY Professional
    Upfront cost Lower labor, added tool and rental cost Higher, but fixed and quoted
    Time investment High, weekends to weeks Low, crew completes in days
    Tool needs Rental or purchase Included in labor
    Mistake risk Higher, and rework is expensive Lower, and often warrantied
    Material warranty Often void if instructions aren’t followed Typically preserved when installed per spec
    Liability and insurance Falls on the homeowner Contractor’s liability and workers’ comp apply
    Change orders You absorb surprises Priced and documented

    When DIY Makes Sense, and When It Doesn’t

    Pro Tip Before deciding, get one professional quote that itemizes labor, prep, and materials. Even if you plan to DIY, the quote tells you what the job is actually worth and where the risk sits.

    How to Save Money on Your Flooring Installation Project

    Frequently Asked Questions

    How much does it cost to floor 1000 sq. ft. fully installed?

    A 1,000-square-foot installation total depends on material, labor rates, and site prep. Carpet and laminate sit at the lower end; hardwood and tile push higher. Add removal of old flooring, subfloor repair, and trim work if needed. Because pricing depends on your room dimensions, material grade, and site conditions, request a written installation estimate from Viva Floors & More for an accurate figure.

    What factors influence the total cost of professional flooring installation?

    The biggest drivers are square footage, material type, labor rates, and installation complexity. Site conditions matter too: uneven subfloors, moisture issues, and stairs all add labor. Other factors include removal of old flooring, baseboard removal and reinstallation, transition strips, and the waste factor from cuts. A professional contractor should itemize each of these on your installation quote.

    What hidden fees should I expect when hiring a professional flooring installer?

    Common add-ons include subfloor preparation, old flooring disposal, furniture moving, baseboard removal, and transition strips. Some installers charge extra for stairs, tight spaces, or after-hours work. Ask for a line-item quote that separates materials, labor, and site prep. If a bid looks unusually low, check whether disposal and subfloor work are excluded. Viva Floors & More provides transparent estimates so you can see every line before you commit.

    Is it cheaper to buy flooring materials separately or through a contractor?

    Buying materials yourself can save on material markup, but you take on measuring, ordering, and waste-factor risk. Contractors often get better pricing on hardwood flooring, luxury vinyl plank, and ceramic tile, and they handle returns. For a renovation budget, compare the total project cost both ways. Viva Floors & More serves DIYers and contractors, so you can price materials directly and decide what works for your project.

    How long does professional flooring installation typically take?

    Most single-room installations finish in one to two days. A whole-home project with removal, subfloor prep, and trim work can run three to seven days depending on square footage and material. Glue-down and nail-down installations take longer than floating floor systems. Moisture barrier curing and acclimation add time. Your installer should give a timeline in the written estimate.

    How much does luxury vinyl flooring installation cost per square foot in 2026?

    Luxury vinyl plank installation cost depends on the product grade, subfloor condition, and whether removal is included. LVP is one of the more affordable options because many planks use a floating floor system that installs faster than glue-down or nail-down methods. For a project-specific number, request a quote from Viva Floors & More with your room dimensions and current subfloor details.


    Flooring costs are unpredictable because every room, subfloor, and material choice changes the total. Viva Floors & More removes that guesswork with expert consultation, a vast in-stock selection, and guidance for homeowners, builders, and contractors alike. Get started with Viva Floors & More and find the right flooring for your space and budget.