Category: Flooring Tips

  • Bulk Flooring Supplies for Local Contractors: 2026 Guide

    Bulk Flooring Supplies for Local Contractors: 2026 Guide

    Table of Contents

    Last Updated: October 12, 2026

    Why Bulk Flooring Supplies Change Your Project Math

    Bulk flooring supplies for local contractors are the single biggest lever on whether a project finishes on budget or bleeds money for months.

    Here is the uncomfortable truth most supply listings avoid: the lowest quoted unit price is rarely the lowest total project cost.

    This guide walks through the full contractor purchasing process, from quantity math to delivery coordination to damaged-goods claims.

    Key Takeaway The three variables that decide your real cost are unit price, waste factor, and delivery timing. Optimize all three, not just the first.

    Choosing a Contractor Flooring Supplier: What Actually Matters

    A contractor flooring supplier earns repeat business on inventory accuracy and terms, not on the size of the showroom. The best supplier is the one whose stock counts match reality and whose ordering process protects your schedule.

    Most contractors evaluate suppliers on price per square foot and stop there. That is a mistake. The relationship you actually need covers four things: verified stock, consistent product lots, clear purchasing terms, and a person who answers when a jobsite problem hits at 7 a.m.

    Account setup and purchasing terms

    Set up a contractor account before you need it. Walking in with an account already open means faster quotes, cleaner invoicing, and a paper trail for warranty claims later.

    Most suppliers that sell at trade pricing ask for some combination of the following before they will quote you contractor rates:

    • A business license, contractor license number, or proof of trade status
    • A resale or sales-tax exemption certificate, so tax is not charged on material you will resell or install under a contract
    • A signed credit application if you want net terms instead of paying at pickup or delivery

    Ask these questions during setup:

    • What are the payment terms and credit options?
    • Is there a minimum order quantity for contractor pricing?
    • Can quotes be held for a defined period?

    Get the answers in writing. Verbal promises about “we’ll work with you” disappear when a delivery slips.

    Pro Tip Open the account and get your resale certificate on file before you are standing at the counter with a loaded truck. Account approval and credit checks take time, and a job that starts Monday cannot wait on paperwork.

    Inventory accuracy and product-lot consistency

    Product-lot consistency is the quiet killer of large installations. If half your order comes from one manufacturing run and half from another, dye lot and sheen can differ visibly across a room.

    According to the National Wood Flooring Association’s guidance on installation and acclimation, material from different production lots should be checked before installation begins.

    A practical way to verify this before you commit:

    1. Ask for the lot or run number on the quantity you need, not just the SKU.
    2. Ask whether that quantity is on the floor now or on a purchase order.
    3. Ask what happens if the lot runs short mid-order, will they substitute a different lot, or hold the balance until matching stock arrives?
    4. When the material lands, open two or three cartons from different pallets and compare them side by side before the crew starts.

    If the supplier cannot tell you the lot number and the on-hand count for that lot, you are not buying verified stock. You are buying a promise.

    Watch Out Mixing dye lots across a single room is one of the most common and most expensive contractor mistakes. The fix is a five-minute lot check before the first plank goes down.

    How to compare contractor pricing without getting fooled

    Wholesale discounts are easy to advertise and hard to compare. Two suppliers can quote the same product at different unit prices and still land at very different total project costs once freight, tax, waste, and delivery are added.

    Build a simple side-by-side for each quote that includes:

    • Unit price at your actual volume tier, not the advertised tier
    • Freight or delivery charge, and whether it is flat or weight-based
    • Sales tax treatment, and whether your resale certificate removes it

    A supplier who is five percent cheaper on the unit line but charges freight, a fuel surcharge, and a restocking fee on overage can easily cost more than the supplier with the higher sticker price.

    How a Flooring Material Cost Estimator Fits Your Bid

    A flooring material cost estimator is any tool or process that converts room dimensions into an accurate material quantity and total cost before you commit to a bid. It is the difference between a profitable quote and a guess.

    Contractors who bid from rough square footage lose money on complex layouts. A proper estimator accounts for room shape, transitions, closets, and the waste factor. Build your estimate in this order:

    1. Measure each room’s length and width in feet
    2. Calculate square footage per room, then total it
    3. Add your waste factor percentage
    4. Multiply by the per-unit price at your volume tier
    5. Add freight, trim, underlayment, and adhesive
    6. Add a contingency line for damaged or short shipments

    FEMA’s guidance on building material quantity estimation reinforces the same principle for disaster rebuilding: order to measured need plus a defined buffer, never to a round number that feels safe.

    Flooring Installation Waste Factor: Ordering the Right Quantity

    The flooring installation waste factor is the percentage you add to measured square footage to cover cuts, defects, and future repairs.

    Waste factor is not one number. It changes with the material and the layout.

    Material Typical Waste Factor Why It Changes
    Hardwood 5-10% Direction changes, board grading
    Laminate 5-10% Plank layout, pattern matching
    Vinyl (LVP/LVT) 5-10% Room shape, cut complexity
    Carpet 5-10% Seam placement, roll width
    Tile 10-15% Cuts, breakage, pattern work

    Diagonal layouts, herringbone patterns, and rooms with many corners push you toward the top of each range. Simple square rooms let you stay at the bottom.

    Request Estimate →

    Pro Tip Keep one unopened box from the same lot in storage. If a plank gets damaged two years later, you have a matching replacement instead of a discontinued-material problem.

    Your Contractor Flooring Quote Checklist Before You Commit

    A contractor flooring quote checklist is the set of items you verify in writing before signing or paying a deposit. Missing any one of these can turn a profitable job into a dispute.

    Run every quote through this list:

    • Unit price confirmed at your volume tier
    • Total quantity and waste factor stated
    • Product lot number recorded

    If a supplier will not put lead times and return terms in writing, treat that as your answer. The quote is not complete.

    Delivery, Lead Times, and Jobsite Coordination

    Delivery logistics decide whether a bulk order helps or hurts you. Coordinate the delivery window against your crew schedule, not the other way around.
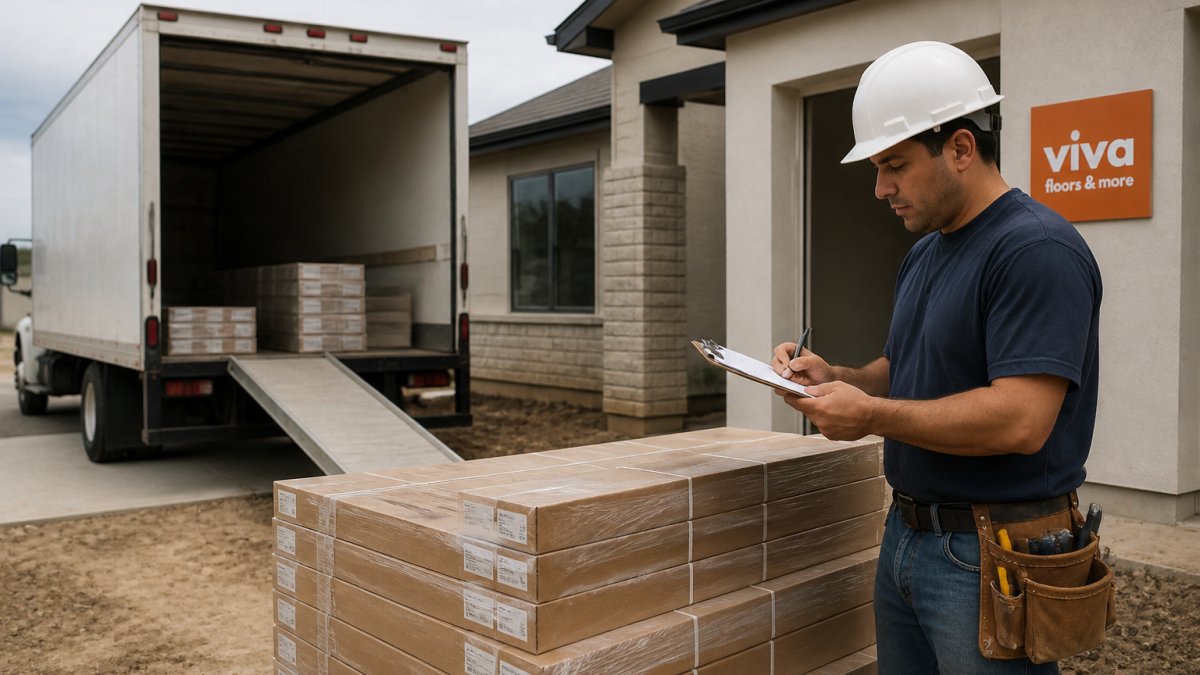
    A contractor in work clothes and a hard hat checking a clipboard beside stacked boxes of flooring material on a residential jobsite, with a delivery truck visible in the background
    A contractor in work clothes and a hard hat checking a clipboard beside stacked boxes of flooring material on a residential jobsite, with a delivery truck visible in the background

    A few coordination habits separate smooth jobs from chaotic ones:

    • Confirm the delivery address and access before the truck rolls
    • Decide who signs for the shipment and counts the boxes
    • Stage material in a climate-controlled space for acclimation

    That last point matters more than most contractors realize. Photos taken at delivery are your evidence if a damaged-goods claim becomes necessary.

    Returns, Overage, Damaged Goods, and Warranty Handling

    Returns and warranty claims are where a supplier’s real character shows. Know the policy before you order, not after something goes wrong.

    Most suppliers set a return window, require unopened original packaging, and charge a restocking fee on overage. Damaged goods usually must be reported within a short window after delivery, which is why same-day inspection matters. Warranty terms vary by manufacturer, and installation errors often void coverage.

    Overage and returns

    Overage is the material you ordered but did not install. It is not automatically waste, a leftover box from the same lot is your future repair stock, but it is also not free money if you try to return it.

    What to confirm before you order:

    • The return window, counted from delivery or pickup, not from the day you finish the job
    • Whether returns are accepted on full cartons only, or on opened cartons with a minimum quantity
    • The restocking fee, usually a percentage of the returned material’s value
    • Whether the return must be from the same lot number as the original order

    A common pattern is to keep one unopened carton per lot as attic stock and return only the clearly excess full cartons inside the window.

    Damaged goods and shortage claims

    Damage and shortage claims are time-sensitive. Most suppliers require reporting within a short window after delivery, and some require it before the driver leaves the property. Once that window closes, the claim is usually yours to absorb.

    A claim-ready delivery routine:

    1. Count the cartons against the packing slip before signing.
    2. Open at least one carton per pallet and inspect for crushed edges, water damage, or broken tile.
    3. Photograph the pallets, the packing slip, and any damage before the driver leaves.
    4. Note any shortage or visible damage on the delivery paperwork and have the driver sign it.
    5. Report the claim the same day, in writing, with the photos attached.

    That last point matters more than most contractors realize. Photos taken at delivery are your evidence if a damaged-goods claim becomes necessary. A signed clean delivery receipt is very hard to overturn later.

    Warranty handling and what voids coverage

    Manufacturer warranties generally cover defects in the material, not failures caused by the installation or the environment. That distinction decides most claims.

    Common reasons a claim gets denied:

    • Installation outside the manufacturer’s written instructions
    • No expansion gap at the perimeter, causing buckling
    • Moisture readings not taken, or material installed over a wet substrate
    • Acclimation skipped or done in an uncontrolled space

    For commercial flooring and residential projects alike, keep your documentation together: order confirmation, lot numbers, delivery photos, moisture readings, and installation records. When a claim comes up, that folder is your proof that the failure is in the material and not in the install.

    Watch Out A warranty claim with no moisture readings and no lot documentation is usually a denied claim. The paperwork you keep at installation is the paperwork that pays you later.

    Conclusion

    Bulk flooring orders are a procurement problem, not a shopping problem, and the contractors who treat them that way protect their margins. Viva Floors & More helps South Texas builders and installers get this right with contractor account support, a deep in-stock inventory of trusted brands like Cali, Robbins, Mohawk, Shaw, and MSI, and two showrooms in Pharr and Brownsville for local pickup.

    Frequently Asked Questions

    Where can contractors buy bulk flooring supplies?

    Contractors typically buy bulk flooring supplies through a local flooring store or supply store that stocks full product categories, including hardwood, laminate, vinyl, carpet, tile, and rubber flooring. A local supplier lets you verify inventory in person, arrange local pickup or delivery, and confirm product-lot consistency across a large order. Before committing, ask about contractor pricing, volume discounts, and whether your quantities are in stock or need to be ordered. Requesting a quote directly from the supplier is the fastest way to confirm availability and your service area.

    How do contractors estimate how much flooring to order?

    Measure each room, calculate square footage, then add a flooring installation waste factor for cuts, pattern matching, and future repairs. Straight-lay installations usually need less overage than diagonal or herringbone layouts, and rooms with lots of angles or doorways need more. Track the total by product SKU and dye lot so every box matches. A flooring material cost estimator helps you convert square footage into boxes, but confirm the final quantity with your supplier before you place the flooring order.

    Can contractors get wholesale pricing on flooring materials?

    Many flooring suppliers offer wholesale pricing or volume discounts to business customers, but terms vary. Ask whether you need a contractor account, a minimum order quantity, or a tax ID before bulk pricing applies. Wholesale pricing usually depends on product category, quantity, and delivery method, so the same order can price differently depending on timing and logistics. Get the quote in writing, confirm what is included, and ask how long the pricing holds before you commit to a purchase order.

    How much extra flooring should contractors order for waste and repairs?

    A common range is 5 to 10 percent overage for straightforward installations and 10 to 15 percent for complex layouts, diagonal patterns, or rooms with many cuts. Keep at least one unopened box from the same dye lot for future repairs. If the flooring order arrives short, ordering more later risks a lot mismatch. Ask your supplier about return policies on unopened overage before you buy, so you are not stuck with extra inventory you cannot use.
  • Stain Resistant Flooring for Rental Properties

    Stain Resistant Flooring for Rental Properties

    Table of Contents

    Last Updated: October 11, 2026

    Why Stain Resistant Flooring Matters for Rental Properties

    Protecting your rental investment starts with the right flooring choice. Stain resistant flooring for rental properties prevents costly replacements between tenants and maintains property value over time. When a tenant moves out, flooring that resists spills, pet accidents, and everyday wear reduces turnover costs significantly.

    At Viva Floors & More, we work with property owners across South Texas who understand that durability directly impacts profitability. A single deep stain or water damage can force expensive refinishing or complete replacement. Stain resistant flooring eliminates that risk.

    The difference between standard flooring and stain resistant options comes down to surface protection. Materials engineered to resist staining keep your property looking newer longer, reduce maintenance headaches, and make cleaning between tenants faster and cheaper. This matters whether you manage one rental or a portfolio.

    Best Flooring for Rental Properties by Material Type

    Choosing the right material determines how well your rental withstands tenant use. Different flooring types offer varying levels of stain resistance, durability, and maintenance requirements. The best choice depends on which spills and accidents are most likely in your property and how quickly they can be cleaned.

    Luxury Vinyl Plank for Rental Property Performance

    Luxury vinyl plank dominates rental properties because it handles abuse and stains reliably. LVP resists stains because liquids sit on the surface rather than absorbing into the material. Spilled wine, pet urine, or muddy water wipes clean without setting, even if cleanup is delayed by several hours.

    The wear layer on quality LVP resists scratches and dents from furniture and tenant activity. Installation is straightforward, meaning faster turnover between tenants.

    Stain performance by spill type:

    • Coffee and tea: Clean completely with a damp cloth; no permanent discoloration
    • Red wine: Wipes clean if addressed within 24 hours; does not set into the surface
    • Pet urine: Sits on the surface; can be cleaned with enzymatic cleaner without odor absorption
    • Grease and cooking oil: Requires mild detergent but does not penetrate or leave residue
    • Mud and dirt: Dries on the surface and vacuums away; does not stain

    The non-porous surface also prevents odor absorption, a critical advantage in pet-friendly rentals. SPC vinyl (stone plastic composite) adds extra rigidity compared to standard LVP, resisting dents from dropped objects while maintaining complete water resistance.

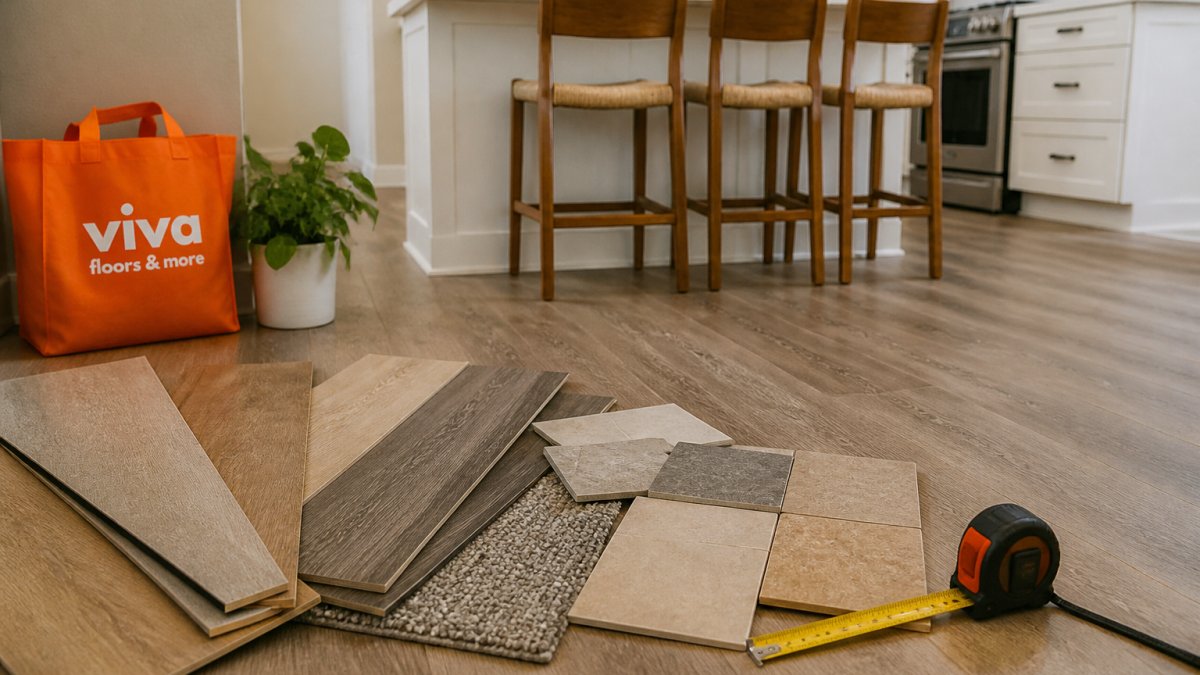
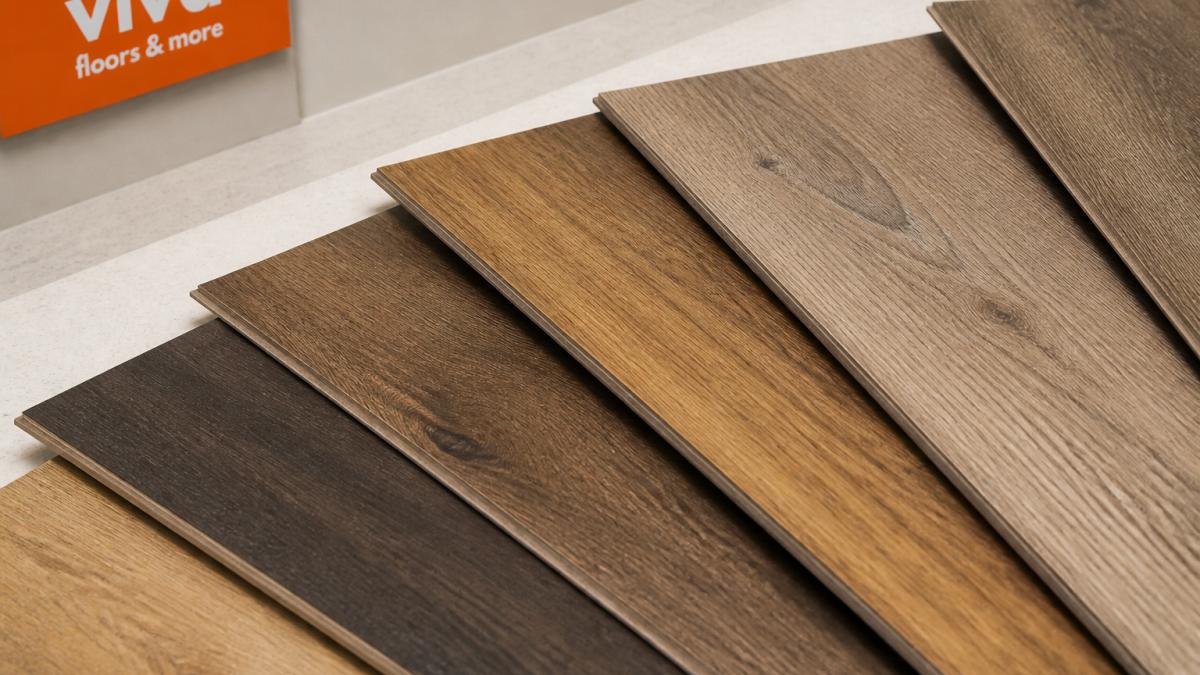
    Close-up of luxury vinyl plank flooring samples showing various wood-grain finishes and textures arranged on a light surface
    Close-up of luxury vinyl plank flooring samples showing various wood-grain finishes and textures arranged on a light surface

    Ceramic and Porcelain Tile

    Tile offers unmatched stain resistance. The glazed surface prevents liquids from penetrating. Porcelain tile is denser than ceramic, making it more resistant to cracking under heavy traffic or dropped objects.

    Stain performance by spill type:

    • Coffee, tea, and juice: Wipe clean immediately; glazed surface does not absorb
    • Red wine and food dyes: May stain grout lines but not the tile itself
    • Pet urine: Sits on the surface; sealed grout prevents odor from setting in seams
    • Grease and cooking oil: Requires standard tile cleaner; does not penetrate
    • Mud and dirt: Dries on the surface and sweeps away cleanly

    Grout lines are the weakness in tile installations. Unsealed grout absorbs stains quickly and harbors odors from pet accidents. Using epoxy grout instead of standard grout eliminates this problem. Epoxy grout is stain-proof, odor-resistant, and does not require sealing. Porcelain tile rated for commercial use handles rental property demands without showing wear. Installation costs are higher than LVP, but tile resists damage for decades, making it a durable option over the long term.

    Laminate Flooring

    Laminate resists surface stains through its protective melamine layer, but moisture is the enemy. Water that seeps into seams causes swelling and buckling. Laminate works in dry climates or properties where moisture control is guaranteed, but it is not ideal for rentals with unpredictable tenant behavior.

    Stain performance by spill type:

    • Coffee and tea: Wipe clean immediately; surface resists staining if dried quickly
    • Red wine: Can stain if left to dry; requires prompt cleanup
    • Pet urine: Absorbs into seams; creates permanent odor and swelling
    • Grease and cooking oil: Sits on the surface but can leave residue if not cleaned promptly
    • Water and moisture: Penetrates seams and causes irreversible damage

    The cost advantage of laminate appeals to budget-conscious landlords. However, repairs may require replacing entire planks. In humid climates or properties with moisture risk, laminate may not be a reliable choice.

    Carpet and Carpet Tiles

    Traditional broadloom carpet absorbs everything. Spills set permanently unless treated immediately. Carpet tiles offer better rental flexibility because individual tiles can be replaced when stained. Stain-resistant treatments help, but they fade over time.

    Stain performance by spill type:

    • Coffee and tea: Absorb into fibers; require immediate professional cleaning to prevent permanent staining
    • Red wine: Sets quickly; professional extraction may not fully remove color
    • Pet urine: Soaks through to the subfloor; creates permanent odor even after cleaning
    • Grease and cooking oil: Attracts dirt and darkens fibers over time
    • Mud and dirt: Dries in fibers; vacuuming removes surface dirt but not embedded soil

    Solution-dyed nylon and polyester fibers resist staining better than piece-dyed fibers because color is built into the fiber itself. Carpet tiles allow replacement of stained sections without replacing the entire floor, reducing turnover costs compared to broadloom. However, even stain-resistant treatments cannot prevent urine from soaking through to the subfloor, creating permanent odor problems in pet-friendly rentals. Carpet works best in climates where moisture is not a concern and in properties where you can enforce strict no-pet policies. For most rental properties, carpet is the highest-maintenance option despite its lower upfront cost.

    Waterproof Flooring for Rentals: Stain Prevention at the Source

    Water resistance and stain resistance work together. Waterproof flooring for rentals prevents moisture from reaching the subfloor, protecting your investment from the most common source of damage.

    Luxury vinyl plank and tile both offer waterproof construction. The core material resists moisture penetration. This matters in bathrooms, kitchens, and laundry areas where spills are inevitable. Waterproof flooring also handles humidity without warping, a critical advantage in South Texas climates.

    SPC vinyl (stone plastic composite) adds extra rigidity compared to standard LVP, resisting dents from dropped objects while maintaining complete water resistance.

    Pet-Friendly Flooring for Rental Homes That Resists Damage

    Tenants with pets create specific challenges. Urine damages most flooring materials unless cleaned immediately. Pet-friendly flooring for rental homes must resist both staining and odor absorption.

    Luxury vinyl plank and porcelain tile both handle pet damage. Urine sits on the surface and can be cleaned before it sets. Sealed grout in tile installations prevents odor from lingering in seams. LVP’s non-porous surface won’t harbor bacteria or smell.

    Request Estimate →

    Avoid carpet in pet-friendly rentals. Even stain-resistant treatments can’t prevent urine from soaking through to the subfloor, creating permanent odor problems.

    Durability, Wear Layers, and Stain Resistance Standards

    Understanding product specifications is essential for comparing flooring objectively. Landlords often rely on marketing claims, but industry standards provide measurable benchmarks that predict real-world performance.

    Wear Layer Thickness and Traffic Ratings

    Wear layers are measured in mils (thousandths of an inch) and directly correlate to how long flooring resists visible scratching and fading.

    For laminate and vinyl, the AC rating system (Abrasion Class) standardizes traffic durability.

    For tile, look for the Porcelain Enamel Institute (PEI) rating, which ranges from 0 to 5.

    Stain Resistance Testing Standards

    Stain resistance is tested under controlled conditions and rated on a scale. The American Society for Testing and Materials (ASTM) publishes standard test methods for flooring stain resistance. Products exposed to common household substances, coffee, red wine, vinegar, mustard, and others, are rated on how easily stains are removed after a set time. Manufacturers often publish these ratings in technical data sheets.

    Carpet stain resistance is measured differently. Solution-dyed nylon and polyester fibers resist staining better than piece-dyed fibers because color is built into the fiber itself, not applied to the surface. Stain treatments applied to carpet provide additional protection but may degrade over time with normal cleaning and foot traffic.

    Water Resistance and Moisture Vapor Transmission

    Water resistance is not the same as waterproofing. Luxury vinyl plank and SPC are waterproof, they prevent moisture from penetrating the core material. Laminate is water-resistant only at the surface; water that seeps into seams causes swelling and permanent damage.

    For products installed in bathrooms, kitchens, or laundry areas, check the moisture vapor transmission (MVT) rating. This measures how much moisture vapor passes through the flooring over time.

    Comparing Products Objectively

    When evaluating flooring for a rental property, request the technical data sheet from the manufacturer. Key specifications to compare:

    • Wear layer thickness (mils)
    • AC or PEI rating
    • Stain-resistance rating (ASTM scale)
    • Moisture vapor transmission rate
    • Warranty coverage (compare length and what damage is covered)
    • Installation method (glue-down vs. click-lock affects repair costs)

    These specifications allow you to compare products from different manufacturers on equal terms, rather than relying on brand reputation or showroom appearance alone.

    Lifecycle Cost and Replacement Planning for Rental Flooring

    The cheapest flooring upfront often costs the most over time. Stain resistant flooring for rental properties requires calculating total cost of ownership, not just purchase price.

    Luxury vinyl plank costs more initially than laminate but lasts longer and requires less maintenance. Tile costs more to install but resists damage for decades. Carpet offers a lower upfront cost but may require more frequent replacement in rental properties.

    Plan replacement cycles into your budget. Properties with multiple units benefit from bulk purchasing through a flooring partner like Viva Floors & More, where inventory availability and professional guidance reduce downtime between tenants.

    Flooring Type Stain Resistance Water Resistance Durability Maintenance
    Luxury Vinyl Plank Excellent Excellent 10-20 years Low
    Porcelain Tile Excellent Excellent 25+ years Medium
    Laminate Good Poor 5-10 years Low
    Carpet Tiles Fair Poor 3-5 years High

    Maintenance and Cleaning Protocols Between Tenants

    The right flooring reduces cleaning time between tenants. Stain resistant flooring for rental properties should require only basic cleaning to restore appearance.

    For luxury vinyl and tile, vacuum or sweep first, then mop with a pH-neutral cleaner. Avoid excess water on vinyl. For stubborn stains on vinyl, a soft brush and mild detergent work without damaging the surface.

    Establish a cleaning protocol for your property manager. Document what works so consistency improves turnover speed. Properties with low-maintenance flooring can help reduce labor costs and speed up tenant transitions.

    Pro Tip Request samples from Viva Floors & More and test them in your rental property’s actual lighting before committing. How flooring looks in a showroom differs from appearance in lived-in spaces. This prevents expensive mistakes on multi-unit properties.

    Choosing stain resistant flooring for rental properties is an investment in long-term profitability. The right material reduces turnover costs, speeds tenant transitions, and keeps your property competitive in the rental market.

    Frequently Asked Questions

    What is the most stain-resistant flooring for a rental property?

    Luxury vinyl plank (LVP) and porcelain tile are the top choices for stain resistance in rentals. LVP has a protective wear layer that resists spills, pet accidents, and food stains, while porcelain tile is non-porous and repels liquids entirely. Both are easy to wipe clean and won’t absorb stains into the material. Ceramic tile offers similar benefits at a lower cost but is slightly more porous. Laminate and carpet are more vulnerable to staining and moisture damage.

    Is luxury vinyl plank a good choice for rental properties?

    Yes, luxury vinyl plank is excellent for rentals because it combines stain resistance, water resistance, and durability at a mid-range cost. The wear layer protects against scratches and spills, and the rigid core prevents moisture from reaching the subfloor. LVP tolerates heavy foot traffic, pet claws, and dropped items without visible damage. Installation is straightforward, and damaged planks can be replaced individually without affecting the entire floor, reducing turnover costs.

    How do you protect rental flooring from stains?

    Choose waterproof or water-resistant materials like LVP, porcelain tile, or SPC vinyl as your foundation. Apply appropriate sealants to porous materials like laminate or natural stone if used. Establish clear tenant guidelines prohibiting barefoot water exposure and requiring prompt cleanup of spills. Schedule professional cleaning between tenants using stain-removal protocols specific to your flooring type. For high-risk areas, consider carpet tiles that can be replaced individually rather than recarpeting the entire room.

    What flooring holds up best to pets and spills in a rental?

    Waterproof flooring like luxury vinyl plank, porcelain tile, and SPC vinyl withstand pet accidents and spills without staining or warping. LVP’s wear layer resists scratches from claws, while tile and vinyl are completely water-resistant. Avoid laminate, which swells and stains with moisture, and light-colored carpet, which shows pet damage quickly. If using carpet, choose carpet tiles in darker, patterned styles that hide stains and allow you to replace only the damaged section rather than the entire floor.

  • Durable Flooring for High Traffic: 2026 Buyer’s Guide

    Durable Flooring for High Traffic: 2026 Buyer’s Guide

    Table of Contents

    Last Updated: October 7, 2026

    Durable Flooring for High Traffic: What Actually Holds Up

    Durable flooring for high traffic is a floor surface engineered to resist wear, moisture, and impact in rooms that see constant use, such as kitchens, hallways, and commercial entries. Getting it right comes down to three specs: wear layer thickness, core composition, and moisture resistance.

    Below, we break down how the major materials compare, which numbers actually predict longevity, and where most buyers go wrong.

    Quick Comparison: Materials at a Glance

    Material Best For Water Resistance Repairability
    Luxury vinyl plank Pets, kids, busy households High Moderate
    Porcelain tile Entryways, kitchens, commercial High Low
    Laminate Budget high-traffic rooms Low to moderate Low
    Engineered wood Living areas, resale value Moderate Moderate

    How We Evaluated These Materials

    We scored each material on four criteria: abrasion resistance, water resistance, repairability, and how well it handles subfloor imperfections. Wear layer thickness carried the most weight because it predicts surface longevity better than any marketing claim. Maintenance demands and installation complexity rounded out the scoring, since a floor that is hard to clean or install rarely stays in good shape.

    LVP and Tile: The Two Workhorses for Busy Rooms

    Luxury vinyl plank and tile handle foot traffic better than any other category we stock. For most busy households, luxury vinyl plank wins on comfort and repairability, while porcelain wins on absolute scratch and moisture resistance.

    Luxury Vinyl Plank (LVP) Pros and Cons

    Pros

    • Comfortable underfoot and warmer than tile
    • Handles moisture well in kitchens and baths
    • Individual planks can be replaced without tearing out the whole floor

    Cons

    • Thinner wear layers wear through faster in entryways
    • Heavy furniture can leave indentation marks
    • Lower-end products can look flat compared to wood

    Porcelain vs. Ceramic Tile for Foot Traffic

    Porcelain tile is denser and more water-resistant than ceramic, which makes it the better pick for entries, mudrooms, and commercial spaces. Ceramic costs less and works fine in low-traffic rooms. Both are slip-resistant when you choose a textured surface finish, and both tolerate cleaning protocols that would damage laminate or wood.

    Flooring Wear Layer Explained: The Number That Predicts Longevity

    The wear layer is the clear protective topcoat on vinyl and laminate flooring, measured in mils (one mil equals one-thousandth of an inch), and it is the single best predictor of how long a floor survives heavy use.

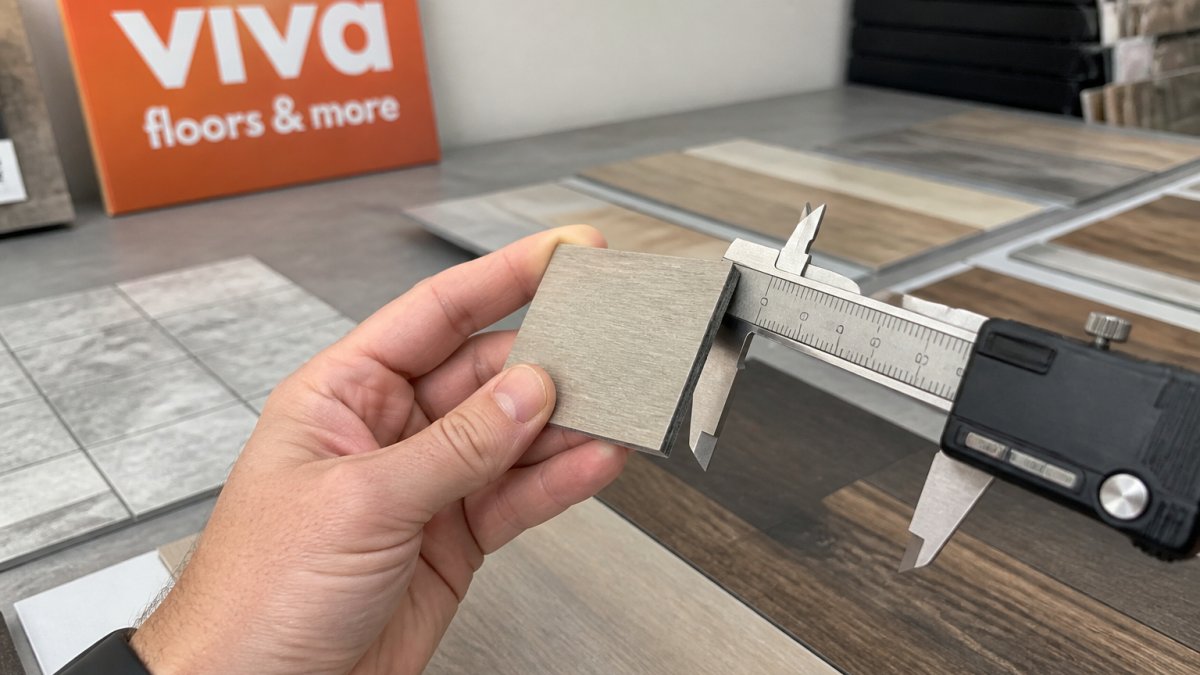
    Close-up of a hand holding a small square flooring sample next to a caliper or ruler, with several LVP, laminate, and tile samples arranged on a showroom table in the background
    Close-up of a hand holding a small square flooring sample next to a caliper or ruler, with several LVP, laminate, and tile samples arranged on a showroom table in the background

    What the Mil Number Actually Means

    Wear layer ratings on vinyl and laminate products generally fall into recognizable bands. Most practitioners group them like this:

    • 6 to 8 mil: light residential use, bedrooms, closets, low-traffic offices
    • 12 mil: standard residential, living rooms, dining rooms, moderate family traffic
    • 20 mil: heavy residential, kitchens, hallways, mudrooms, homes with large dogs

    These bands are not arbitrary. Abrasion resistance scales roughly with thickness, so a 20 mil floor does not simply last “a little longer” than a 6 mil floor, it can outlast it several times over in the same hallway. That is why two planks that look identical on the showroom floor can perform completely differently after three years of daily footfall.

    Vinyl Wear Layers vs. Laminate Wear Layers

    Vinyl and laminate both publish a wear layer number, but the number does not mean the same thing on both products. Vinyl wear layers are measured in mils of solid vinyl or urethane. Laminate wear layers are typically described using an AC rating (AC1 through AC5) tied to the European abrasion standard, and some manufacturers also publish a mil equivalent.

    How to Verify the Number Before You Buy

    Ask for the mil rating in writing, on the spec sheet, the carton label, or the manufacturer’s technical data page, before you commit. A few practical checks:

    • The wear layer is listed separately from the overall thickness. A “5 mm thick” plank with a 6 mil wear layer is a thin-wear-layer product, no matter how thick the core sounds.
    • Warranty language often reveals the intended use. A residential-only warranty usually signals a thinner wear layer than a product warrantied for commercial application.
    • If a seller cannot tell you the wear layer, that is your answer.
    Key Takeaway Wear layer thickness, not overall plank thickness, determines how long the surface survives. Match the mil rating to the room: 12 mil for general living areas, 20 mil for hallways and pet-heavy homes, 28 mil or higher for commercial spaces.

    Hardwood vs Laminate for High Traffic: An Honest Comparison

    Laminate outperforms hardwood on scratch resistance and cost, but hardwood wins on repairability and resale value. Solid hardwood dents and scratches under pet claws and heavy footfall, and refinishing is the only real fix.

    Engineered wood sits between the two. Its plywood core handles moisture and temperature shifts better than solid hardwood, making it a reasonable option for high-traffic living areas where you still want a real wood surface.

    Watch Out Skipping subfloor prep is the most common mistake we see. An uneven or damp subfloor causes buckling, hollow spots, and premature wear no matter how good the flooring is.

    Best Flooring for Pets and Kids: Scratch, Stain, and Water Resistance

    Luxury vinyl and porcelain tile are the best flooring for pets and kids because both resist scratches, stains, and standing water. Pet-specific durability comes down to three metrics: scratch resistance, indentation resistance, and waterproof construction.

    For households with large dogs, look for thick wear layers and rigid cores that resist claw marks and dropped toys. Tile handles accidents best since it will not absorb liquid, but it is harder underfoot for toddlers.

    Request Estimate →

    Subfloor Prep, Acoustic Performance, and Repairability

    Two factors separate a floor that lasts from one that fails early: what is underneath it and how easily it can be fixed. Neither gets enough attention in most buying guides.

    Subfloor and Underlayment for High-Traffic Zones

    High-traffic zones need a flat, dry, structurally sound subfloor. We recommend checking for moisture and leveling low spots before installation. A quality underlayment adds impact resistance, acts as a moisture barrier, and quiets footfall, which matters in upstairs rooms and open floor plans.

    Repairability vs. Replacement

    Repairability should drive your material choice more than most buyers expect. LVP and tile allow spot repairs; laminate and solid hardwood often mean replacing a whole section. In rental properties and commercial spaces, that difference decides your long-term maintenance budget.

    Commercial vs. Residential Requirements and Maintenance

    Commercial grade flooring is built to a higher standard than residential products, with thicker wear layers and stricter slip-resistant ratings. If you are flooring a rental or business space, specify commercial grade even if the traffic looks moderate today.

    What Actually Separates Commercial From Residential

    The difference is not marketing language, it shows up in measurable ratings:

    • Wear layer: Commercial vinyl typically starts around 20 mil and runs to 28 mil or higher; residential products commonly sit between 6 and 12 mil.
    • Slip resistance: The most widely cited reference is the DCOF (Dynamic Coefficient of Friction) value for tile, measured under the ANSI A326.3 test method. A DCOF of 0.42 or higher is the commonly referenced threshold for level interior commercial floors that may be walked on when wet. Residential rooms generally are not held to that threshold, but wet areas like bathrooms and entries benefit from it.
    • Abrasion and indentation ratings: Laminate uses the AC1-AC5 scale, with AC4 and AC5 aimed at commercial traffic. Vinyl and tile publish their own abrasion and breaking-strength figures on the technical data sheet.

    Slip Resistance in Plain Terms

    Slip resistance is where commercial and residential specs diverge most visibly. A polished porcelain that looks great in a residential living room may fall below the DCOF threshold for a commercial entry that sees rain or spills. Textured and matte finishes generally raise the DCOF value. If you are specifying tile for a commercial space, ask for the DCOF number on the technical data sheet, not just the word “slip-resistant” on the box.

    Maintenance Protocols by Material

    Maintenance demands differ by material, and matching your cleaning routine to the surface protects the wear layer and extends longevity:

    • Porcelain and ceramic tile: Tolerates regular damp mopping and most neutral-pH cleaners. Avoid acidic cleaners on cementitious grout, which can erode it over time. Grout sealing every few years keeps stains from setting in high-traffic entries.
    • Luxury vinyl plank: Damp mop with a pH-neutral vinyl cleaner. Avoid steam mops on glue-down installations and abrasive pads, which can dull the wear layer. Felt pads under furniture prevent indentation marks.
    • Laminate: Dry or barely damp cleaning only. Standing water at the seams is the primary failure mode, it swells the core and cannot be reversed.
    Watch Out Using a commercial-grade cleaner on a residential vinyl floor, or a residential mop-and-bucket routine on a commercial entry, is a common mismatch. Check the manufacturer’s care guide, the wrong cleaner can void the warranty even if the floor itself is rated for the traffic.

    A Practical Rule for Mixed-Use Spaces

    In homes with a home office, a finished basement gym, or a rental unit, the traffic pattern often resembles commercial use even though the building is residential. In those cases, specify commercial grade in the high-traffic zones and residential grade in bedrooms and low-use rooms. This hybrid approach usually costs less than flooring the entire space in commercial product while still protecting the areas that take the beating.

    Choosing Durable Flooring for Your Home: A Decision Framework

    Use this framework to narrow your options fast:

    • Pets and kids, moisture-prone rooms: luxury vinyl plank with a thick wear layer
    • Entryways and commercial spaces: porcelain tile with a textured finish
    • Living areas where resale matters: engineered wood
    • Tight budget, low-traffic rooms: laminate

    At Viva Floors & More, we carry trusted brands like Cali, Robbins, Mohawk, Shaw, and MSI, so you can compare materials side by side and get straight answers from our team. Tile Council of North America installation standards and Resilient Floor Covering Institute guidance are useful references as you weigh options.

    Frequently Asked Questions

    What is the most indestructible flooring for high-traffic homes?

    Porcelain tile is the hardest-wearing option for high-traffic areas. It resists scratches, moisture, and heavy foot traffic, and its surface finish holds up for decades. Luxury vinyl plank with a thick wear layer (20 mil or more) is the next best choice and is easier on the feet and budget. Laminate with a high abrasion class also performs well in living rooms and hallways, but it is more vulnerable to standing water than tile or LVP.

    What type of durable flooring is best for pets and kids?

    Luxury vinyl plank and porcelain tile handle pets and kids better than most materials. LVP is waterproof, resists scratches from claws, and offers some give underfoot. Porcelain tile is nearly scratch-proof and easy to clean, though dropped items can break. Avoid solid hardwood in pet-heavy homes unless you accept refinishing every few years. Laminate can work if you choose a scratch-resistant surface and clean up spills quickly.

    How do I choose between tile, hardwood, and vinyl for busy hallways?

    Start with moisture and traffic volume. Hallways see constant foot traffic, so a wear layer of 20 mil or higher on LVP, or a through-body porcelain tile, will outlast thinner products. Hardwood brings warmth and can be refinished, but it dents and scratches under heavy use. Vinyl and tile win on water resistance. If noise matters, add an underlayment or acoustic mat. Match the material to the room’s moisture and the level of care you are willing to give it.

    Does a thicker wear layer really matter for high-traffic flooring?

    Yes. The wear layer is the clear top coat that protects the printed design. A 6 mil wear layer suits bedrooms and light use, 12 mil fits most residential spaces, and 20 mil or more is built for high-traffic homes and light commercial areas. A thicker wear layer resists scratches, scuffs, and indentation from furniture and pet claws. It does not make the floor waterproof on its own, so check the core and the moisture barrier too.


    Choosing durable flooring for high traffic comes down to matching wear layer, core, and subfloor prep to how the room is actually used. Viva Floors & More offers expert consultation, a large in-stock selection, and options for every room and budget, with two showroom locations in Pharr and Brownsville. Request an estimate and let our team take the guesswork out of your next flooring project.

  • Installing Flooring in Humid Climates: A Step-by-Step Guide

    Installing Flooring in Humid Climates: A Step-by-Step Guide

    Table of Contents

    Last Updated: October 5, 2026

    Why Installing Flooring in Humid Climates Requires a Different Approach

    Installing flooring in humid climates fails for one reason: moisture moves through the floor assembly after the boxes are open.

    Humidity is the variable most installers underestimate. Wood and wood-based products absorb moisture from the air and subfloor, swelling and shrinking as the air dries, a cycle that repeats all year in humid climates.

    The result is predictable: cupping, buckling, gaps, and warping. The fix is not a better adhesive. It is controlling moisture before, during, and after the install.

    How Humidity Affects Different Flooring Materials

    Every flooring type reacts to moisture differently, which should drive your choice.

    • Solid hardwood moves the most. It absorbs and releases moisture across its full thickness.
    • Engineered hardwood moves less because its core is layered in cross directions.
    • Luxury vinyl plank handles humidity well but can gap if the subfloor is uneven.

    The takeaway: the wetter and more variable your indoor air, the more you should lean toward low-movement materials.

    Best Flooring for Humid Climates: Material-by-Material Breakdown

    The best flooring for humid climates is porcelain tile, concrete, and luxury vinyl plank, with engineered hardwood as a solid option when the space stays climate-controlled. Solid hardwood and standard laminate are the riskiest choices.

    Material Moisture Tolerance Movement Risk Best For
    Porcelain tile High Very low Bathrooms, kitchens, slab-on-grade
    Concrete High Very low Garages, commercial, modern interiors
    Luxury vinyl plank High Low Whole-home, rentals, high traffic
    Engineered hardwood Medium Moderate Living areas with climate control
    Cork Medium Moderate Bedrooms, low-traffic rooms
    Laminate Low High Dry, climate-controlled rooms only
    Solid hardwood Low Very high Dry rooms with stable indoor humidity

    Porcelain Tile and Concrete Flooring

    Porcelain tile is the safest pick in a humid climate. It does not absorb ambient moisture, so it will not swell, cup, or gap, and concrete behaves the same way. The catch is the subfloor: tile needs a flat, stable surface, and slab movement will crack the grout or tile.

    Luxury Vinyl Plank, Laminate, and Cork

    Luxury vinyl plank is the practical middle ground: moisture-resistant, compatible with most subfloors, and durable against pets and kids. Laminate is the weak link, its wood-based core swells when moisture reaches it, so keep it out of bathrooms, laundry rooms, and any space with a slab below. Cork handles humidity better than laminate but still needs a dry, sealed subfloor.

    Watch Out The most common mistake in humid climates is putting laminate or solid hardwood over a concrete slab with no vapor barrier. The floor may look fine for months, then cup and buckle in the first wet season. Fixing it means pulling up the entire floor.

    Subfloor Moisture Testing Before Flooring Installation

    Subfloor moisture testing before flooring installation is non-negotiable in a humid climate. Test the slab or subfloor, record the numbers, and do not install until they fall within the range your flooring maker specifies.

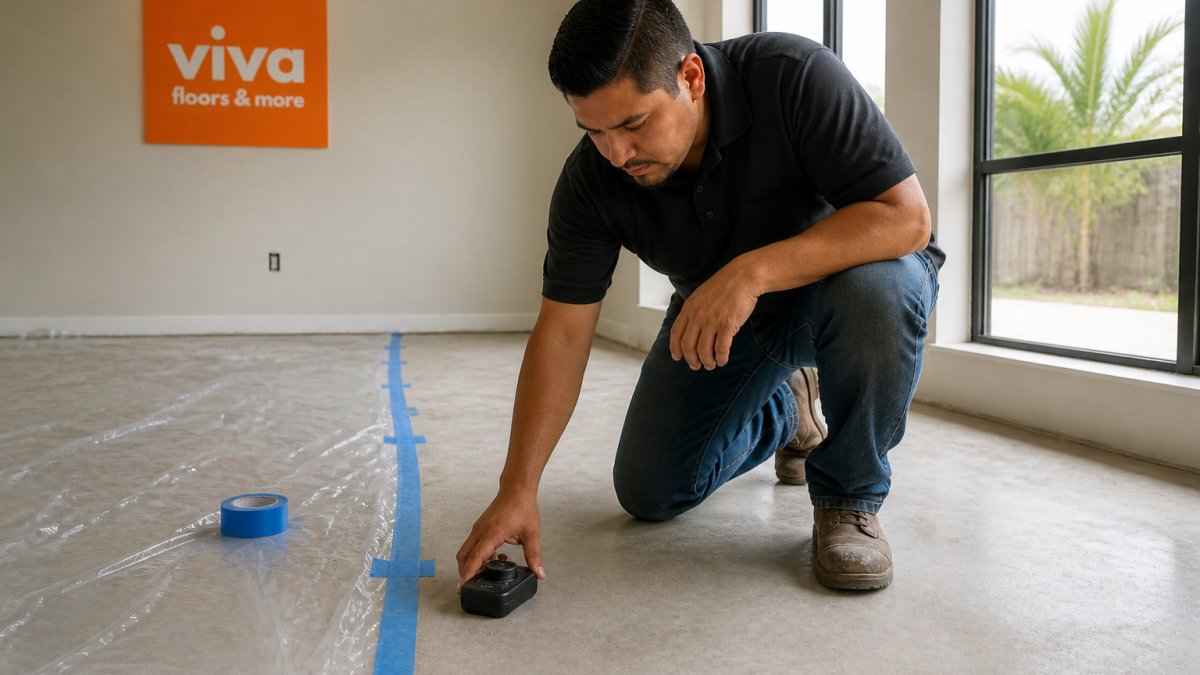
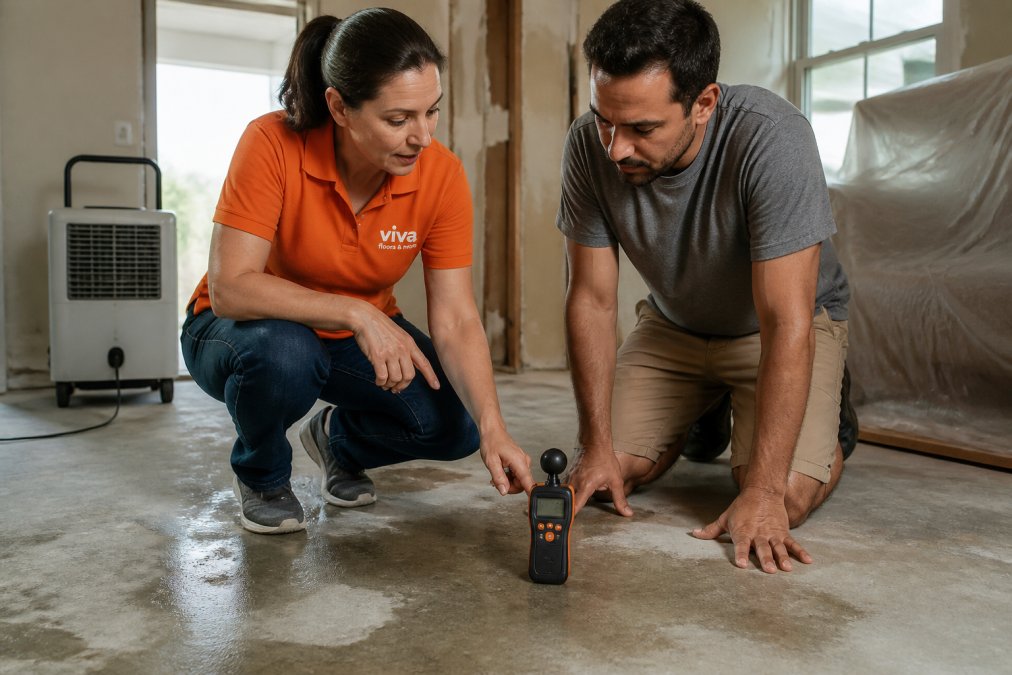
    A person kneeling on a bare concrete subfloor pressing a handheld moisture meter flat against the surface, with a sheet of plastic sheeting and tape visible nearby in a home under renovation, natural window light
    A person kneeling on a bare concrete subfloor pressing a handheld moisture meter flat against the surface, with a sheet of plastic sheeting and tape visible nearby in a home under renovation, natural window light

    Match the Test to the Subfloor Type

    Concrete and wood subfloors fail for different reasons, so they need different tests.

    Concrete slabs, moisture vapor rises from below. Use one of these three:

    1. Calcium chloride test (ASTM F1869). A dish of calcium chloride sits under a sealed plastic dome for 60 to 72 hours, measuring the rate of moisture vapor passing through the slab in pounds per 1,000 square feet per 24 hours (lb/1000 ft²/24 hr).
    2. In-situ relative humidity test (ASTM F2170). A probe is drilled into the slab to a specified depth (typically 40% of the slab thickness) and left to equilibrate, reading moisture inside the concrete as a percentage relative humidity (%RH). This is the more reliable method for thick slabs and slabs on grade.
    3. Electrical impedance / pin meter. Fast and cheap, but it reads only the top fraction of an inch. Use it for a quick scan, never as the final pass/fail reading.

    Wood subfloors, moisture content, not vapor emission, is the concern. Use a pin-type or pinless moisture meter and read the wood’s moisture content (MC) as a percentage. A common target is within a few points of the flooring’s own MC and the home’s equilibrium moisture content, but the maker’s number always wins.

    Reading the Numbers: What Fails and What Passes

    There is no universal threshold, the flooring maker’s installation guide governs. But the ranges below reflect what most manufacturers of wood-based and resilient flooring publish, and they are a useful sanity check before you open a box.

    Test Typical manufacturer limit What it means
    Calcium chloride (ASTM F1869) Often 3 lb/1000 ft²/24 hr or lower for wood-based floors; some resilient products allow up to 5 Vapor emission rate through the slab
    In-situ RH (ASTM F2170) Often 75% RH or lower; some products allow up to 80% Moisture inside the concrete
    Wood subfloor MC Within roughly 2-4 points of the flooring’s MC Moisture in the wood itself

    If a reading lands above the maker’s limit, you have three options, in order of preference:

    • Wait. Concrete continues to cure and dry. A slab that fails today may pass in weeks or months.
    • Apply a moisture-mitigation coating. A roll-on epoxy or urethane vapor retarder can bring emission into range. It must be the product the flooring maker approves, or you void the warranty.
    • Change the floor. Switch to a material rated for the higher reading, porcelain tile, for example, tolerates far more slab moisture than solid hardwood.

    Document Every Reading

    Record each reading with the date, exact location (sketch the room and number the test points), test method, and meter or kit used, and photograph the meter display. If a floor fails later, that log proves the subfloor passed at install, often the difference between a covered warranty claim and a denied one.

    Flooring Acclimation in Humid Weather: Timing and Best Practices

    Flooring acclimation in humid weather means letting the material sit in the room where it will be installed so it reaches the room’s moisture level before you nail or glue it down.

    Request Estimate →

    Here is the timing to plan around:

    • Engineered hardwood: 48 to 72 hours in the room.
    • Solid hardwood: 3 to 5 days, sometimes longer.
    • Laminate and luxury vinyl plank: often 48 hours, but check the box.

    Keep the room at normal living conditions during acclimation, a climate-controlled room, not an open garage. Run the AC or heat as you normally would.

    Stack the boxes so air can move around them. Do not lay planks flat against a cold slab.

    Pro Tip Open a few boxes and stagger the planks during acclimation. This lets air reach more surfaces and gives you an early look at color and grain variation before you commit to a layout.

    Step-by-Step Installation Workflow for Humid Climates

    A humid-climate install follows a strict order, and the order changes depending on the material. This workflow adds what most guides leave out: the decision points, the expansion-gap math, and the code and warranty triggers that determine whether your install holds up.

    Phase 1: Conditions and Testing (Before Anything Is Opened)

    1. Condition the space. Run the HVAC as it will run after move-in. Most manufacturers want normal living temperature and stable indoor relative humidity before, during, and after install, a common target is roughly 30-50% indoor RH, but the product’s installation guide is the authority.
    2. Test the subfloor. Run the appropriate test for the subfloor type (see above) and record every reading.
    3. Confirm the subfloor is flat. Most makers specify flatness within a set tolerance over a set distance, commonly 3/16 inch in 10 feet, but check the guide. Out-of-flat subfloors cause gaps in vinyl and hollow spots under tile.

    Phase 2: Subfloor Preparation and Moisture Control

    1. Clean and repair. Remove old adhesive, patch cracks, and grind or fill high and low spots.
    2. Install the vapor control layer. Over a concrete slab, roll out the vapor retarder the flooring maker approves, seal the seams with the maker’s tape, and run it up the walls a few inches before trimming. Over a crawl space, cover the bare ground with a vapor barrier and keep the space dry and ventilated.
    3. Choose the underlayment by material. This is where most generic guides go wrong:
      • Floating floors (laminate, LVP, engineered): use the underlayment the maker specifies. Some floating floors have the pad pre-attached; adding a second pad can void the warranty.
      • Glue-down floors: the adhesive is the moisture barrier. Use the maker’s adhesive and trowel size.
      • Nail-down solid hardwood: use the specified felt or rosin paper, not plastic sheeting, unless the maker says otherwise.
      • Tile: use a crack-isolation membrane over slabs where the maker or local code requires it.

    Phase 3: Acclimation and Layout

    1. Acclimate the material in the room where it will be installed, at normal living conditions, for the time the maker specifies.
    2. Dry-fit and square the layout. Snap a chalk line, check for square, and dry-fit the first two rows. In humid climates, plan the layout so cut edges at walls hide under baseboard.

    Phase 4: Installation and Expansion Gaps

    1. Install per the maker’s method, floating, glue-down, nail-down, or thin-set. Do not mix methods.
    2. Leave expansion gaps at every fixed object. This is the single most-skipped step in humid climates. A common starting point is a gap roughly equal to the flooring’s thickness at every wall, cabinet, column, and door jamb, but the maker’s number governs. Floors pinned tight have nowhere to move when humidity rises, so they buckle.
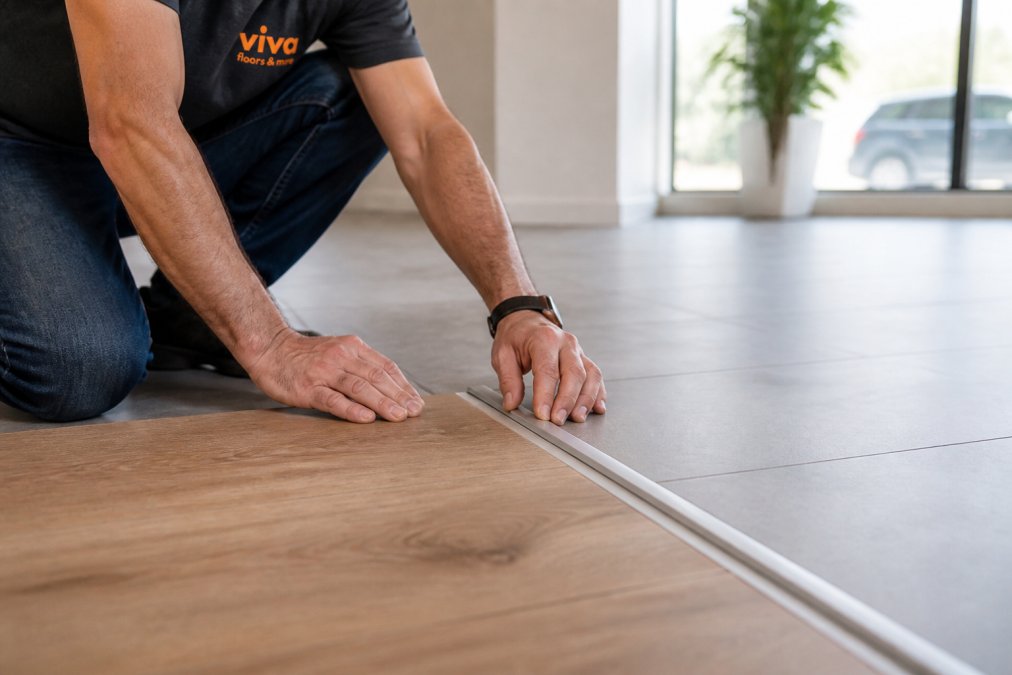
    3. Do not bridge expansion joints. Leave the maker’s specified gap at doorways and long runs, and use a T-molding or transition strip rather than running flooring straight through.

    Phase 5: Finish, Verify, and Monitor

    1. Finish and trim. Add baseboards and transition strips, but nail baseboard to the wall, not through the flooring, so the floor can still move.
    2. Verify the install. Walk the floor, check for hollow spots, gaps, and squeaks, and confirm every expansion gap is covered but not filled.
    3. Monitor humidity going forward. Keep the space climate-controlled and recheck subfloor moisture if you notice new cupping or gaps.

    In a humid climate, the subfloor, the vapor control layer, and the expansion gaps decide whether your floor lasts. Get those three right, follow the maker’s installation guide step for step, and most flooring types will perform well, and keep your warranty intact.

    Preventing Floor Buckling from Humidity: Symptoms and Fixes

    Preventing floor buckling from humidity starts with spotting the early signs. Buckling is the peak of a moisture problem, not the beginning.

    Watch for these symptoms:

    • Cupping: edges of the plank curl up, center stays low.
    • Crowning: center of the plank rises, edges stay down.
    • Buckling: the floor lifts off the subfloor in a ridge.

    Fixes depend on the cause:

    • If the indoor humidity is too high, bring it down and hold it steady.
    • If the subfloor is wet, the floor has to come up. There is no shortcut.
    • If the expansion gap is missing, trim the edges and reset the trim.

    Long-Term Humidity Monitoring and Maintenance

    Keeping a floor flat in a humid climate is a maintenance habit, not a one-time task. Monitor indoor relative humidity and keep it stable year-round.

    Simple habits that protect the floor:

    • Run the AC or a dehumidifier during the wettest months.
    • Keep the crawl space dry and ventilated.
    • Wipe up spills quickly, especially on laminate.

    The U.S. Environmental Protection Agency’s guide to indoor air quality notes that indoor humidity affects both comfort and the durability of building materials, which is why a stable range matters more than a single reading.


    Humidity is the one variable that decides whether a floor lasts or fails, and it is the variable most installers ignore.

    Frequently Asked Questions

    What type of flooring is best for humid climates?

    Porcelain tile, luxury vinyl plank, and concrete flooring handle humidity best because they resist moisture absorption. Engineered hardwood outperforms solid hardwood in humid conditions since its plywood core limits expansion. Cork and rubber flooring also work well in moisture-prone rooms. Avoid solid hardwood in areas with relative humidity consistently above 55%, and always check manufacturer guidelines for your specific product.

    What humidity is too high for hardwood floors?

    Most hardwood manufacturers recommend keeping indoor relative humidity between 30% and 50%. When humidity climbs above 55% for extended periods, solid hardwood absorbs moisture, causing planks to swell, cup, or buckle. Engineered hardwood tolerates slightly higher levels but still has limits. Use a dehumidifier or air conditioning to maintain consistent indoor humidity year-round, especially during summer months in humid regions.

    How should flooring acclimate before installation in humid weather?

    Bring flooring boxes into the installation room and let them sit flat for at least 48 to 72 hours. For some materials, manufacturers recommend 3 to 5 days. Keep the room at normal living conditions with air conditioning running. Stack boxes with spacers between them so air circulates around each box. Do not open packaging until you are ready to install, and never acclimate flooring in a garage or unconditioned space.

    How do you check a subfloor for moisture before installing flooring?

    Use a calibrated moisture meter to test concrete slabs and wood subfloors at multiple points. For concrete, the calcium chloride test or relative humidity probe test gives readings manufacturers accept for warranty claims. Acceptable thresholds vary by material and manufacturer, but many specify concrete slab readings below 3 to 5 pounds per 1,000 square feet per 24 hours. Always record your readings and keep them for warranty documentation.

  • Buy Bulk Flooring Materials in South Texas: 2026 Guide

    Buy Bulk Flooring Materials in South Texas: 2026 Guide

    Table of Contents

    Last Updated: October 4, 2026

    Why Buying Bulk Flooring Materials in South Texas Makes Sense

    Buying bulk flooring materials in South Texas is the practice of purchasing hardwood, laminate, vinyl, tile, or stone in large quantities directly from a wholesale supplier to cover a full renovation, new build, or commercial project. At Viva Floors & More, we’ve watched Rio Grande Valley homeowners and contractors save real money by consolidating orders instead of buying box by box at retail.

    The math is simple. One room’s worth of flooring rarely justifies a bulk order. Five rooms, a rental duplex, or a 3,000-square-foot commercial space changes the equation entirely. When you buy in bulk quantities, you lock in consistent dye lots and lot numbers, reduce per-square-foot pricing, and avoid the nightmare of matching a discontinued plank six months later.

    Here’s what most guides won’t tell you: the real savings in bulk procurement isn’t just the unit price. It’s the avoided cost of a second order, a second delivery, and a second installation window.

    Below, we’ll show you exactly how to estimate waste, choose materials that survive Texas heat and humidity, and handle freight logistics without getting buried in fees.

    U.S. Department of Energy guidance on moisture and building materials

    Choosing the Right Materials for Bulk Flooring Projects

    The right material for a bulk order depends on where it’s going: residential interiors or high-traffic commercial spaces. Both categories reward bulk buying, but for different reasons.

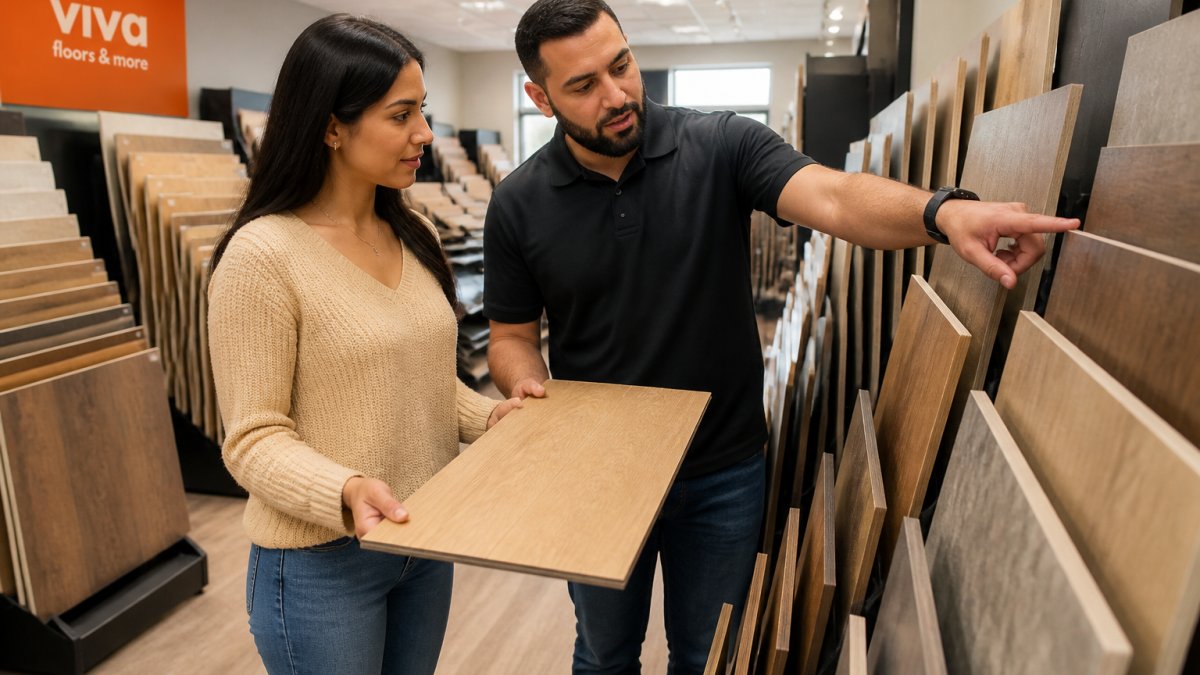
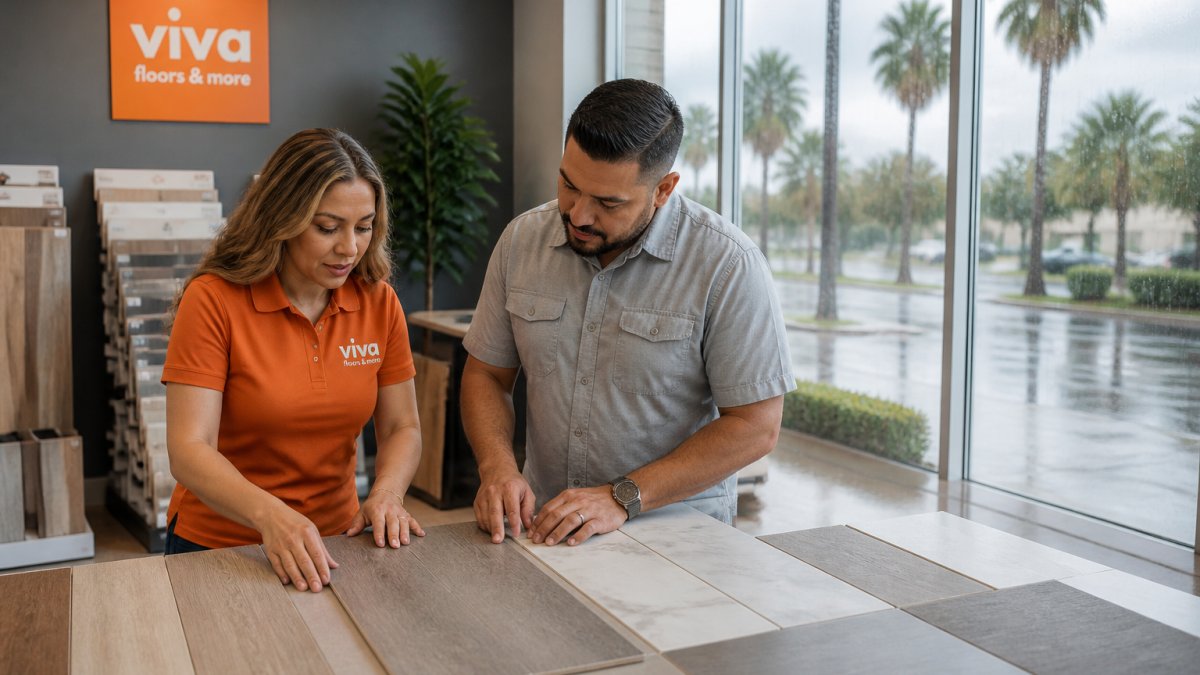
    A well-lit flooring showroom with rows of hardwood, laminate, vinyl, and tile samples on display racks while a salesperson points out material specifications to a customer holding a sample board
    A well-lit flooring showroom with rows of hardwood, laminate, vinyl, and tile samples on display racks while a salesperson points out material specifications to a customer holding a sample board

    Hardwood and Laminate for Residential Interiors

    Solid hardwood and laminate remain the default choice for bedrooms, living rooms, and dining areas. Hardwood offers refinishing potential and resale value. Laminate delivers a similar look at a lower cost per square foot, and modern wear layers handle family traffic well.

    For bulk orders, laminate is often the easier material to standardize across a whole house because dye lots are more consistent and installation is faster.

    Resilient Vinyl, Ceramic Tile, and Porcelain Slabs for High-Traffic Environments

    Luxury vinyl plank, ceramic tile, and porcelain slabs are the workhorses of commercial flooring. Vinyl handles moisture and heavy foot traffic. Tile and porcelain resist scratches, stains, and standing water, which matters in rental units, restaurants, and retail spaces.

    Material Best For Moisture Resistance Maintenance
    Hardwood Living areas, resale value Low Refinish every 7-10 years
    Laminate Whole-home budgets Moderate Damp mop
    Resilient vinyl Kitchens, rentals, commercial High Sweep and damp mop
    Ceramic tile Bathrooms, entryways High Sealed grout care
    Porcelain slab High-traffic commercial Very high Minimal
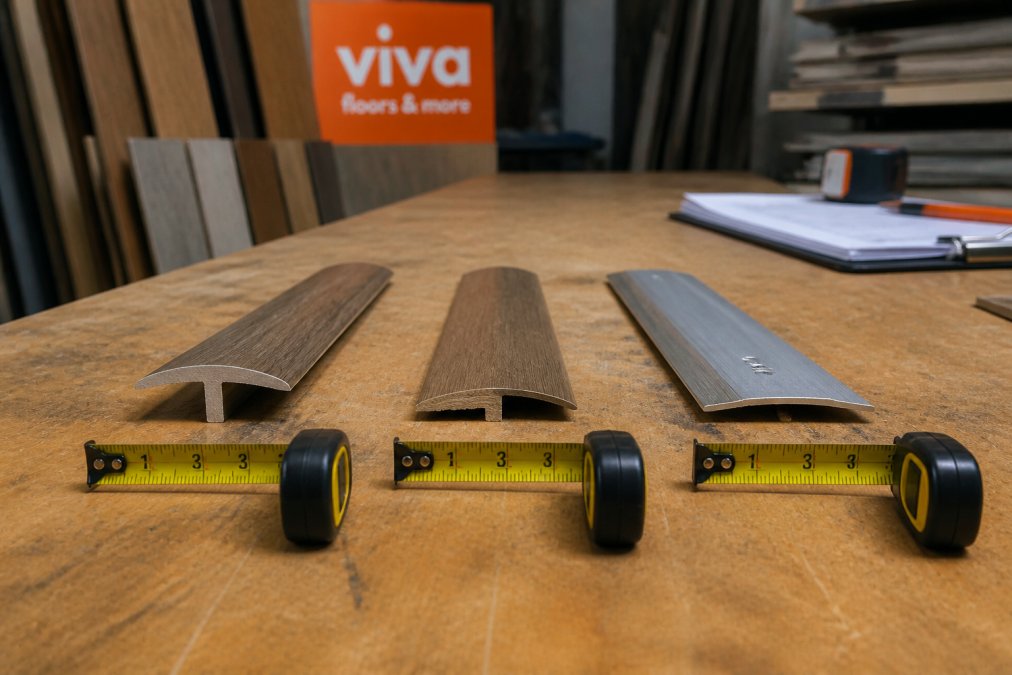
    Pro Tip Order all your flooring underlayment, floor moulding, and transition strips in the same bulk purchase. Sourcing accessories separately later is where most projects blow their budget.

    How to Estimate Flooring Waste for Large Projects

    To estimate flooring waste for large projects, calculate total square footage, then add a waste factor of 5% for simple square rooms and 10-15% for rooms with angles, closets, or diagonal layouts. Bulk buyers who skip this step almost always come up short.

    A common mistake is ordering the exact square footage and assuming the installer will “make it work.” They can’t. Every cut produces offcuts, and pattern-matched materials like plank flooring waste more than you’d expect.

    Here’s the basic formula:

    • Measure each room’s length x width to get square footage
    • Add all rooms together for total square footage
    • Multiply by 1.05 for simple layouts, 1.10-1.15 for complex ones
    • Round up to the nearest full carton

    For a 2,000-square-foot project with a 10% waste factor, you’re ordering 2,200 square feet. That buffer covers miscuts, future repairs, and the inevitable damaged plank.

    Watch Out Skipping the waste factor on a bulk order means waiting weeks for a reorder that may not match your original dye lot. Always over-order slightly on the first purchase.

    The Cost of Professional Flooring Installation in 2026

    Installation is the line item that bulk buyers most often underestimate, because material pricing falls with volume while labor pricing does not. A crew still spends roughly the same hours per square foot on a 3,000-square-foot job as on a 500-square-foot job, so the labor share of your total project cost grows as the material share shrinks.

    That inversion is the whole reason a bulk cost-benefit analysis matters. Here is how to run one before you commit to a pallet.

    Build a Total-Cost Model, Not a Price-Per-Square-Foot Comparison

    A retail box price and a wholesale pallet price are not comparable until you load both with the same costs. Build the model in four columns:

    1. Material cost, wholesale unit price × total square footage including waste factor.
    2. Freight and delivery, pallet shipping, liftgate or forklift charges, and any residential surcharge.
    3. Installation labor, quoted per square foot, plus removal, disposal, and subfloor prep.
    4. Accessories and contingency, underlayment, moulding, transition strips, adhesive, and a reserve for damaged or short shipments.

    Most practitioners find the wholesale advantage is real but smaller than the sticker gap suggests once freight and accessories are loaded in. The savings usually come from three places: a lower unit price, avoided second-order freight, and avoided dye-lot mismatch on a reorder.

    The Break-Even Question

    Ask a simple question: at what project size does the bulk order beat buying box by box? The answer depends on your freight cost and your waste factor, not on a fixed square-foot threshold. A common pattern is that small jobs (a single room) rarely clear the freight minimum, while multi-room, multi-unit, or commercial jobs clear it easily because the fixed freight cost is spread across far more square feet.

    Run the model twice, once at your low waste estimate and once at your high estimate, and see whether the bulk order still wins. If it only wins at the optimistic waste number, you have not found a margin, you have found a hope.

    Factors That Push Installation Cost Higher

    • Removing and disposing of existing flooring
    • Leveling an uneven or out-of-spec subfloor
    • Stair installation and custom transitions
    • Furniture moving and room prep
    • Pattern-matched layouts (herringbone, diagonal) that raise cut waste

    What Bulk Buyers Should Negotiate

    Because labor does not scale down with volume, the leverage in a bulk purchase is on the material and logistics side. Ask about contractor pricing tiers, Cash and Carry discounts if you can haul it yourself, whether accessories are stocked at the same price as the flooring, and whether delivery is quoted flat or by weight and distance. Those four items move the total-cost needle more than haggling over pennies per square foot.

    Request Estimate →

    Pro Tip Model your project at both a 5% and a 15% waste factor before you order. If the bulk purchase only pays off at the low number, increase your order size or reduce freight cost before signing.

    For a current quote on your specific project, request an estimate from our team. Pricing depends on quantity, material, and site conditions, and we would rather give you an accurate number than a guess.

    Texas Climate Considerations for Bulk Flooring Purchases

    South Texas heat and humidity affect flooring more than most buyers realize. Acclimation matters here more than in drier climates, and moisture resistance should drive material choices in ground-floor and slab-on-grade installations.

    Wood and laminate expand and contract with humidity swings. If you’re buying bulk hardwood for a home in the Rio Grande Valley, plan to let the material acclimate on site for several days before installation. Skipping acclimation is the fastest route to buckling and gaps.

    Vinyl and porcelain handle humidity with far less drama. For rental properties and commercial spaces where climate control is inconsistent, these materials are the safer bulk purchase.

    Key Takeaway In South Texas, moisture resistance and acclimation time matter as much as price per square foot. The cheapest material is expensive if it fails in year two.

    Logistics and Freight Shipping for Bulk Flooring Materials

    Bulk flooring ships by freight, not parcel carrier, and freight logistics is where first-time bulk buyers get surprised. Flooring is heavy, and palletized orders require either a loading dock, a forklift, or a liftgate delivery.

    Plan for these logistics details before you order:

    • Confirm whether the delivery address can accept a full pallet
    • Ask whether liftgate service is included or an add-on
    • Verify the freight class and weight of your order
    • Schedule delivery for a day someone can inspect the shipment

    Job site delivery is standard for contractor orders, but residential deliveries often need special handling. Damaged freight claims must be filed quickly, so inspect every pallet before signing.

    What to Look for in a Wholesale Flooring Supplier

    A good wholesale flooring supplier combines inventory depth, specification knowledge, and reliable job site delivery. Price alone is a poor filter, the supplier who cannot deliver on schedule costs you more than the one who charges slightly more and shows up on time. But “good supplier” is not a checklist you can act on. Here is a framework that is.

    Evaluate on Five Axes, Not One

    1. Inventory depth and consistency. Ask how many square feet of your chosen material they hold in stock and whether they can fill a reorder from the same dye lot months later.

    **2.

    3. Accessories stocked alongside flooring. Underlayment, moulding, transition strips, and adhesive should come from the same order. Sourcing accessories separately is where most projects blow their budget and lose time.

    4. Delivery and freight capability. Confirm whether they deliver to a job site, whether liftgate service is available, and who handles a damaged-freight claim.

    5. Pricing structure transparency. Contractor tiers, Cash and Carry options, and whether accessory pricing matches flooring pricing should be stated up front, not negotiated at the counter.

    Red Flags

    • No ability to confirm dye lot or lot number on a reorder
    • Accessories quoted separately with no stock guarantee
    • Freight terms that shift after the order is placed
    • No written return or damage-claim policy

    The Local Advantage

    For bulk buyers, proximity still matters. A regional supplier can often deliver faster, absorb a short-shipment correction without a second freight bill, and let you inspect material before it ships. That is worth more than a marginally lower unit price from a distant distributor once you factor in the cost of a delayed install.

    At Viva Floors & More, we have served the Rio Grande Valley since 1992 as a family-owned operation. Our two showrooms in Pharr and Brownsville stock one of the largest flooring selections in South Texas, including trusted brands like Cali, Robbins, Mohawk, Shaw, and MSI. Builders, remodel contractors, and DIY homeowners all get the same expert guidance and bulk pricing.

    Federal Trade Commission guidance on buying and warranties

    Frequently Asked Questions

    What are the benefits of buying flooring materials in bulk?

    Buying bulk flooring lowers your per-square-foot cost because suppliers pass on volume discounts. You also reduce the risk of running short mid-installation, since dye lots and batch colors stay consistent across the entire order. For large projects, one shipment means fewer delivery fees and less coordination. Contractors and builders in the Rio Grande Valley often order 10% to 15% extra to cover cuts and future repairs, and bulk pricing makes that buffer affordable.

    How do I calculate the amount of flooring needed for a large project?

    Measure each room’s length and width in feet, multiply them to get square footage, then add all rooms together. For waste, add 10% for straight-lay installations and 15% for diagonal or herringbone patterns. If you are tiling, round up to full boxes since partial returns are rarely accepted. Bring your measurements to a supplier who can verify them against material specifications and help you estimate flooring waste for large projects accurately.

    Is it cheaper to buy flooring materials directly from a distributor?

    Direct distributor pricing often beats retail, especially on bulk quantities. You skip middleman markups and gain access to contractor pricing tiers. However, the cheapest online listing may not include freight, returns, or installation supplies. Factor in delivery to your job site, underlayment, floor moulding, and adhesive before comparing. A local wholesale distributor that stocks inventory can also prevent weeks-long delays if a shipment arrives damaged.

    What are the common shipping considerations for bulk flooring orders?

    Bulk flooring ships on pallets, usually via freight carriers rather than standard parcel services. Confirm whether the price includes liftgate delivery, since pallets can weigh over 1,000 pounds and require a forklift or ramp. Check the delivery address for truck access and clear space. Ask about lead times and whether the supplier coordinates job site delivery. For South Texas projects, humidity during transit can affect some materials, so inspect pallets on arrival before signing.

  • Durable Kitchen Flooring for Busy Families: 2026 Guide

    Durable Kitchen Flooring for Busy Families: 2026 Guide

    Table of Contents

    Last Updated: October 2, 2026

    What Durable Kitchen Flooring for Busy Families Actually Needs

    Durable kitchen flooring for busy families has to survive splashed water, dropped pans, muddy paws, and a decade of foot traffic without buckling, staining, or scratching through. This guide from Viva Floors & More breaks down the materials that hold up in real kitchens, the specs that separate a floor that lasts from one that fails in two years, and the trade-offs nobody mentions at the showroom.

    The Four Metrics That Decide Whether a Floor Survives Your Kitchen

    Durability in kitchen flooring is determined by four things: water resistance, wear layer or surface hardness, scratch and stain resistance, and how easily the floor can be repaired.

    Evaluate every material against these:

    • Water resistance: How long standing water can sit without swelling or lifting the floor
    • Wear layer or surface hardness: The protective top layer that absorbs scratches and dents
    • Stain and scratch resistance: How the finish handles spills, pet accidents, and dragged chairs
    • Repairability: Whether you can fix one damaged plank or tile instead of the whole floor

    EPA guidance on indoor air quality and flooring

    Waterproof Luxury Vinyl Plank Flooring: The Family-Kitchen Workhorse

    Waterproof luxury vinyl plank flooring is the most practical choice for most family kitchens because the core is fully waterproof, the surface resists scratches, and damaged planks can be swapped individually. Luxury vinyl plank (LVP) and luxury vinyl tile (LVT) are the same product family: LVP mimics wood, LVT mimics stone or ceramic.

    Wear Layer Thickness and What It Means for Scratches and Dents

    The wear layer is the clear protective film on top of the vinyl, measured in mils, and it is the single spec that predicts how long the floor survives.

    • 6-8 mil: Light use, low-traffic rooms
    • 12 mil: Standard residential kitchens
    • 20 mil and up: Heavy traffic, large dogs, active households
    Pro Tip Ask to see the wear layer rating in writing before you buy. A salesperson who cannot produce it is guessing, and so are you.

    Porcelain vs. Ceramic Tile: Durability, Grout Lines, and Slip Resistance

    Porcelain wins on durability, ceramic wins on price, and grout lines decide how much maintenance you sign up for. Both are fired clay tiles, but the difference is measurable: porcelain is pressed denser and fired at higher temperatures, which drops its water absorption rate below 0.5 percent. Ceramic typically absorbs more than that, which is why it needs sealing in wet zones and porcelain generally does not.

    Feature Porcelain Ceramic
    Water absorption Under 0.5% (impervious) Higher, needs sealing in wet areas
    Impact resistance High Moderate
    Slip resistance Varies by finish, choose textured Varies by finish
    Grout maintenance Grout still needs sealing and scrubbing Same
    Repairability Individual tiles replaceable Individual tiles replaceable

    The Specs That Actually Predict Tile Performance

    For a family kitchen, the two numbers worth checking are the PEI abrasion rating and the DCOF slip rating.

    • PEI rating: A wear scale from 1 to 5. Kitchen floors should be PEI 4 or 5. A PEI 3 tile is rated for light residential traffic and will show wear in a busy kitchen within a few years.
    • DCOF (Dynamic Coefficient of Friction): The measured slip resistance of the tile surface. The industry benchmark for level interior floors is a DCOF of 0.42 or higher. Polished tile often falls below that, which is why a spilled drink on a glossy floor is a genuine fall risk.
    • Frost resistance: Rarely relevant indoors, but a sign of a dense, low-absorption body.

    Grout Lines: The Real Maintenance Variable

    Grout is where tile floors age fastest. Wider joints collect more grease and stain more visibly; narrow joints (1/8 inch or less) with a modern grout look cleaner longer. Two upgrades change the maintenance math:

    • Epoxy grout resists staining and does not need periodic sealing the way cementitious grout does. It costs more and is harder to install, but it removes the resealing chore.
    • Rectified tile is cut to exact dimensions so it can be installed with very tight joints, reducing the grout surface area that traps dirt.

    Repairing a Single Cracked Tile

    Pro Tip Ask for the PEI and DCOF ratings in writing before you buy. A tile that scores PEI 3 or a DCOF under 0.42 is the wrong pick for a kitchen with kids and pets.
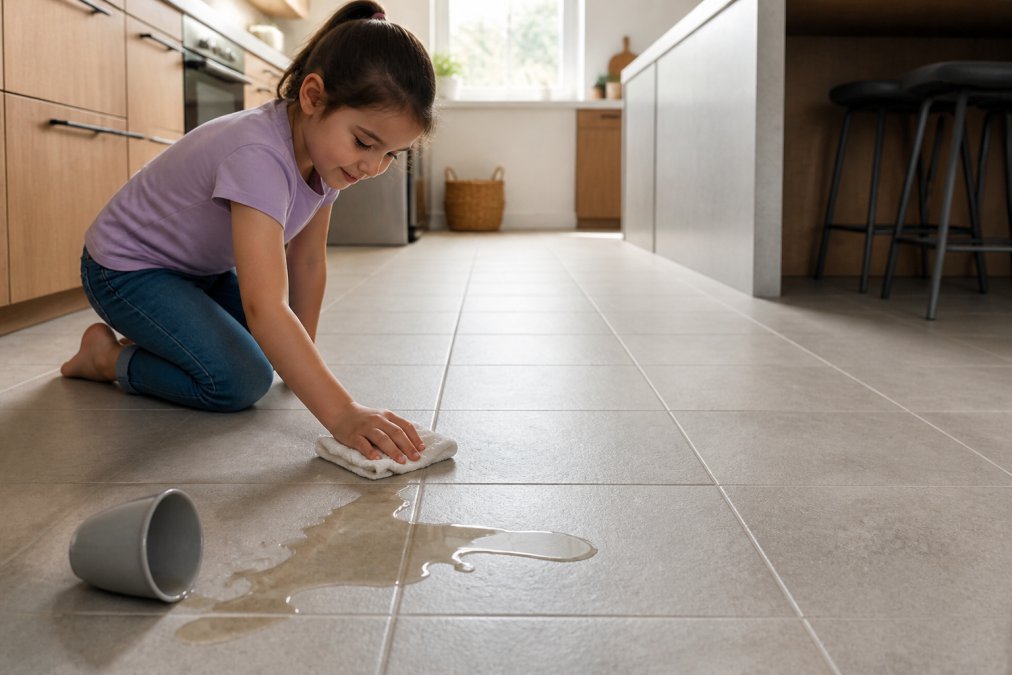
    A matte-finish porcelain tile kitchen floor with narrow grout lines, a child's spilled cup being wiped up, natural light, no visible brand logos
    A matte-finish porcelain tile kitchen floor with narrow grout lines, a child’s spilled cup being wiped up, natural light, no visible brand logos

    Best Flooring for Pets in the Kitchen: Scratch, Stain, and Accident Tests

    The best flooring for pets in the kitchen is waterproof LVP with a wear layer of 20 mil or higher, because it resists claw scratches, wipes clean after accidents, and does not absorb odors the way porous surfaces can.

    Pet-specific durability comes down to three tests:

    Request Estimate →

    • Scratch test: Drag a key across a sample. Deep grooves mean claw marks will show.
    • Stain test: Leave a drop of pet food or beet juice for an hour, then wipe. A ghost stain means the finish is too thin.
    • Accident test: Pour water on a seam and let it sit. If the edges lift, the core is not waterproof.
    Watch Out Skipping the moisture barrier under a concrete slab is the most expensive shortcut in flooring. Moisture wicks up, adhesive fails, and planks cup within a season.

    Engineered Hardwood and Laminate: Where They Work and Where They Fail

    Engineered hardwood works in a kitchen if you accept the maintenance, and laminate works if you keep water off it. The difference between the two comes down to what is under the surface, and that determines how each one fails.

    Engineered Hardwood: The Veneer Thickness Decides Everything

    Engineered hardwood has a real wood top layer over a plywood core, so it handles humidity swings better than solid hardwood and resists the seasonal gapping that plagues solid planks. The spec that matters is the veneer thickness:

    • Under 2 mm: Too thin to refinish. Once the finish wears through, the floor is done.
    • 2-4 mm: Can typically be refinished once.
    • 4 mm and up: Can usually be refinished once or twice, depending on the finish and the installer.

    Laminate: The Core Is the Weak Point

    Laminate is the budget option. Modern laminate is scratch-resistant and easy to clean, and its click-lock installation suits DIY projects. Its weakness is the fiberboard core, which swells permanently once water reaches it. Unlike vinyl, laminate does not shrug off a slow leak under the refrigerator. In a kitchen with kids and pets, laminate is a gamble unless you are vigilant about wiping spills immediately.

    The Repair Problem Nobody Explains

    Watch Out A slow leak under a dishwasher or refrigerator is the most common cause of laminate and engineered hardwood failure. If you choose either, put a water alarm under the appliances. It is a small cost that prevents a full-floor replacement.

    Eco-Friendly, Low-VOC, and Acoustic Options Most Buyers Miss

    Eco-friendly flooring means low VOC emissions, and the options most buyers overlook are cork, linoleum, and certified low-emission vinyl. VOC emissions are the chemicals released from adhesives, finishes, and synthetic cores, and they matter more in kitchens because the room is small and often poorly ventilated.

    • Cork: Naturally resilient, warm underfoot, and quiet. It needs sealing and dents under heavy appliances.
    • Linoleum: Made from renewable materials, naturally antimicrobial, and quieter than tile. It requires periodic resealing.
    • Low-VOC vinyl and laminate: Look for independent indoor air quality certifications on the product label.

    Repairability, Replacement Logistics, and Life-Cycle Cost

    Life-cycle cost, not sticker price, decides which floor is actually cheaper. A floor that costs less upfront but needs full replacement in five years costs more than a floor that lasts fifteen with minor repairs.

    Repairability is where materials diverge sharply:

    • LVP and LVT: Individual planks lift and replace if you keep spare boxes
    • Tile: Individual tiles chip out and replace, but matching dye lots is hard years later
    • Engineered hardwood: Planks can be replaced, though sanding and refinishing costs more
    • Laminate: Replacing a plank means disassembling the floor back to that point
    • Cork and linoleum: Patch repairs are possible but seams show
    Key Takeaway The cheapest floor is the one you install once. Budget for the wear layer, the moisture barrier, and spare material, and the life-cycle cost drops even when the upfront price rises.

    Conclusion

    Matching a floor to a household with kids, pets, and constant traffic is harder than any showroom display suggests, and the wrong pick shows up as scratches, stains, and swollen seams within a couple of years. Viva Floors & More has guided Rio Grande Valley families through that decision since 1992, with expert consultation, a large in-stock selection from trusted brands, and options for every room and budget. Visit a showroom to compare wear layers and waterproof cores side by side, then request an estimate and get the right floor the first time.

    Frequently Asked Questions

    What is the most durable flooring for a kitchen with kids and pets?

    Waterproof luxury vinyl plank with a wear layer of at least 20 mil handles the most abuse. It resists scratches from dog claws, stands up to dropped pans, and will not swell if a water bowl tips over. Porcelain tile runs a close second for impact resistance, though grout lines need sealing and dropped glasses break more often on tile than on vinyl. Both outperform laminate and engineered hardwood in a busy family kitchen.

    Is luxury vinyl plank better than tile for a busy kitchen?

    It depends on what you need. Luxury vinyl plank is warmer underfoot, quieter, and more forgiving when a dish drops. Tile wins on heat resistance and does not dent under heavy appliances. For families with toddlers who sit on the floor, LVP is the more comfortable choice. For kitchens where hot pans and heavy foot traffic dominate, porcelain tile holds up longer without showing wear.

    How do I choose flooring that hides dirt and scratches in a high-traffic kitchen?

    Mid-tone colors with a matte or low-gloss finish hide the most. Light floors show dark crumbs, dark floors show dust and paw prints, and high-gloss finishes amplify every scratch. Look for flooring with a textured surface and printed grain patterns, which break up the visual impact of scuffs. A wear layer of 20 mil or thicker keeps surface scratches from reaching the printed design layer underneath.

    What type of flooring works best for an open-concept kitchen and living area?

    One continuous floor across both spaces keeps the room feeling larger and eliminates transition strips that collect dirt. Waterproof luxury vinyl plank is the most common pick because it handles kitchen spills and still feels comfortable in the living area. Engineered hardwood also works if you seal the kitchen zone carefully, but any standing water near the sink or dishwasher becomes a real risk over time.

  • Choosing Flooring for Humid South Texas: 2026 Guide

    Choosing Flooring for Humid South Texas: 2026 Guide

    Table of Contents

    Last Updated: September 28, 2026

    Why Humid South Texas Demands a Different Approach to Flooring

    Choosing flooring for humid south Texas starts with one uncomfortable fact: the climate, not the showroom, decides whether your floor survives. Relative humidity here swings hard, and most homes sit on concrete slabs that wick moisture upward year-round. This guide covers the materials that hold up, the moisture barrier requirements that protect them, and the acclimation process most installers skip.

    A homeowner and a flooring consultant examining a moisture meter reading on a concrete slab inside a home under renovation, with a dehumidifier in the background
    A homeowner and a flooring consultant examining a moisture meter reading on a concrete slab inside a home under renovation, with a dehumidifier in the background

    The problem is rarely the plank. It is almost always the substrate underneath it.

    Concrete is porous. It pulls moisture from the soil and releases it as vapor, a process called moisture vapor transmission. When that vapor hits an organic floor covering, the material absorbs it, swells, and eventually cups or buckles. Solid hardwood has no defense against this. Neither does standard laminate.

    Watch Out Skipping a moisture test before installation is the single most common reason floors fail here. A slab that looks bone dry can still emit enough vapor to destroy a hardwood floor within one season.

    Waterproof Flooring Options That Handle South Texas Humidity

    Waterproof flooring options fall into three practical categories for this climate: rigid-core vinyl, porcelain tile, and engineered hardwood. Each handles humidity differently, and the right pick depends on the room, the slab, and how much you care about resale.

    Luxury Vinyl Plank (LVP) and Rigid Core

    Luxury vinyl plank is the most forgiving choice for a humid climate. The waterproof core resists swelling, and the wear layer determines how long the surface holds up under dogs, kids, and foot traffic. A thicker wear layer means better scratch resistance, which matters in high-traffic areas.

    The catch: LVP still needs a flat, dry slab. A waterproof plank over a wet substrate traps moisture and grows mold underneath.

    Porcelain and Ceramic Tile

    Porcelain tile is the most dimensionally stable option available. It does not absorb water, does not swell, and does not care about humidity swings. Ceramic behaves similarly but is softer and more porous, so it suits walls and low-traffic floors better than a busy kitchen.

    Grout is the weak point.

    Engineered Hardwood vs. Solid Hardwood

    Engineered hardwood is built from cross-layered plywood with a real wood veneer on top. That layered construction resists the thermal expansion and humidity-driven movement that makes solid hardwood risky on a slab. Solid hardwood is a single piece of milled wood. It moves with every humidity change, and on concrete it almost always loses.

    Pro Tip Ask for the plank’s dimensional stability rating before you buy. Cross-layered engineered products and rigid-core vinyl handle humidity swings far better than single-piece materials, and the spec sheet tells you which is which.

    Moisture Barrier Requirements for Flooring on Concrete Slabs

    Moisture barrier requirements exist because concrete slabs never stop emitting vapor. A vapor barrier is a membrane installed between the slab and the flooring that blocks that vapor from reaching the material above. Without one, even waterproof flooring can fail when hydrostatic pressure pushes moisture up through the slab.

    Testing Your Subfloor Before Installation

    Test before you buy, not after. There are two accepted methods, and they measure different things.

    Reading the Numbers Before You Choose a Barrier

    Once you have a reading, the barrier decision follows a simple logic:

    • Low emission. A standard underlayment with a built-in vapor retarder is often enough, provided the manufacturer’s spec sheet allows it.
    • Moderate emission. A dedicated vapor barrier membrane with a low permeance rating is required. Permeance is measured in perms; lower is better. Most flooring manufacturers specify a maximum permeance in their installation documents.
    • High emission or active hydrostatic pressure. A surface membrane alone may not hold. You need a high-performance epoxy or polyurethane moisture-mitigation system, and sometimes a self-leveling subfloor prep layer, before any barrier goes down.

    Vapor Barriers and Hydrostatic Pressure

    Hydrostatic pressure is groundwater pushing upward against the slab. It is common in low-lying areas and after heavy rain. Where pressure is high, a standard underlayment will not hold. You need a high-performance vapor barrier with a low permeance rating, and sometimes a subfloor prep layer to level the slab first.

    Request Estimate →

    Key Takeaway Ask your installer for the written test results, the method used, the date, and the reading, before the first plank goes down. That single document is what protects you if the floor fails later.

    The Acclimation Process for Hardwood Floors in Humid Climates

    The acclimation process for hardwood floors means letting the material sit in the room where it will be installed long enough to reach moisture equilibrium with that space. Skip it, and the planks will expand or contract after installation, opening seams and cupping edges.

    Here is how to do it right:

    • Place boxes in the installation room, not the garage
    • Run the home’s HVAC at normal living conditions
    • Leave the flooring to sit for the manufacturer’s stated period, often several days
    • Check the moisture content of the wood against the subfloor reading
    • Only install once the two readings are close

    Best Flooring for Wet Areas: Kitchens, Bathrooms, and Laundry Rooms

    The best flooring for wet areas is porcelain tile or rigid-core vinyl. Both shrug off standing water and handle the humidity that kitchens and bathrooms generate daily. Water resistance is the deciding factor, not style.

    Room Best Material Why It Works Watch For
    Kitchen Porcelain tile Handles spills and heavy traffic Grout sealing
    Bathroom Porcelain or ceramic tile Waterproof surface Subfloor prep
    Laundry room Rigid-core vinyl Waterproof, easy to replace Seam integrity
    Living areas Engineered hardwood Stable in humidity swings Acclimation period

    Indoor Air Quality and VOCs: What Humid Climates Change

    Indoor air quality is where humid climates change the flooring conversation. Heat and moisture accelerate the release of volatile organic compounds, or VOCs, from adhesives, finishes, and some synthetic materials. A floor that smells fine in a dry climate can off-gas more in a warm, humid home.

    Warranty Implications and Long-Term Maintenance for Humid Climates

    Warranty coverage often hinges on installation conditions, not just the product. Many manufacturers require documented moisture testing and a compliant vapor barrier. Install over a wet slab without that paperwork, and a claim for swelling and warping can be denied outright.

    What Manufacturers Actually Ask For

    When a claim is filed, the paperwork request usually includes:

    • The moisture test results from before installation, with the method and date
    • Proof of the vapor barrier product and its permeance rating
    • The acclimation record for wood and engineered products
    • Evidence that indoor humidity was maintained within the warranty range
    • Proof of professional installation, if the warranty requires it
    Pro Tip Before you sign an installation contract, ask the retailer to show you the manufacturer’s written humidity requirement for the product you are buying. If they cannot produce it, that is a signal to slow down.

    Long-Term Maintenance Comes Down to Controlling the Indoor Climate

    • Keep indoor relative humidity in a moderate range with a dehumidifier or HVAC. In a humid climate, a standalone dehumidifier in the main living area is often the difference between a floor that lasts and one that does not.
    • Wipe up standing water promptly, especially near seams and at the base of appliances.
    • Reseal grout in wet areas on a regular schedule, annually is a reasonable baseline in a humid home.
    • Recheck moisture readings if you notice buckling, cupping, or a musty smell. Those are early signals, not cosmetic issues.
    • Keep HVAC running during vacations. A closed-up house with no air movement is the fastest way to void a warranty and ruin a floor at the same time.

    A hygrometer costs very little and tells you more about your floor’s future than any showroom display. Pair it with a dehumidifier sized to the square footage of the home, and you have addressed the two variables, moisture vapor from below and ambient humidity from above, that decide whether the floor survives.

    Frequently Asked Questions

    What is the best flooring for a hot, humid climate like South Texas?

    Luxury vinyl plank (LVP) and porcelain tile perform best in humid South Texas. LVP has a waterproof core that resists swelling and warping, while porcelain tile is naturally water-resistant and won’t grow mold. Engineered hardwood also works if installed with proper moisture barriers. Avoid solid hardwood and standard laminate, which expand and cup when relative humidity stays above 60%.

    Do I need a moisture barrier for my flooring installation?

    Yes, if you’re installing over a concrete slab, which is common in South Texas homes. Concrete allows moisture vapor transmission even when it looks dry. A vapor barrier with a perm rating of 0.1 or lower prevents moisture from reaching your flooring. Always test your slab first using a calcium chloride test or hygrometer to confirm moisture levels are safe before installation.

    How does high humidity affect hardwood flooring?

    High humidity causes solid hardwood to absorb moisture, leading to swelling, warping, and cupping. Engineered hardwood handles humidity better because its plywood core adds dimensional stability. The acclimation process for hardwood floors, letting planks sit in the room for 3-5 days before installation, helps them adjust to your home’s moisture level and reduces movement after installation.

    What are the signs of moisture damage in flooring?

    Watch for buckling, cupping, or crowning in plank flooring, gaps between boards, soft spots underfoot, and discoloration near seams. Musty odors indicate mold growth beneath the surface. In tile, loose or cracked tiles and crumbling grout signal moisture issues. If you notice any of these signs, check your indoor relative humidity and inspect your vapor barrier immediately.


    Flooring failure in a humid climate is almost never a mystery. It is a moisture test that never happened, a vapor barrier that was skipped, or an acclimation period that got rushed. Viva Floors & More takes the guesswork out of that process with expert consultation, a vast in-stock selection, and guidance for both DIY installers and contractors managing full builds. Request an estimate and get a floor that is matched to your home’s actual moisture profile, not a showroom sample.

  • Preventing Height Gaps in Flooring Transitions

    Preventing Height Gaps in Flooring Transitions

    Table of Contents

    Last Updated: September 27, 2026

    Why Height Gaps Happen in Flooring Transitions

    Preventing height gaps in flooring transitions starts with one fact: no two flooring materials are the same thickness. A typical hardwood plank runs about 3/4 inch thick, while many vinyl planks sit closer to 5 millimeters. That difference has to go somewhere, and if you ignore it, you get a lip at the doorway that catches socks, trips feet, and collects dirt for years.

    So why do transitions fail?

    • Thickness variance between materials that meet at a doorway
    • Subfloor that isn’t flat, level, or both
    • Expansion gaps that get filled too tight, forcing planks to lift
    • Missing or wrong transition strip for the height change
    • Seasonal movement that opens seams as indoor humidity swings

    How to Level Subfloor for Different Flooring Heights

    The best way to level a subfloor for different flooring heights is to measure each finished floor height, find the difference, and build up the lower side to match. You are not leveling the subfloor to the horizon. You are leveling it to the height of the thicker floor next door.

    Measuring Thickness Variance Between Materials

    Start with real numbers, not guesses. Measure the actual installed thickness of each material, including underlayment and adhesive.

    • Laminate flooring: measure plank plus foam underlayment
    • Vinyl plank: often 4mm to 8mm, check the box
    • Hardwood installation: 3/4 inch is common for solid; engineered runs thinner
    • Tile: tile thickness plus thinset plus backer board
    • Carpet: pile height plus pad, measured compressed

    Calculated Subfloor Buildup for a Flush Transition

    Here’s the method most guides skip. Say your tile assembly finishes at 1 inch and your vinyl plank finishes at 1/4 inch. You need 3/4 inch of buildup under the vinyl side.

    • Under 1/4 inch: leveling compound or a thicker underlayment
    • 1/4 to 3/4 inch: plywood sheets cut to fit, screwed down
    • Over 3/4 inch: framed buildup or a reducer transition instead

    Flooring Transition Strips Types and How to Choose

    The right transition strip depends on the height difference and the two materials meeting. Pick the profile first, then the finish. Most guides stop at a table. The problem is that a table tells you what exists, not what to grab off the shelf for your specific doorway. Use the decision logic below instead.

    Diagram comparing T-molding, reducer, and threshold flooring transitions with measured dimensions on a workbench.
    Diagram comparing T-molding, reducer, and threshold flooring transitions with measured dimensions on a workbench.
    Strip Type Best For Height Difference Typical Profile Width
    T-molding Two floors at the same height 0 to 1/16 inch 1-3/4 to 2 inches
    Reducer One floor lower than the other 1/8 to 1/2 inch 1-1/2 to 2-1/4 inches
    Threshold plate Doorways, tile-to-wood 1/4 to 1 inch 2 to 4 inches
    End cap Carpet to hard surface Varies by pile 1-1/4 to 1-3/4 inches
    Stair nose Step-down edges Full step 1-1/4 to 2 inches

    A Visual Decision Path for Choosing the Right Profile

    Work through these questions in order. The first “yes” is your answer.

    1. Is the height difference 1/16 inch or less? → T-molding. It bridges two surfaces of equal height and hides the seam without a slope.
    2. Is the difference between 1/8 and 1/2 inch? → Reducer. It slopes from the higher floor down to the lower one, so feet don’t catch an edge.
    3. Is the difference between 1/4 and 1 inch, and the seam sits in a doorway? → Threshold plate. Flat and wide, it spans the gap and takes foot traffic without flexing.
    4. Is one side carpet? → End cap. The profile tucks the carpet edge and meets the hard surface flush.
    5. Is one side a step-down? → Stair nose. It wraps the edge and gives a finished look.

    Matching Strip Material to the Floor It Touches

    Match the strip material to the floor it touches. A wood reducer against vinyl plank looks off. A metal threshold in a carpeted bedroom feels cold. Here’s the practical pairing:

    • Wood or wood-look strips against hardwood, laminate, and engineered plank
    • Metal (aluminum or brass) against tile, stone, and commercial-grade vinyl
    • Vinyl or PVC strips against luxury vinyl plank and sheet vinyl
    • Carpet-friendly end caps with a metal or wood face and a carpet tuck channel

    Height Delta Cheat Sheet by Material Pair

    Use these common finished heights to estimate your delta before you measure. Actual numbers vary by product, so verify with a tape measure.

    • Solid hardwood (3/4 inch) meeting vinyl plank (5mm, about 3/16 inch): delta near 9/16 inch → reducer
    • Tile with thinset and backer board (about 1 inch) meeting laminate with underlayment (about 1/2 inch): delta near 1/2 inch → reducer or threshold plate
    • Engineered hardwood (1/2 inch) meeting carpet with pad (about 3/4 inch compressed): delta near 1/4 inch → end cap or reducer
    • Two vinyl plank floors of the same thickness: delta near 0 → T-molding
    Pro Tip Measure the finished height of each floor at the doorway, not in the middle of the room. Subfloor dips and humps change the delta by as much as 1/8 inch over a few feet.

    T-Molding vs. Reducer vs. Threshold Plate

    T-molding bridges two surfaces of equal height. It has a T-shaped moulding profile that sits in the gap and covers both edges.

    Installation Steps to Prevent Gaps

    Follow these steps in order. Skipping one is how gaps come back.

    1. Measure the height differential at three points across the doorway
    2. Level or build up the subfloor until surfaces are within 1/16 inch
    3. Leave the expansion gap at each wall and edge, per the flooring maker’s spec
    4. Dry-fit the transition strip before cutting
    5. Cut with a miter saw for a clean, square edge
    6. Set the strip with adhesive or a track system
    7. Weight or tape it down for the full cure time

    Adhesive vs. Track Systems

    Construction adhesive gives a permanent bond. It works well for threshold plates and reducers that won’t move. The downside: removal later means prying and scraping.

    What to Do If Flooring Planks Start Separating in Winter

    Planks that separate in winter are usually drying out, not failing. Indoor humidity drops when heaters run, wood and laminate shrink, and seams open at the ends. The same shrinkage that opens plank seams can also open the gap under a transition strip, because the strip is anchored to a floor that is moving.

    Why Winter Gaps Open, The Mechanism

    Wood and laminate are hygroscopic. They absorb moisture from the air and release it as humidity falls. When indoor relative humidity drops from a summer 50% to a winter 25%, a plank can shrink across its width by roughly 1/32 inch per foot of width. On a 6-inch-wide plank, that’s small. Across a 20-foot room, the cumulative movement at the perimeter can be 1/4 inch or more, enough to pull a transition strip loose or open a visible seam at the doorway.

    Humidity Targets That Prevent Winter Gaps

    • Aim for 35% to 55% relative humidity year-round. Most flooring manufacturers specify this range in their warranty terms.
    • Measure with a hygrometer, not a guess. Inexpensive digital hygrometers are widely available.
    • Run a humidifier in the driest rooms. Whole-home humidifiers tied to the HVAC system hold the range better than portable units.
    • Avoid over-humidifying. Above 60%, planks can swell and buckle at the seams.

    What to Do When Gaps Appear

    1. Check the indoor humidity first. If it’s below 35%, that’s your cause.
    2. Run a humidifier and give the floor two to four weeks to re-acclimate.
    3. Do not caulk the seams shut. The floor needs to move back. Caulk traps stress and causes buckling when humidity returns.
    4. Do not force planks together with putty or filler. Same reason.
    5. Wait for spring. Many gaps close on their own as humidity returns.
    6. If gaps stay open past spring, call a pro to check for a subfloor or acclimation problem.

    When a Winter Gap Is Actually a Transition Problem

    A gap at the doorway is not always seasonal. Distinguish between the two:

    • Seasonal gap: opens in winter, closes in summer, runs along plank ends or edges, and follows the humidity curve.
    • Transition gap: stays open year-round, appears at the seam between two flooring materials, and often shows a loose or rocking strip.
    Watch Out Never fill a seasonal plank gap with wood filler or caulk. The floor will swell in summer and buckle against the filler, causing a bigger repair than the original gap.

    Preventing Next Winter’s Gaps

    • Acclimate flooring to the home’s average humidity before installation, per the manufacturer’s spec.
    • Leave the expansion gap at walls and transitions. A tight strip plus a shrinking floor equals a lifted seam.
    • Keep humidity stable through the heating season with a humidifier and a hygrometer.
    • Re-check transition strips each fall before the dry season starts, and tighten track screws or re-adhere loose profiles.

    review humidity and acclimation guidance from the National Wood Flooring Association

    Long-Term Maintenance and Moisture Control

    Transitions last when the floor under them stays stable. Keep these habits going:

    • Re-seal or re-tape thresholds every few years in high-traffic doorways
    • Wipe up spills at transitions fast, especially near tile and wood
    • Check for movement each season and tighten track screws if needed
    • Add acoustic underlayment under floating floors to cut noise transfer between rooms
    • Use a moisture barrier over concrete slabs before any hard surface goes down

    Frequently Asked Questions

    What is the best way to transition between different height floors?

    The best method depends on the height difference. For gaps under 12 mm, a transition strip like T-molding or a reducer often works. Larger gaps may need subfloor leveling compound or a custom ramp. Always measure the exact height differential first, then choose a moulding profile that bridges it without creating a trip hazard. If you are unsure, a flooring professional can recommend the right strip for your specific materials.

    Can you use subfloor leveling compound to fix height gaps?

    Yes, self-leveling compound can correct minor subfloor unevenness, but it is not a substitute for structural fixes. If the height difference between two flooring materials is more than a few millimeters, leveling compound alone will not solve the transition gap. You may need to add a plywood underlayment or use a thicker transition strip. Always check the compound’s maximum thickness rating and let it cure fully before installing flooring.

    When should you use a T-molding versus a reducer?

    Use T-molding when two floors are nearly the same height (within 3-5 mm) and you need a seamless transition. Choose a reducer when one floor is noticeably higher, as it creates a gradual slope that prevents tripping. For large height differences over 12 mm, a threshold plate or custom ramp may be necessary. Matching the moulding profile to your flooring thickness ensures a flush, professional finish.

    What causes flooring planks to separate in winter?

    Winter air is dry, so wood and laminate planks lose moisture and shrink. If they were installed tight without an expansion gap, the shrinking pulls seams apart. To fix it, you can try a humidifier to stabilize indoor humidity, or gently tap planks back together if the gap is small. For persistent separation, a flooring professional may need to reinstall the affected rows with proper expansion space.


    Height gaps in flooring transitions come down to math, moisture, and matching the right strip to the job. Get the subfloor buildup right, leave room for movement, and pick a profile that fits the height difference. If you’d rather not guess, Viva Floors & More offers expert consultation, a huge in-stock selection from trusted brands, and help for both DIYers and contractors. Request an estimate and get your transitions right the first time.

  • Stain Resistant Tile for Kitchens: Best Options in 2026

    Stain Resistant Tile for Kitchens: Best Options in 2026

    Table of Contents

    Last Updated: September 25, 2026

    Why Stain Resistant Tile Matters in Busy Kitchens

    A kitchen floor takes more abuse than any other surface in the house, coffee, olive oil, tomato sauce, and muddy footprints can all land on it in one afternoon. For Rio Grande Valley homeowners, that daily punishment makes stain resistant tile for kitchens a practical necessity.

    Family cooking in a bright kitchen with red wine spilled on stain resistant tile near a golden retriever
    Family cooking in a bright kitchen with red wine spilled on stain resistant tile near a golden retriever
    Key Takeaway Stain resistant tile is tile engineered with low porosity and a hard, sealed surface that resists absorbing liquids, oils, and pigments. Porcelain and glazed ceramic both qualify when the glaze is intact and the grout is properly sealed.

    Porcelain vs Ceramic Kitchen Tile: Which Handles Stains Better?

    Porcelain wins on stain resistance in most kitchens: it’s denser, fired hotter, and absorbs very little water, leaving stains nowhere to settle. Ceramic works for many homes but needs more care in wet, messy zones.

    Porosity and Water Absorption Rates

    Porosity is the best predictor of how a tile handles spills. Porcelain tile is pressed from denser clay and fired hotter, making it nearly impermeable. Ceramic tile is softer and more absorbent, so unglazed or chipped ceramic can soak up liquids over time.

    Durability and High-Traffic Performance

    Foot traffic wears finishes faster than expected. Porcelain holds its texture and glaze under constant use, which matters in entryways opening into the kitchen. Ceramic handles moderate traffic but shows wear sooner in busy households with pets and kids.

    Feature Porcelain Tile Ceramic Tile
    Water absorption Very low, near impermeable Higher, needs sealing
    Stain resistance Excellent Good when glazed
    Durability High-traffic ready Moderate traffic
    Best for Kitchens, mudrooms Bathrooms, light use
    Pro Tip A common mistake is judging tile by color alone. Run your fingernail across the surface: if it catches or feels chalky, the glaze is soft and will stain faster than a smooth, vitrified finish.

    Slip Resistant Kitchen Tile Options for Safety

    Safety and stain resistance often pull in opposite directions: glossy tile cleans easily but turns slick when wet. The fix is a textured matte finish with a slip-resistant rating, which grips underfoot while repelling spills.

    How to Clean Kitchen Floor Tiles Without Damaging the Surface

    The right routine protects the finish for years. Most damage comes from harsh cleaners and abrasive tools, not from normal wear.

    • Sweep or vacuum daily to lift grit before it scratches the glaze
    • Mop with warm water and a pH-neutral cleaner
    • Wipe spills promptly, especially oil, wine, and tomato
    • Skip steel wool and abrasive powders that dull the surface
    • Avoid bleach-heavy cleaners on colored grout

    Choosing the Right Finish: Matte vs Glossy for Stain Resistance

    Finish is the most misunderstood variable in stain-resistant tile. Homeowners assume glossy means easier to clean, but finish affects how stains behave, how visible they are, and how slippery the floor gets when wet, getting it wrong is a common reason kitchen floors disappoint.

    How Finish Affects Stain Behavior

    A glazed tile has a thin, glass-like layer fired onto the body. That glaze resists stains and can be glossy, satin, or matte; the chemistry is similar across finishes, the difference is texture and light reflection.

    • Glossy (polished) finishes have a smooth, highly reflective surface. Liquids bead up and wipe away easily, and there’s nowhere for pigment to hide. The downside is visibility: every streak, water spot, footprint, and smear of grease shows under kitchen lighting, especially on dark colors.
    • Matte finishes have a micro-textured surface that scatters light instead of reflecting it. That texture hides smudges, water spots, and light scratches far better than gloss. The trade-off is that some matte glazes are slightly more porous at the surface, so prompt cleanup still matters, and textured surfaces can hold onto fine dust.
    • Satin finishes sit in the middle, a soft sheen that reflects some light but hides more than gloss. For most busy kitchens, satin is the practical sweet spot.

    Slip Resistance and the Coefficient of Friction

    Finish and slip resistance are linked: polished or glossy tile turns slick when wet, a real concern near the sink, dishwasher, and refrigerator, the three spots where water lands most often.

    Where Each Finish Belongs in a Kitchen

    Finish should match the job, not the showroom lighting.

    • Kitchen floors: matte or satin, textured enough for grip, in a mid-tone color that hides crumbs and dust between cleanings. This is where stain resistance and safety have to coexist.
    • Backsplashes: glossy works well here. A backsplash takes splatter and steam but no foot traffic, so slip resistance is irrelevant, and the easy-wipe surface is an advantage. Glossy also reflects light and makes a small kitchen feel brighter.
    • Countertops: if you’re using tile, a honed or matte finish hides etching and knife marks better than polished, though it requires more careful sealing depending on the material.

    Color, Lighting, and the Stain-Visibility Trap

    Finish and color interact in surprising ways. Glossy dark tile shows every water spot and dust particle; matte light tile hides smudges but shows dark crumbs and pet hair. A matte mid-tone, warm gray, greige, or stone-look, is the most forgiving combination in a working kitchen.

    Key Takeaway For a busy kitchen floor, the safest combination is a matte or satin porcelain tile in a mid-tone color with a DCOF of 0.42 or higher. Save the glossy finish for the backsplash, where it cleans easily and never gets walked on.

    Cleaning Implications by Finish

    Glossy tile rewards a quick squeegee or microfiber wipe, streaks show instantly, so dry as you go. Matte tile forgives a damp mop and air-drying, but texture traps fine dust, so a vacuum with a hard-floor attachment beats a broom. Neither finish should see abrasive powders, steel wool, or acidic cleaners, which dull the glaze.

    Request Estimate →

    Grout, Sealing, and Chemical Resistance: What Competitors Miss

    Grout is where most kitchen tile stain problems begin. The tile is usually innocent, porcelain and glazed ceramic resist liquids well, but cement-based grout is porous by design and grabs grease, coffee, wine, and tomato sauce if unprotected. Most buying guides skip this, and it’s why a floor that looked spotless at installation can look dingy within a year.

    Epoxy Grout vs. Cementitious Grout for Stain Prevention

    The two main grout families behave very differently in a kitchen.

    • Cementitious (cement-based) grout is the traditional option. It’s made from Portland cement, sand, and pigments, mixed with water. It’s inexpensive, widely available, and easy for a installer to work with. The trade-off is porosity: even polymer-modified versions absorb liquids, and once grease or red wine soaks in, the pigment can shift permanently. Cementitious grout needs sealing and periodic resealing to stay stain resistant.
    • Epoxy grout is a two-part resin system, typically an epoxy resin and a hardener, that cures into a dense, non-porous surface. It doesn’t absorb water or oils the way cement grout does, so it resists staining far better and generally doesn’t need sealing. It costs more per square foot and is less forgiving to install, especially on vertical surfaces, but for a busy kitchen it’s the more durable choice.
    • Urethane grout sits between the two. It’s pre-mixed, flexible, and more stain resistant than cement grout, though not quite as impervious as epoxy. It’s a reasonable middle option for homeowners who want better stain performance without the epoxy price or installation complexity.

    Sealing Schedules and What Actually Works

    Sealing isn’t one-time. A penetrating sealer soaks into cement grout and blocks liquid from the pores, but it wears down with daily mopping and foot traffic. Most practitioners recommend resealing cement grout every 12 to 18 months in a busy kitchen, and more often in front of the sink or stove.

    Watch Out Skipping grout sealing is the number one reason kitchen floors look dirty within a year. Once grease soaks into unsealed cement grout, no amount of scrubbing brings the original color back, the stain is inside the grout, not on it.

    How to Test Tile and Grout for Chemical Resistance

    Kitchen spills are mildly acidic or oily and can etch a glaze or dull a finish over time. Test a spare tile or sample before you commit, using the substances your kitchen actually produces.

    1. Lemon juice and vinegar. These are weak acids. Place a few drops on the tile surface and on a grout sample, let sit for 15 to 30 minutes, then wipe clean. A quality glazed or porcelain tile should show no change. If the surface dulls or the grout lightens, that material is a poor fit for a kitchen where you cook with citrus or vinegar regularly.
    2. Red wine and tomato sauce. These combine acid with pigment, the worst combination for porous surfaces. Apply, let sit, wipe, and check for a ghost stain. This is the single most useful test for a kitchen tile.
    3. Cooking oil. Oil doesn’t etch, but it penetrates unsealed cement grout and darkens it. A drop of oil on grout left for an hour will show you how the grout will age.
    4. Your actual cleaners. Check the tile manufacturer’s guidance on which cleaners are safe. Acidic cleaners, including many bathroom and hard-water products, can etch a glaze or damage grout over repeated use. pH-neutral cleaners are the safe default for everyday mopping.
    Pro Tip Ask your supplier for a sample tile and a grout sample before you buy. Testing both with lemon juice, wine, and oil takes an afternoon and tells you more than any showroom display.

    Matching Grout Color to Stain Reality

    Grout color is a stain-management decision, not just design. Light grout shows every spill and bit of grease; dark grout hides stains but can look heavy against light tile. A mid-tone, warm gray, taupe, or matched to the tile, is most forgiving in a working kitchen. If you love white grout, epoxy is the only version that holds up to a busy household without constant resealing.

    Kitchen Flooring vs Backsplash: Different Requirements for Stain Resistant Tile

    Floors and backsplashes face different enemies. Kitchen floor tile must handle foot traffic, dropped utensils, and standing water. A backsplash deals with splatter, steam, and heat, but almost no wear.

    Conclusion

    Picking kitchen tile balances stain resistance, durability, and how a surface actually lives in your home. The wrong choice shows up fast, and replacing a floor costs far more than choosing well the first time.

    Frequently Asked Questions

    What type of tile is best for kitchens?

    Porcelain tile is generally the best choice for kitchens because of its low porosity and high stain resistance. It handles spills, grease, and heavy foot traffic well. Ceramic tile works for lighter use, but porcelain’s density and vitrified surface make it more durable for busy cooking areas. For a kitchen with kids and pets, porcelain is the safer bet.

    Is porcelain or ceramic tile better for kitchen floors?

    Porcelain outperforms ceramic in kitchens due to its lower moisture absorption rate, usually under 0.5%. Ceramic absorbs more water and may need sealing. Porcelain also resists scratches and stains better under heavy use. If your kitchen sees daily cooking and foot traffic, porcelain is the stronger option. Ceramic can work for low-traffic kitchens or as a backsplash.

    Do I need to seal stain-resistant kitchen tiles?

    Most porcelain tiles with a vitrified surface do not need sealing because they are impermeable. Ceramic tiles with a glossy glaze also resist stains without sealing. However, the grout lines between tiles are porous and should be sealed or treated with epoxy grout. Sealing grout prevents stains from oil, wine, and sauces from soaking in. Always check the manufacturer’s recommendation for your specific tile.

    How do I remove stubborn stains from kitchen floor tiles?

    For stubborn stains on kitchen floor tiles, start with a paste of baking soda and water for grease or oil. For wine or juice, use a diluted hydrogen peroxide solution. Avoid abrasive cleaners on glossy glaze, as they can scratch the surface. For grout stains, a soft brush with oxygen bleach works well. Always test on a small area first. Regular spill cleanup prevents most stains from setting.

    What color tile is the easiest to keep clean?

    Mid-tone colors like beige, greige, and warm gray hide crumbs and light stains better than white or black. White shows every speck of dirt, while black highlights dust and water spots. A matte finish in a mid-tone shade with a subtle pattern is the most forgiving for busy kitchens. Textured surfaces also camouflage daily messes better than smooth, glossy tiles.

  • Cost of Professional Flooring Installation 2026

    Cost of Professional Flooring Installation 2026

    Table of Contents

    Last Updated: September 15, 2026

    What Drives the Cost of Professional Flooring Installation in 2026

    The cost of professional flooring installation 2026 comes down to two variables: the material you choose and the condition of the room beneath your feet. This guide from Viva Floors & More breaks down where every dollar goes.

    Square footage sets the baseline: a 200-square-foot bedroom and a 1,200-square-foot open floor plan use the same labor rate but wildly different totals. Most contractors price per square foot, then adjust for complexity.

    Site conditions are where estimates drift. A flat, clean concrete slab is straightforward; an uneven subfloor, a staircase, or a room full of furniture changes the math entirely.

    Material Choice and Square Footage

    Material choice drives the largest single line item. Laminate and luxury vinyl plank sit at the lower end, hardwood and natural stone at the higher end, with ceramic tile and engineered wood in between.

    Square footage multiplies that cost, then adds a waste factor for cuts, mistakes, and future repairs, higher for diagonal layouts and rooms with lots of corners.

    • Straight lay: minimal waste
    • Diagonal lay: more waste
    • Herringbone or complex patterns: the most waste

    Site Conditions and Installation Complexity

    Site conditions determine how much prep the job needs before a single plank goes down. Subfloor preparation, moisture barriers, and leveling compound add labor hours a per-square-foot quote won’t capture.

    Installation complexity matters just as much. Stairs, closets, doorways, and transition strips slow crews down, each transition point is a small job inside the larger one.

    Watch Out Skipping subfloor preparation to save money is a common mistake. A floor installed over an uneven or damp subfloor can cup, crack, or lift within a year, and the warranty usually won’t cover it (nwfa.org).

    Flooring Installation Labor Rates Per Square Foot

    Flooring installation labor rates per square foot range widely by material, region, and installer experience. Labor is usually quoted separately from materials, and it’s the number homeowners most often underestimate.

    Labor-only pricing covers the crew’s time, not the product. You supply the flooring, underlayment, and trim. That saves money if you source well, but shifts the risk of shortages or defects onto you.

    Installation methods affect the rate. Floating floor systems click together quickly and cost less in labor; glue-down and nail-down take longer and require more skill, so they carry higher rates.

    Installation Method Labor Intensity Best Suited To
    Floating floor Low Laminate, luxury vinyl plank
    Glue-down installation Medium Engineered wood, vinyl
    Nail-down installation High Solid hardwood

    How Labor-Only Pricing Works

    Labor-only pricing separates the crew’s fee from the material bill: you buy the flooring, the installer charges for time, skill, and equipment. It works best when you know exactly what you want and can source it reliably.

    The catch: under-order and the crew waits while you pay for the delay; damaged material is your cost. Labor-only pricing rewards prepared homeowners.

    Regional Labor Rate Variations

    Regional labor rates swing based on local demand, cost of living, and how many qualified crews operate nearby. Urban markets with tight labor run higher than rural ones, and construction booms push rates up further.

    Local material availability plays a role too: when flooring must be shipped in, markup and lead times rise. Sourcing locally keeps both labor and material costs steadier.

    Cost to Remove Old Flooring and Dispose of Materials

    The cost of professional flooring installation 2026 includes removal of old flooring, a line item most estimates bury or skip. Tearing out carpet, tile, or glued-down hardwood takes real labor, and the debris has to go somewhere.

    Removal difficulty depends on what’s coming up. Carpet and padding pull up fast; ceramic tile is slow, dusty work that often damages the subfloor; glued-down hardwood takes longest because the adhesive fights every inch.

    Disposal adds a second cost: old flooring is bulky and heavy, and many landfills charge by weight or volume.

    A flooring contractor in work clothes and knee pads pulling up old carpet and tack strips in a residential living room, with a pry bar and debris pile nearby
    A flooring contractor in work clothes and knee pads pulling up old carpet and tack strips in a residential living room, with a pry bar and debris pile nearby

    Disposal Fees and Hauling

    Disposal fees and hauling are usually quoted separately from removal labor. A crew that hauls debris away charges for the dump run, truck, and time; some contractors leave the pile for you, which lowers the quote but adds a chore.

    If you’re renovating on a budget, ask upfront whether haul-away is included. It’s one of the most common surprises on a final invoice.

    Pro Tip Ask your installer to separate reusable material before hauling. Leftover planks from a full box are worth keeping for future repairs, and some materials can be donated rather than dumped.

    Luxury Vinyl Plank Installation Cost: What to Expect

    Luxury vinyl plank installation cost lands in the middle of the range, cheaper than hardwood but above basic laminate. LVP is a favorite for high-traffic homes because it handles moisture and wear well.

    The material varies by thickness and wear layer.

    Hidden Costs: Subfloor Repair, Baseboards, and Transition Strips

    Subfloor Repair and Leveling

    Watch Out Skipping subfloor preparation to save money is a common mistake. A floor installed over an uneven or damp subfloor can cup, crack, or lift within a year, and the warranty usually won’t cover it because the manufacturer can point to a failed substrate.

    Baseboard Removal, Reinstallation, and Painting

    Three common approaches, each with a different cost profile:

    Transition Strips and Trim

    How to Get These Costs Into the Quote Up Front

    The fix is procedural. Before you sign:

    Key Takeaway The most accurate flooring estimate accounts for what’s under the floor, not just what goes on top. Ask any installer to inspect the subfloor before quoting a final number, and get the baseboard and transition scope in writing.

    DIY vs. Professional Installation: A Cost Comparison

    What DIY Actually Costs

    The labor line disappears, but three new lines appear:

    The Warranty and Insurance Angle Most Guides Miss

    Side-by-Side Comparison

    Factor DIY Professional
    Upfront cost Lower labor, added tool and rental cost Higher, but fixed and quoted
    Time investment High, weekends to weeks Low, crew completes in days
    Tool needs Rental or purchase Included in labor
    Mistake risk Higher, and rework is expensive Lower, and often warrantied
    Material warranty Often void if instructions aren’t followed Typically preserved when installed per spec
    Liability and insurance Falls on the homeowner Contractor’s liability and workers’ comp apply
    Change orders You absorb surprises Priced and documented

    When DIY Makes Sense, and When It Doesn’t

    Pro Tip Before deciding, get one professional quote that itemizes labor, prep, and materials. Even if you plan to DIY, the quote tells you what the job is actually worth and where the risk sits.

    How to Save Money on Your Flooring Installation Project

    Frequently Asked Questions

    How much does it cost to floor 1000 sq. ft. fully installed?

    A 1,000-square-foot installation total depends on material, labor rates, and site prep. Carpet and laminate sit at the lower end; hardwood and tile push higher. Add removal of old flooring, subfloor repair, and trim work if needed. Because pricing depends on your room dimensions, material grade, and site conditions, request a written installation estimate from Viva Floors & More for an accurate figure.

    What factors influence the total cost of professional flooring installation?

    The biggest drivers are square footage, material type, labor rates, and installation complexity. Site conditions matter too: uneven subfloors, moisture issues, and stairs all add labor. Other factors include removal of old flooring, baseboard removal and reinstallation, transition strips, and the waste factor from cuts. A professional contractor should itemize each of these on your installation quote.

    What hidden fees should I expect when hiring a professional flooring installer?

    Common add-ons include subfloor preparation, old flooring disposal, furniture moving, baseboard removal, and transition strips. Some installers charge extra for stairs, tight spaces, or after-hours work. Ask for a line-item quote that separates materials, labor, and site prep. If a bid looks unusually low, check whether disposal and subfloor work are excluded. Viva Floors & More provides transparent estimates so you can see every line before you commit.

    Is it cheaper to buy flooring materials separately or through a contractor?

    Buying materials yourself can save on material markup, but you take on measuring, ordering, and waste-factor risk. Contractors often get better pricing on hardwood flooring, luxury vinyl plank, and ceramic tile, and they handle returns. For a renovation budget, compare the total project cost both ways. Viva Floors & More serves DIYers and contractors, so you can price materials directly and decide what works for your project.

    How long does professional flooring installation typically take?

    Most single-room installations finish in one to two days. A whole-home project with removal, subfloor prep, and trim work can run three to seven days depending on square footage and material. Glue-down and nail-down installations take longer than floating floor systems. Moisture barrier curing and acclimation add time. Your installer should give a timeline in the written estimate.

    How much does luxury vinyl flooring installation cost per square foot in 2026?

    Luxury vinyl plank installation cost depends on the product grade, subfloor condition, and whether removal is included. LVP is one of the more affordable options because many planks use a floating floor system that installs faster than glue-down or nail-down methods. For a project-specific number, request a quote from Viva Floors & More with your room dimensions and current subfloor details.


    Flooring costs are unpredictable because every room, subfloor, and material choice changes the total. Viva Floors & More removes that guesswork with expert consultation, a vast in-stock selection, and guidance for homeowners, builders, and contractors alike. Get started with Viva Floors & More and find the right flooring for your space and budget.