Category: Product Comparisons

  • Pros and Cons of Tile Floors: A Complete 2026 Guide

    Pros and Cons of Tile Floors: A Complete 2026 Guide

    Table of Contents

    Last Updated: October 13, 2026

    Pros and Cons of Tile Floors: The Honest Breakdown

    Tile floors are hard-surface coverings made from fired clay or cut stone, installed in a grid pattern with grout lines between each piece. They resist water, stains, and scratches better than most flooring materials. At Viva Floors & More, we’ve helped Rio Grande Valley homeowners, builders, and contractors choose tile since 1992, and the same questions come up every time. This guide breaks down the real pros and cons of tile floors by material, room, and budget, so you can decide with clear eyes. Below, we cover where tile wins, where it falls short, and how it compares to vinyl plank.
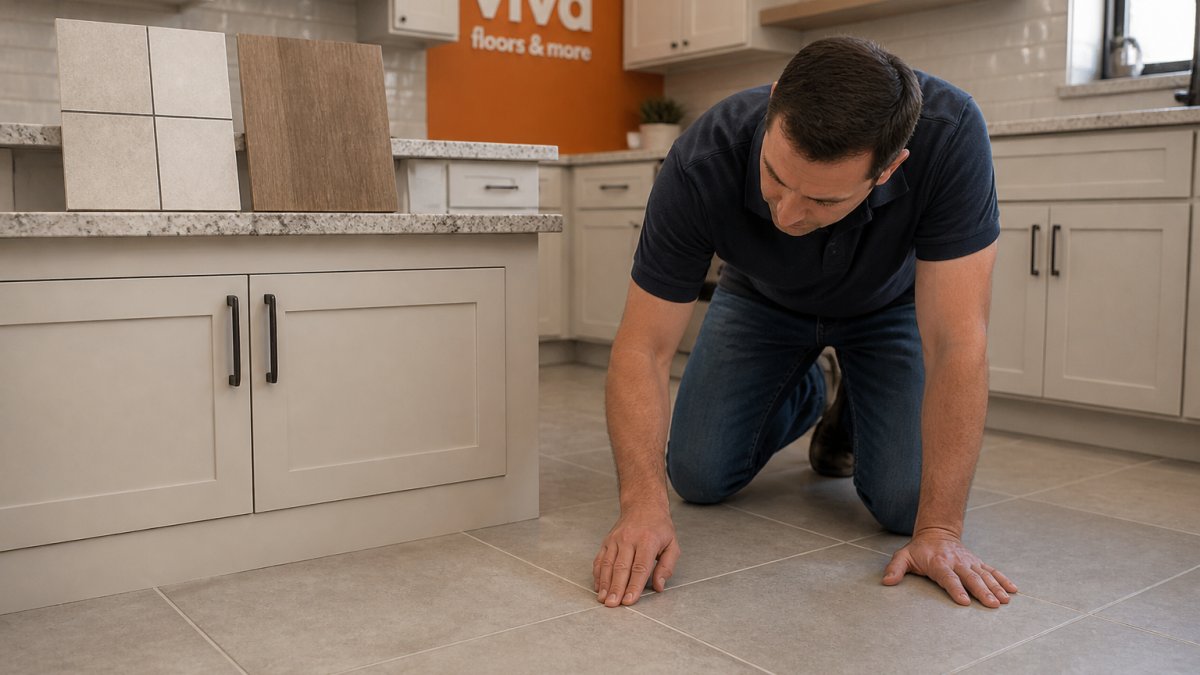
    A homeowner kneeling on a tiled kitchen floor, running a hand across the grout line while comparing a ceramic tile sample against a vinyl plank sample on the countertop
    A homeowner kneeling on a tiled kitchen floor, running a hand across the grout line while comparing a ceramic tile sample against a vinyl plank sample on the countertop

    Where Tile Wins and Where It Falls Short

    Tile’s biggest strength is water and stain resistance. Spills wipe up fast. Pet accidents, muddy shoes, and kitchen splatter don’t soak in.

    Its biggest weakness is comfort. Tile feels cold and hard underfoot. Grout lines also need regular cleaning and periodic sealing.

    Here’s the short version:

    • Wins: water resistance, stain resistance, scratch resistance, long lifespan, easy mopping
    • Falls short: cold underfoot, hard on joints, grout upkeep, cracking risk, higher upfront cost

    That trade-off shapes every decision below.

    Types of Floor Tile: Ceramic, Porcelain, and Natural Stone

    The three main types of floor tile differ by porosity, hardness, and price, and those differences decide where each one belongs. Ceramic is the softest and most affordable. Porcelain is denser and more water-resistant. Natural stone, including marble and travertine, offers unique looks but needs more care.

    Type Water Resistance Best For Maintenance
    Ceramic Moderate Living rooms, bedrooms Low
    Porcelain High Kitchens, bathrooms Low
    Natural stone Varies by stone Entryways, feature floors High

    Ceramic vs. porcelain: what actually separates them

    Both are made from clay, but porcelain is pressed under higher pressure and fired at higher temperatures. That tighter body is why porcelain absorbs very little water, the standard benchmark for water absorption puts porcelain at 0.5% or less, while standard ceramic can run several times higher (Porcelain vs. Non-Porcelain). In practice, that means porcelain handles bathrooms, laundry rooms, and basements with far less risk of freeze-thaw damage or staining from the tile body itself.

    Hardness matters too. Tile is rated on a wear scale (often called the PEI rating) from 1 to 5. A PEI 1-2 tile is fine for walls or light-traffic bedrooms; PEI 3 suits most residential floors; PEI 4-5 is built for heavy traffic and commercial use. A cheap ceramic that looks identical to porcelain on the showroom floor may be a PEI 2, fine in a guest room, a poor choice for a mudroom.

    Natural stone is not one material

    “Natural stone” is a category, not a product, and the differences are large:

    • Marble: soft and porous, stains and etches from acids (lemon juice, vinegar, some cleaners), needs sealing and careful cleaning.
    • Travertine: warmer and more textured, often filled and honed; still porous and needs sealing.
    • Slate: dense and naturally slip-resistant, good for entryways, but can flake along natural cleavage lines.
    • Granite: among the hardest and most stain-resistant stones, but heavier and pricier to install.

    Every stone is a one-of-a-kind piece, so expect color and veining variation between boxes, order extra for cuts and future repairs.

    Wood-look tile is its own decision

    Wood-look tile is usually porcelain printed with a wood grain. It gives you tile’s water resistance with a plank look, which is why it shows up in kitchens and bathrooms where real hardwood would be risky. The trade-off: grout lines break up the “planks,” and the surface is still hard and cold underfoot.

    Pro Tip Match the tile to the room, not the other way around. Porcelain for wet and high-traffic rooms, ceramic for dry rooms where budget matters, natural stone where the look justifies the upkeep.

    Tile Council of North America installation and material standards

    Ceramic Tile Flooring Pros and Cons

    Ceramic tile flooring pros and cons start with price and versatility. Ceramic is the budget-friendly option, with the widest range of colors, textures, and wood-look tile styles.

    Pros:

    • Lowest upfront cost of the three types
    • Easy to clean with a damp mop
    • Allergy-friendly, since it holds no dust or dander
    • Endless design options

    Cons:

    • Softer body, so it chips more easily under dropped objects
    • More porous, so it needs sealing in wet areas
    • Grout lines still require scrubbing
    Pro Tip If you’re tiling a bedroom or living room, ceramic saves money without a real downside. Save porcelain for the wet rooms.

    Porcelain Tile Flooring Pros and Cons

    Porcelain tile flooring pros and cons center on durability. Porcelain is pressed denser and fired hotter, so it resists moisture, stains, and heavy foot traffic better than ceramic.

    Pros:

    Request Estimate →

    • Very low porosity, so water and stains stay out
    • Scratch-resistant and long-lasting
    • Works over most subfloors with the right prep
    • Handles high-traffic commercial and rental spaces

    Cons:

    • Costs more than ceramic upfront
    • Still hard and cold underfoot
    • Can crack if the subfloor flexes

    For kitchens, bathrooms, and rentals, porcelain is usually the smarter buy.

    Tile vs. Vinyl Plank Flooring: Which Fits Your Home?

    Tile vs. vinyl plank flooring comes down to water, comfort, and cost. Vinyl plank is warmer, softer, and faster to install. Tile lasts longer and resists water better in truly wet rooms.

    • Choose tile for bathrooms, kitchens, mudrooms, and anywhere moisture is constant.
    • Choose vinyl plank for bedrooms, basements, and rooms where comfort matters more than longevity.
    • Resale value: both appeal to buyers, but tile reads as more permanent.
    Watch Out Skipping a moisture test before installing tile over concrete can lead to cracked tiles and loose grout within a year. Always check the subfloor first.

    Grout, Sealing, and Long-Term Maintenance Costs

    Grout maintenance is the hidden cost of tile floors, and it’s where most tile budgets quietly break. Grout is porous, so it absorbs spills and dirt unless it’s sealed, and the upkeep never fully stops.

    The routine, and what it costs in time

    • Sweep or vacuum weekly to lift grit before it scratches the surface
    • Mop with a pH-neutral cleaner every one to two weeks
    • Reseal grout every one to two years in high-traffic areas
    • Reapply sealer sooner in bathrooms and kitchens

    Sealing takes an afternoon and protects the grout lines. Skip it, and grout stains become permanent. Cement-based grout is the common default; epoxy grout costs more upfront but resists staining and rarely needs resealing, which can pay back over a decade in a busy kitchen or bath.

    Lifecycle cost, not sticker price

    Upfront price is only the first line item. Over the life of the floor, the real cost stack looks like this:

    1. Purchase and installation, the visible number
    2. Grout sealing and cleaning supplies, recurring, small but steady
    3. Repairs, replacing a cracked tile or regrouting a section
    4. Replacement, eventually, or never, depending on care

    The advantage tile has is repairability. A cracked or chipped tile can often be removed and replaced individually without tearing out the whole floor, a real edge over sheet vinyl or laminate, where damage usually means replacing a whole run. The catch is that you need matching tile on hand; dye lots change, so leftover boxes from the original install are worth keeping.

    Where the money actually goes wrong

    Most tile regrets trace back to installation, not the tile. A subfloor that flexes, a missing moisture test over concrete, or grout joints that are too wide all shorten the floor’s life and drive up repair costs. Spending more on proper subfloor prep and a qualified installer usually costs less over time than fixing a failed floor.

    Key Takeaway Tile’s real long-term value is that it can be repaired piece by piece. Budget for grout upkeep and keep spare tiles, that combination is what makes the lifecycle cost competitive with cheaper floors.

    Slip Resistance, Comfort, and Room-by-Room Suitability

    Slip resistance depends on the tile finish, not the material. Matte and textured tiles grip better than polished ones. This matters most in bathrooms and entryways.

    Comfort is the other half of the story. Tile feels cold underfoot, especially over concrete slabs. Underfloor heating solves that, but adds cost and installation time.

    Room-by-room, here’s how we’d plan it:

    • Bathrooms and kitchens: porcelain, matte finish, sealed grout
    • Living rooms: ceramic or wood-look tile for warmth in style
    • Bedrooms: consider vinyl plank if comfort tops your list
    • Entryways: textured stone or porcelain for grip

    For homes with kids, pets, or elderly family members, choose a matte finish and add rugs in high-traffic spots. Tile is allergy-friendly and supports good indoor air quality, since it traps no allergens.

    Conclusion: Is Tile Flooring Right for Your Project?

    Tile isn’t right for every room, but it’s hard to beat in wet, high-traffic spaces. If you want durability, easy cleaning, and design range, tile floors deliver. If you want warmth and softness underfoot, mix in vinyl plank or add heated flooring.

    At Viva Floors & More, we help you weigh those trade-offs in person, with samples under real lighting and expert advice for homeowners, builders, and DIYers alike. Visit our Pharr or Brownsville showroom to compare ceramic, porcelain, and natural stone side by side. Request an estimate today and get the right floor for your space, budget, and lifestyle.

    Frequently Asked Questions

    What are the downsides of tile flooring?

    Tile floors feel hard and cold underfoot, especially in bedrooms and living rooms, and grout lines collect dirt that needs regular scrubbing and resealing. Tiles can crack or chip if heavy objects drop on them or if the subfloor shifts. Installation costs more than vinyl or laminate because it requires a level subfloor, cement board, and thin-set mortar. These trade-offs are usually worth it in bathrooms, kitchens, and entryways where water resistance matters most.

    Is it better to have tile or vinyl plank flooring?

    It depends on the room. Tile wins in bathrooms, kitchens, laundry rooms, and covered patios because it handles standing water and heavy traffic without warping. Vinyl plank wins in bedrooms, living rooms, and basements because it feels warmer, costs less to install, and goes down faster over most existing subfloors. Many homeowners use both: tile in wet zones and vinyl plank in dry living areas.

    Is porcelain tile better than ceramic tile for floors?

    Porcelain is denser and less porous than ceramic because it is fired at higher temperatures, so it resists moisture and stains better in high-traffic areas. Ceramic costs less and works well in low-moisture rooms like bedrooms or hallways. For bathrooms, kitchens, and entryways, porcelain tile flooring usually justifies the higher upfront cost through longer lifespan and fewer repairs.

    Do tile floors add value to a home?

    Tile floors can support resale value in wet areas like bathrooms and kitchens, where buyers expect a water-resistant hard surface. The effect on overall home value depends on the tile quality, installation, and how well it fits the home’s style. A poorly installed tile floor with cracked grout or uneven tiles can hurt a sale, so proper subfloor prep and sealing matter as much as the tile itself.
  • Flooring Samples vs Installed Look: Why the Difference?

    Flooring Samples vs Installed Look: Why the Difference?

    Table of Contents

    Last Updated: September 30, 2026

    Why Flooring Samples vs the Installed Look Rarely Match

    Flooring samples vs the installed look rarely match because a small sample viewed under showroom lighting tells you almost nothing about how a full floor will read in your home. The lighting is different, the scale is different, and the sample itself may come from a different production batch than the flooring you eventually install.

    At Viva Floors & More, we’ve watched this scenario play out: a homeowner picks a beautiful plank in the showroom, orders the full floor, and then calls us confused when the installed result looks nothing like what they expected.

    Here’s the good news. The mismatch is predictable, and once you understand why it happens, you can test for it before you commit.

    A flooring sample is a small cut of a larger production run, typically measuring a few inches wide and a foot or two long. That size works for checking color and finish, but it fails at showing you pattern repeat, batch consistency, or how dozens of planks will look together across a whole room.

    Key Takeaway The gap between sample and installed floor comes down to four things: lighting conditions, sample size, batch variation, and surrounding surfaces. Control for all four before you buy.

    Showroom Lighting vs Natural Light: What Changes on Site

    Showroom lighting and natural light produce different color results from the same flooring plank. Showrooms rely on overhead fixtures that stay constant. Your home gets a moving mix of daylight, ambient light, and artificial light that shifts hour by hour.

    Color Rendering and Lighting Temperature

    Color rendering is how accurately a light source shows the true colors of a surface. Standard showroom fixtures often have a color rendering index below what you’d get from direct sunlight or a well-chosen LED.

    Lighting temperature measures how warm or cool a light source appears, rated in Kelvin. A 2700K bulb casts a warm, yellow tone. A 5000K fixture runs cool and blue. The same oak plank can look honey-toned under one and grayish under the other.

    This effect has a name: metamerism. It’s when two colors match under one light source but look different under another. Flooring is especially prone to it because wood and laminate surfaces have complex undertones.

    How Ambient Light Shifts Flooring Color Perception

    Ambient light is the indirect light bouncing off walls, ceilings, and furniture. A room with warm beige walls bounces warm light onto your floor. A room with cool gray walls does the opposite.

    This is why the same flooring material can look completely different in two homes on the same street. The floor didn’t change. The light around it did.

    U.S. Department of Energy guide to lighting and color rendering

    Flooring Color Variation in Natural Light and Through the Day

    Flooring color variation in natural light changes throughout the day, and that’s normal. Morning sun runs cooler and more direct. Afternoon light warms up. Evening artificial light adds its own cast on top.

    Wood grain and vinyl plank surfaces react to all of it. Direct sun can make a medium-brown hardwood read almost golden. The same plank in shade can look flat and dark.

    North-facing rooms tend to receive cooler, more consistent light all day. South-facing rooms get strong direct sun that shifts dramatically from morning to evening. If you’re choosing flooring for a north-facing living room, a warm undertone often helps balance the cool light.

    Don’t judge a sample from a single viewing. Check it in the morning, at midday, and after sunset. The floor you live with is the one you see at all three times.

    Request Estimate →

    The Best Way to View Flooring Samples Before You Commit

    The best way to view flooring samples is to test them in your own home, under your own lighting, at full scale, and against the exact batch you plan to install. Showroom viewing is a starting point, not a final answer.

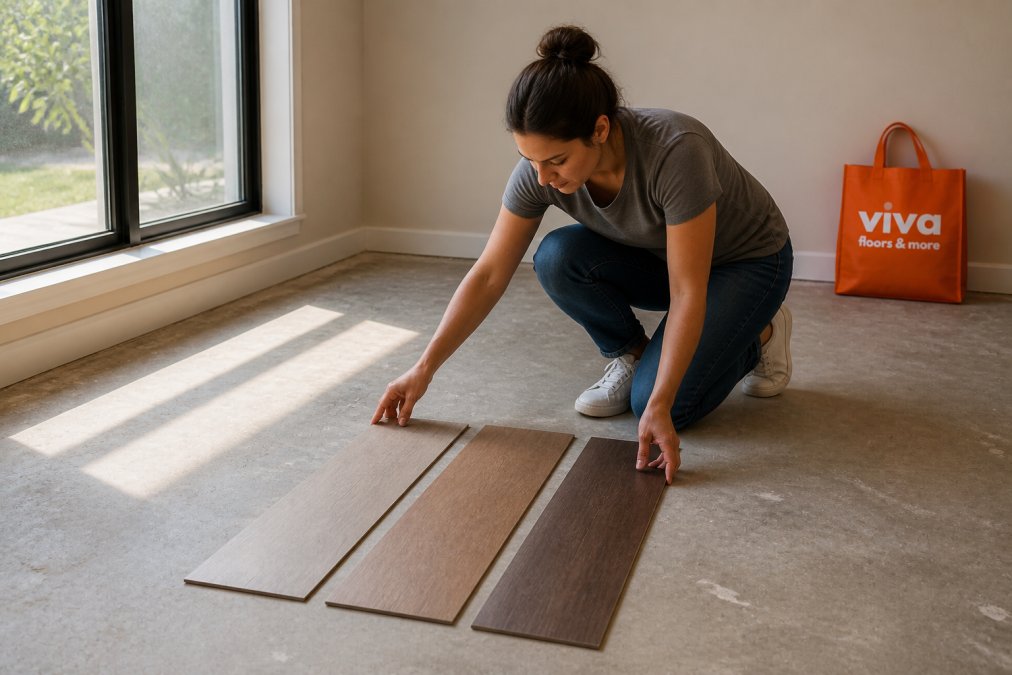
    A homeowner kneeling on a bare concrete subfloor, placing three flooring sample planks side by side near a large window in an empty room, afternoon sunlight falling across the samples
    A homeowner kneeling on a bare concrete subfloor, placing three flooring sample planks side by side near a large window in an empty room, afternoon sunlight falling across the samples

    In-Home Testing and Sample Size

    Request full-size planks or larger sample boards whenever possible. A small square chip hides pattern repeat and grain flow. A full plank shows you what a real installation will look like.

    Lay samples flat on the subfloor in the actual room. Move them around. Check them against your wall color and near your cabinets. This is the single most effective step you can take.

    Why sample size matters more than most people realize. A 6-inch chip shows roughly one plank face. A 500-square-foot room with 7-inch-wide planks contains dozens of plank faces laid side by side. Pattern repeat, the distance before a printed or embossed design starts over, is invisible on a chip but obvious across a full floor. Laminate and vinyl plank (LVP) are printed in repeating cycles, often every few planks. On a small sample you see one tile of that cycle.

    Digital Visualization Tools and Batch Consistency

    Digital visualization tools let you upload a photo of your room and drop in flooring options. They’re useful for narrowing choices, but they can’t replicate real light behavior or true texture. Treat them as a shortlist tool, not a decision-maker.

    Pro Tip Ask for samples from the same batch or lot number you plan to order. If the retailer can’t confirm the batch, your installed floor may not match the sample you approved.

    Professional Lighting Calibration at Home

    You don’t need a designer’s toolkit to judge a sample accurately, you need to remove variables. Showrooms often use high-CRI fixtures in the 3000K-3500K range, which is warmer than midday daylight and cooler than a typical 2700K living room bulb. That single difference can flip a gray-brown plank toward brown or gray.

    To simulate a neutral reference at home:

    • Test under a 5000K, high-CRI (90+) bulb. This approximates north-facing daylight and is the closest thing to a neutral baseline. Compare the plank under this light first.
    • Then test under your actual room lighting. Whatever you have installed, 2700K, 3000K, dimmable, or mixed, is the light you’ll live with. The neutral test tells you the true color; the room test tells you the lived color.
    • Test against your wall and cabinet colors. Undertones interact. A warm beige wall pushes a floor warmer; a cool gray wall pushes it cooler. Hold the sample vertically against the wall, not just flat on the floor.
    • Test at three times of day. Morning, midday, and after sunset. The floor you live with is the one you see at all three times.

    How to Choose Flooring for Open Floorplans

    Here’s a practical way to evaluate options:

    Consideration What to Check Why It Matters
    Lighting zones Sample in each connected area Light varies room to room
    Cabinet contrast Compare floor against cabinetry Contrast changes perceived tone
    Wall color View floor beside wall paint Undertones interact
    Sheen level Check gloss under direct sun Gloss shows glare and dust
    Pattern repeat Lay multiple planks together Reveals repetition
    Square footage Estimate total visible area Scale amplifies tone and pattern
    Transitions Identify doorways and thresholds Breaks in the floor change how it reads
    Watch Out Choosing a floor based on a single small sample in one room is the most common mistake we see. Order full-size samples and test them in every connected space, and at the transition points, before you commit.

    If your open plan has more than one flooring material, order samples of both and view them together at the seam. The decision isn’t whether each floor looks good on its own; it’s whether they look good next to each other.

    Common Mistakes That Make Samples Look Wrong After Installation

    Most sample-to-installation mismatches trace back to a handful of avoidable errors. Here’s what to watch for.

    • Judging under showroom light only. Test in your home before ordering.
    • Using a tiny sample. Small chips hide pattern and grain flow.
    • Mixing batches. Order the full project quantity at once.
    • Ignoring wall and cabinet color. Contrast shifts perceived tone.
    • Skipping time-of-day testing. Check morning, afternoon, and evening.
    • Overlooking sheen. Gloss level changes how color reads in sunlight.

    Frequently Asked Questions

    Why does flooring look different once it is installed?

    Several factors combine. Showroom lighting temperature and color rendering shift how a sample reads compared to daylight in your home. A small sample only shows a fraction of the pattern repeat, so wood grain and color variation spread across a full room look different. Batch consistency also matters: planks from a different production run can carry slightly different undertones. Together these make the installed floor look darker, warmer, or more varied than the sample you carried home.

    How can I accurately test flooring samples in my home?

    Take the sample to the actual room, not the garage or a hallway. Lay it on the subfloor near a window and leave it for 24 to 48 hours. Check it in morning light, midday sun, and after dark with your interior lights on. Look at it against your wall color and next to a cabinet door. Ask for the largest sample available, ideally several planks, so you can see how the pattern repeat and color variation play out across a wider area.

    Does natural light change the appearance of flooring?

    Yes, and more than most people expect. Flooring color variation in natural light depends on the direction your windows face, the time of day, and how much ambient light bounces off walls and furniture. North-facing rooms stay cooler and can make warm undertones look gray. South-facing rooms flood with direct sun that brightens and warms the floor. A sample viewed under showroom lights at noon may look nothing like the same plank at 7 p.m. in your living room.

    Should I order large flooring samples before committing?

    Larger samples are worth the effort. A small swatch hides pattern repeat, plank-to-plank color variation, and how the wood grain reads across a full-room view. Ask for three or four full planks from the same batch, then lay them together the way they would install. This reveals batch consistency and lets you judge texture, finish, and sheen at the same time.

  • Best Countertop Materials for Kitchens: 2026 Guide

    Best Countertop Materials for Kitchens: 2026 Guide

    Table of Contents

    Last Updated: September 16, 2026

    What Actually Matters When Choosing Countertop Materials

    The best countertop materials for kitchens balance four things: how they handle heat and scratches, how much upkeep they demand, how they fit your budget, and whether they suit the way you actually cook. At Viva Floors & More, we’ve helped Rio Grande Valley homeowners, builders, and contractors sort through these trade-offs since 1992, and the same pattern shows up again and again: people fall in love with a look online, then discover the maintenance reality after installation.

    Countertop materials are the surfacing products installed over kitchen base cabinets, and they fall into two broad families: natural stone (granite, marble, soapstone) and man-made surfaces (quartz, laminate, solid surfacing, concrete). Each family behaves differently under heat, knives, citrus, and kids.

    Here’s the part most buying guides skip. The material you choose has to match your household, not a showroom photo. A busy family with two dogs and three kids needs a different surface than a couple who cooks twice a week.

    Below, we break down every major option by durability, upkeep, and cost so you can walk into a showroom knowing exactly what to ask for.

    Quartz vs Granite Countertops: Which Engineered Stone Wins?

    Quartz wins on maintenance; granite wins on heat tolerance and one-of-a-kind looks. This is the single most common comparison we field, and the honest answer depends on which trade-off bothers you less.

    Quartz is engineered stone: ground quartz mixed with resin and pigments, then formed into slabs. That manufacturing process makes it non-porous, so it resists stains and never needs sealing. Granite is natural stone, cut from the earth, and every slab carries unique veining and mineral patterns. It’s heat-tolerant and scratch-resistant, but it’s porous, so it needs periodic sealing to block stains and bacteria.

    Factor Quartz Granite
    Porosity Non-porous Porous, needs sealing
    Heat resistance Moderate, use trivets High, heat-tolerant
    Maintenance Wipe-and-go Reseal periodically
    Look Consistent, uniform veining One-of-a-kind natural pattern
    Repairability Professional repair only Can be re-polished
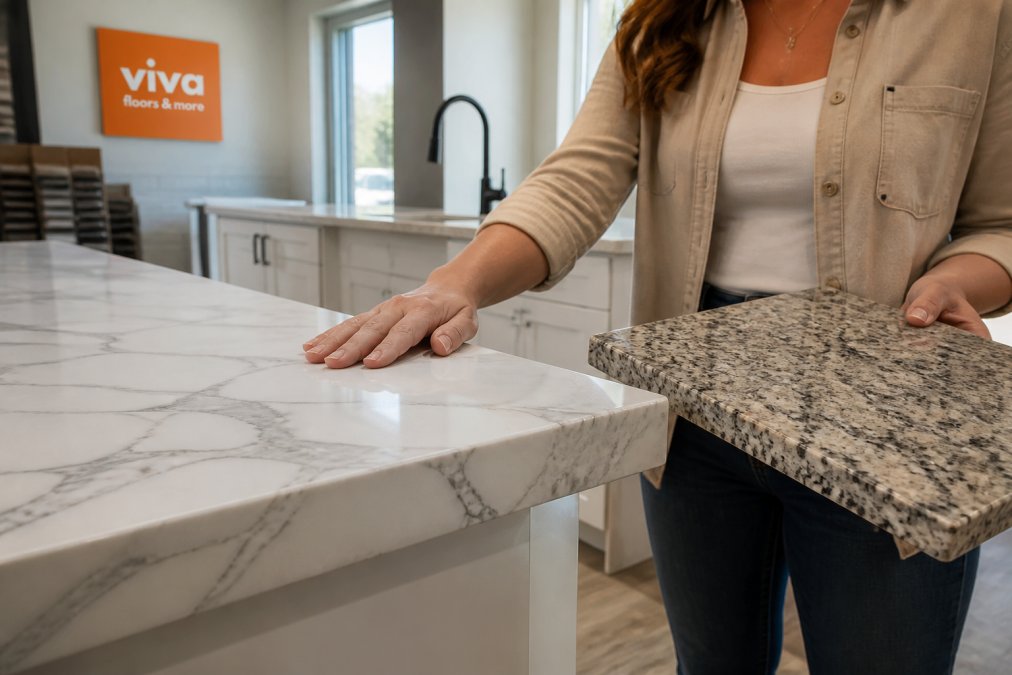
    A bright kitchen with white quartz countertops and gray veining, a homeowner running a hand along the polished edge while comparing it to a granite sample held in the other hand
    A bright kitchen with white quartz countertops and gray veining, a homeowner running a hand along the polished edge while comparing it to a granite sample held in the other hand

    A common mistake is assuming quartz is bulletproof. It isn’t. Leave a hot cast-iron pan on a quartz surface and you can scorch the resin. Granite shrugs that off, which is why serious cooks often lean granite despite the sealing chore.

    Key Takeaway Choose quartz if you want low-maintenance and consistent color. Choose granite if you want heat tolerance and a slab nobody else owns.

    Marble, Soapstone, and Natural Stone: Beauty vs Upkeep

    Marble and soapstone deliver the most striking looks and the highest maintenance demands. Both are natural stone, and both will show their age, though in different ways.

    Marble is famous for its soft veining and honed or polished finishes. It’s also soft and porous, so it etches when acidic foods like lemon or vinegar sit on it. Many homeowners accept the patina as character; others find it maddening. Soapstone is denser and non-porous, with a matte finish that ages gracefully. It scratches, but scratches can be sanded out and oiled over. Its dark gray tone suits farmhouse and industrial kitchens.

    The thing nobody tells you about natural stone is that sealing isn’t a one-time job. It’s a recurring task, and how often you reseal depends on the stone’s porosity and how hard you use the kitchen.

    Watch Out Skipping reseal on a porous natural stone lets oil, wine, and tomato sauce soak in permanently. Once a stain sets, it often requires professional re-polishing to remove.

    Affordable Kitchen Countertop Options That Still Hold Up

    Laminate is the most budget-friendly kitchen countertop option that still performs well, and modern laminate has closed much of the gap with stone. Today’s laminate uses photographic overlays that mimic granite, marble, and quartz convincingly, and the wear layer resists scratches and stains far better than the laminate of twenty years ago. The key mechanism is the melamine wear layer bonded over a decorative paper layer and a particleboard or plywood core; the thicker the wear layer, the better it stands up to daily use.

    Where laminate falls short: it can’t take a hot pan, and seams can lift if water gets underneath. But for rental properties, starter kitchens, and budget remodels, it’s a smart, durable choice that leaves money for flooring and cabinets. A common pattern among fabricators is that laminate edges are the first failure point, so specify a matching edge band rather than a raw cut, and seal the seams around the sink with silicone to keep water out of the core.

    Request Estimate →

    Solid surfacing, often called by brand names like Corian, sits a step up. It’s non-porous, seamless, and repairable, since scratches can be sanded out. It’s also one of the few materials you can custom-cut and integrate a sink into with no visible seam. The trade-off is heat: solid surfacing can scorch or crack under a hot pan, so trivets are non-negotiable.

    A third budget path is butcher block in a limited footprint. It is not the cheapest per square foot, but it is one of the few materials a homeowner can cut, sand, and refinish without a fabricator. That repairability lowers the long-term cost of ownership even when the upfront number is higher than laminate.

    For pricing on any of these, it depends on square footage, edge profiles, and fabrication, so request a current quote rather than trusting a number you saw online. The variables that move the quote most are the number of cutouts (sink, cooktop, outlets), the edge profile, and whether the fabricator has to template on-site. A simple L-shaped laminate run with one sink cutout and a standard edge will sit at the low end; a solid surface island with an integrated sink and a custom edge will sit at the high end.

    Key Takeaway If the goal is the lowest upfront cost, laminate wins. If the goal is the lowest lifetime cost in a busy kitchen, solid surfacing or butcher block in a limited area often wins because damage can be sanded out instead of replaced.

    Consumer information on countertop surface wear and care

    Butcher Block, Solid Surfacing, and Concrete: Niche Picks Worth a Look

    Butcher block, concrete, and solid surfacing each solve a specific problem better than the mainstream options, and each carries a trade-off that most guides gloss over. The unique angle here is repairability and cabinet compatibility: these three materials are where the weight-load and DIY-repair questions actually decide whether the installation succeeds.

    Butcher block brings warmth and a farmhouse feel, and it’s genuinely food-safe and knife-friendly. The trade-off is upkeep: it needs regular oiling and can be damaged by standing water. It’s a strong pick for prep islands and baking stations rather than a full perimeter. The mechanism is simple: wood fibers absorb oil, which keeps water out and slows staining; when the surface dries out, water penetrates and the wood cups or cracks.

    Material Best For Main Drawback Repair Approach
    Butcher block Prep islands, baking Needs oiling, water damage Sand and re-oil
    Concrete Industrial kitchens Heavy, can crack Patch and reseal by fabricator
    Solid surfacing Busy family kitchens Can scorch, softer surface Sand out scratches
    Watch Out Before committing to concrete or a thick natural stone slab, confirm that the cabinet frames and floor can carry the load. Sagging and cracked seams often trace back to support that was never checked before fabrication.

    Kitchen Countertop Maintenance Tips by Material

    Pro Tip Keep a small bottle of pH-neutral stone cleaner under the sink and a stack of felt-backed trivets within arm’s reach. The two habits prevent most countertop damage we see.

    Repairability, Sustainability, and Cabinet Compatibility

    Watch Out Installing a heavy stone slab on cabinets that weren’t built for the load can cause sagging or cracked seams within a year. Confirm support before fabrication, not after.

    For homeowners weighing material availability, note that supply of certain imported slabs fluctuates, so confirm lead times with your supplier early in the project.

    Conclusion

    Choosing among the best countertop materials for kitchens comes down to matching a surface to your household, not chasing a trend.

    Frequently Asked Questions

    What is the most durable countertop material for a kitchen?

    Quartz and granite consistently rank as the most durable countertop materials. Quartz is non-porous and resists scratches, stains, and moisture without sealing. Granite is heat-tolerant and holds up to hot pans, but it is porous and needs periodic sealing. Both handle daily kitchen use for decades with basic care. Soapstone and concrete also wear well but require more attention to patching and resealing over time.

    Which countertop material is best for the money?

    Laminate and butcher block offer affordable upfront costs among kitchen countertop options, and both can be replaced or refinished without a full remodel. Quartz often delivers strong long-term value because it never needs sealing and resists staining. If resale value matters, quartz and granite tend to hold appeal with buyers. Pricing depends on square footage, edge profiles, and fabrication, so request a quote for your layout.

    Which countertop materials do kitchen designers recommend avoiding?

    Designers often steer clients away from marble in busy family kitchens because it etches from acids like lemon juice and stains easily. Polished limestone and some porous natural stones fall into the same category. Very thin laminate with dark colors shows scratches. These materials are not bad, but they demand more care than most households want. If you love the look, use them on a low-traffic island or backsplash instead of the main prep area.

    How do I choose the right countertop material for my renovation?

    Start with three questions: how much cooking happens on that surface, how much upkeep you will realistically do, and what your cabinets can support. Porcelain and quartz are low-maintenance. Granite and soapstone need sealing. Butcher block needs oiling. Match the material to your habits, then confirm thickness and weight with your installer. Bring cabinet and floor samples to your showroom so you can see how the countertop reads under your lighting before you commit.

  • Best Pet Friendly Flooring for Homes: 2026 Guide

    Best Pet Friendly Flooring for Homes: 2026 Guide

    Table of Contents

    Last Updated: September 21, 2026

    Quick Comparison: Best Pet Friendly Flooring for Homes

    The best pet friendly flooring for homes comes down to four materials that handle claws, accidents, and heavy traffic. Waterproof luxury vinyl plank (LVP) wins for most pet owners, followed by porcelain tile, then laminate, with engineered hardwood as the premium option for lighter-shedding households.

    Material Scratch Resistance Waterproof Best For Watch Out For
    Luxury vinyl plank High Yes Most pet households Can dent under heavy furniture
    Porcelain tile Very high Yes Large dogs, accidents Cold, hard underfoot
    Laminate Medium No Budget rooms, light pets Swells if water seeps in
    Engineered hardwood Low-medium No Senior pets, light traffic Needs rugs and quick cleanup

    Waterproof Luxury Vinyl Plank: The Top Pick for Pet Owners

    Waterproof luxury vinyl plank is the best all-around choice for pet owners: its core resists moisture completely and its wear layer shrugs off claw marks, so a dog skidding across the room leaves no trail behind.

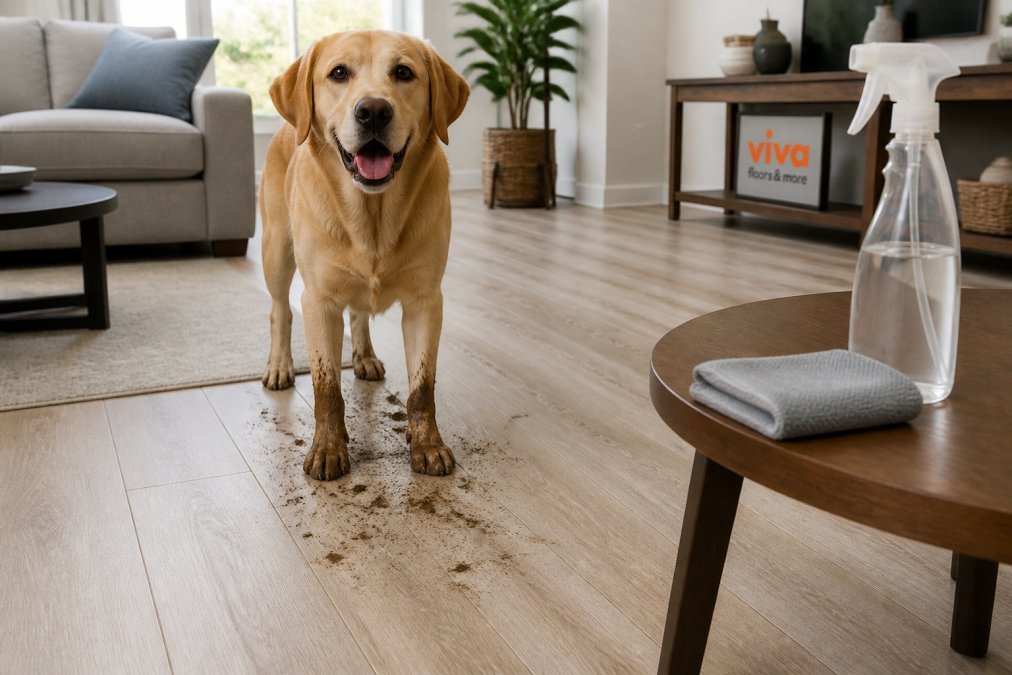
    Infographic showing how to clean muddy paw prints off waterproof pet friendly flooring using simple tools.
    Infographic showing how to clean muddy paw prints off waterproof pet friendly flooring using simple tools.
    Pro Tip Run your fingernail across a plank sample before you buy. If it leaves a visible mark, that wear layer is too thin for a household with large dogs. Ask for the wear layer thickness in millimeters, not just “heavy duty.”

    Wear Layer and Waterproof Core

    The wear layer is the clear topcoat that takes abuse; the core keeps water out. For homes with dogs, look for a high-traffic wear layer and a fully waterproof core, not just moisture-resistant.

    Scratch Resistant Flooring for Dogs: Materials That Hold Up

    Porcelain tile and high-wear luxury vinyl plank are the most scratch resistant flooring for dogs, with tile leading on durability and LVP on comfort. Both resist claw marks far better than wood or standard laminate.

    Watch Out Skip glossy, high-shine finishes if you have pets. They show every scratch, paw print, and dust mote. A matte or low-sheen surface finish hides wear far better.

    Porcelain Tile and Engineered Hardwood

    Porcelain tile is non-porous, so pet accidents and odors don’t soak in and cleaning is simple. Engineered hardwood offers real wood looks but needs more care, since standing water and claw marks can damage the surface.

    Pros and Cons of Laminate vs Vinyl for Pets

    The pros and cons of laminate vs vinyl for pets come down to water. Vinyl is waterproof and forgiving; laminate is not, and one soaked accident can swell the core permanently.

    Factor Laminate Vinyl (LVP)
    Water resistance Low Waterproof
    Scratch resistance Medium High
    Repair if damaged Hard Plank-by-plank
    Best for Dry rooms, light pets Whole-home pet use

    Acoustic Impact, Senior Pet Mobility, and Indoor Air Quality

    Most flooring guides stop at scratch and water resistance. The three factors below are what pet owners actually complain about after move-in, and what big-box guides rarely address.

    Noise: Why Hard Floors Amplify Claws

    Sound transmission has two parts: impact noise (claws clicking, a dog jumping off the couch) and airborne noise (barking, TV). Hard surfaces like tile, laminate, and glue-down vinyl reflect impact noise into the room below, a 60-pound dog trotting across upstairs tile can sound like a drum solo beneath it.

    Pro Tip If noise is your top concern, ask the retailer for the underlayment’s impact insulation class (IIC) rating. Higher is quieter. A cork underlayment typically outperforms thin foam on this measure.

    Senior Pet Mobility and Traction

    Older dogs, dogs with arthritis, and dogs recovering from surgery struggle on slick surfaces. The problem is coefficient of friction: polished tile or high-gloss LVP gives paws almost nothing to grip, and a dog that slips once in a hallway often becomes afraid of it.

    What actually helps:

    • Textured or embossed surfaces. A registered emboss (the texture follows the wood grain) grips better than a smooth finish. Matte and low-sheen surfaces outperform high-gloss every time.
    • Area rugs and runners. The cheapest, fastest fix. Put a runner down the main traffic path and a rug at the bottom of stairs. Use a non-slip pad underneath so the rug itself doesn’t slide.
    • Stair treads. Bare hardwood or tile stairs are the single most dangerous surface for a senior dog. Carpet runners or adhesive tread strips make stairs navigable again.
    • Ramps over steps. For dogs that can no longer do stairs at all, a low-angle ramp to the couch or bed removes the jump entirely.

    Indoor Air Quality and VOCs

    New flooring can release volatile organic compounds (VOCs) from adhesives, finishes, and the core itself. The smell of a freshly installed floor is largely off-gassing, lingering for days to weeks depending on ventilation and product chemistry.

    Request Estimate →

    What to look for:

    • Low-VOC or zero-VOC adhesives. Glue-down installations use the most adhesive, so this matters most there. Ask the installer what adhesive they plan to use and whether a low-VOC alternative is available.
    • FloorScore and GREENGUARD certifications. These are third-party programs that test flooring and adhesives for VOC emissions. A product carrying either has been independently verified, which is more meaningful than a manufacturer’s own “low-VOC” claim.
    • Solid vs. engineered vs. synthetic. Solid hardwood and tile have minimal off-gassing once installed. Engineered wood, laminate, and vinyl rely on binders and wear layers that can emit for a period after installation.
    • Ventilation during and after install. Open windows, run fans, and if possible keep pets out of the room for the first 24 to 72 hours. The EPA’s resources on volatile organic compounds explain what VOCs are and why indoor concentrations can exceed outdoor levels.
    Key Takeaway Noise, traction, and air quality are the three factors that separate a floor that merely survives pets from one that actually works for them. Underlayment controls noise, texture controls traction, and certification controls what you breathe.

    Installation and Maintenance for Pet-Friendly Floors

    Daily maintenance is simple: sweep or vacuum to lift grit, then damp-mop with a pet-safe cleaner. Grit is the enemy, trapped sand acts like sandpaper under paws and dulls the surface finish.

    Here’s a maintenance schedule that works:

    • Sweep or vacuum high-traffic areas daily
    • Damp-mop with a pH-neutral, pet-safe cleaner weekly
    • Wipe accidents immediately, even on waterproof floors
    • Trim pet nails every few weeks to reduce scratching
    • Place mats at doors and water bowls
    • Inspect seams and edges monthly for lifted planks
    Key Takeaway The single biggest maintenance mistake is using too much water or harsh cleaners. Both dull the finish and void many warranties. A damp mop and a pet-safe product are all you need.

    Repairability: What Happens When Accidents Occur

    Durability tells you how long a floor lasts; repairability tells you what happens on the day it doesn’t. For pet owners, this separates a floor you live with for 15 years from one you resent for 10.

    How Each Material Actually Repairs

    Luxury vinyl plank (floating install). The most repairable pet floor: floating LVP clicks together at the edges, so one damaged plank can be removed and replaced without disturbing the rest. Score and cut out the center of the damaged plank, pry the pieces free, trim the locking tabs off the replacement, and glue it into the gap. A pro can do this in under an hour.

    The Spare-Box Rule

    Dye lots change. A plank bought three years from now won’t match today’s floor, even with an identical SKU, and manufacturers discontinue colors without warning. The rule: buy 5 to 10 percent extra square footage at install and store it flat in a climate-controlled space. For a 500-square-foot room, that’s roughly one to two extra boxes, the cheapest insurance you’ll ever buy on a floor.

    Watch Out Do not store spare planks in a garage, attic, or shed. Extreme heat and humidity can warp them before you ever need them, and a warped spare is useless.

    When to Repair vs. Replace

    • One or two damaged planks in a floating LVP floor. Repair. This is exactly what the material is designed for.
    • A swollen laminate plank. Replace the affected area. There is no repair.
    • A cracked tile in a high-traffic spot. Repair, and keep spares for the next one.
    • Widespread water damage across a room. Replace the affected section. Trying to salvage individual planks in a saturated floor usually fails.
    • Surface scratches only. Often refinishable or concealable with a color-matched filler pen, depending on material.

    Pet owners often discover the repairability question only after the first accident, when the spare boxes are gone and the color is discontinued. Ask about repair method and spare availability before you buy, not after.

    Key Takeaway Floating LVP is the clear winner on repairability because a single plank can be swapped without touching the rest of the floor. Laminate is the loser because a swollen core cannot be fixed. Whatever you choose, buy spare boxes now and store them properly.

    Frequently Asked Questions

    What type of flooring is most pet-resistant?

    Waterproof luxury vinyl plank (LVP) and porcelain tile are the most pet-resistant options. LVP handles pet accidents, claw marks, and high-traffic areas when it has a wear layer of 20 mil or higher. Porcelain tile is nearly scratch-proof and completely waterproof. Both are non-porous, so they resist stains and odors. For homes with dogs and cats, LVP offers the best balance of durability, comfort, and realistic wood looks.

    Is LVP or laminate better with dogs?

    LVP is generally better with dogs because its core is waterproof, while most laminate cores are moisture-resistant but not waterproof. Dog pee can seep into laminate seams and cause swelling. LVP also tends to be softer underfoot and quieter. Laminate can work in low-moisture areas and often costs less, but for homes with puppies or senior dogs prone to accidents, waterproof LVP is the safer long-term choice.

    Will dog pee ruin vinyl plank flooring?

    No, waterproof luxury vinyl plank will not be ruined by dog pee if it is cleaned up within a reasonable time. The waterproof core prevents moisture from reaching the subfloor. However, urine can discolor the surface if left for days, and it may seep into seams if the planks are not tightly locked. Wipe accidents promptly with an enzymatic cleaner to protect the wear layer and keep odors from setting in.

    How do I choose flooring that won’t scratch from pet claws?

    Look for a scratch-resistant flooring with a hard surface finish, such as a polyurethane coating with aluminum oxide or a ceramic bead topcoat. For LVP, choose a wear layer of at least 20 mil. Porcelain tile with a matte or textured finish also resists claw marks. Avoid soft woods like pine and high-gloss finishes that show every scratch. Ask for samples and test them with a key or coin before buying.