
Last Updated: October 23, 2026
Quick Summary
The best transition materials for luxury vinyl plank are vinyl and composite profiles, which match plank colors and handle moisture, with rubber or aluminum for entries and stairs. Choose the profile by height difference: T-molding under 3 mm, a reducer for 3 to 12 mm, and a deeper reducer or ramp over 12 mm.
- Measure the height gap at three points along the seam and use the tallest number.
- A transition must never be screwed or nailed through the floating LVP plank.
- Use a track system that lets the molding slide so the floor stays unpinned.
- Keep the finished lip at or below about 1/4 in. to avoid a trip hazard.
- Tuck the carpet edge under the profile lip instead of butting it against the strip.
Table of Contents
- Why LVP Transitions Matter (and How to Pick the Right One)
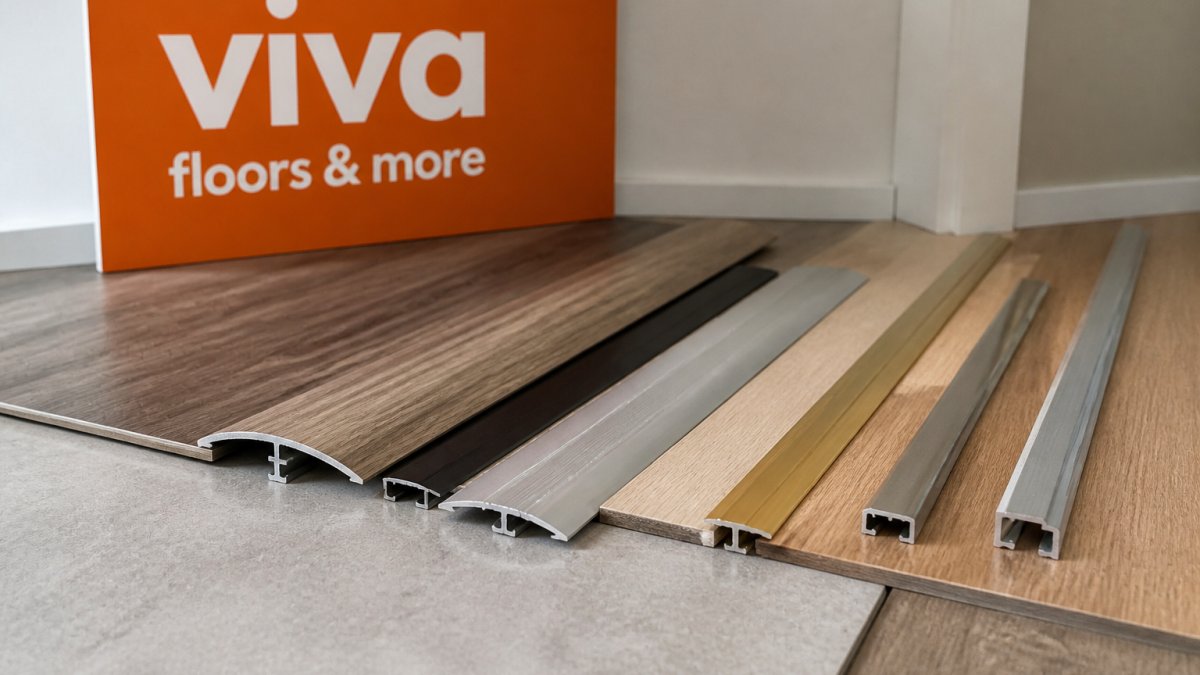
- Types of LVP Transition Molding: T-Molding, Reducers, End Caps, and Stair Noses
- Choosing the Best Material: Vinyl, Rubber, Wood, and Aluminum
- Vinyl Plank Flooring to Carpet Transition: What Works Best
- LVP to Tile Transition: Matching Heights and Materials
- LVP Transition Molding Installation: Step-by-Step
- Alternatives to Transition Strips: When You Can Skip the Molding
- Conclusion
- Frequently Asked Questions
Why LVP Transitions Matter (and How to Pick the Right One)
A transition strip covers the seam where luxury vinyl plank meets another surface.
Luxury vinyl plank is a floating floor that expands and contracts, so every manufacturer requires a gap at walls and fixed objects.
That constraint eliminates half the options on a typical store shelf. Below: which profiles work, which materials hold up, and how to measure before you buy.
Measuring Floor Height Differences
Height difference decides the profile, so measure first. Lay a straightedge across the seam and measure the vertical gap from the top of the lower floor to the top of the LVP in millimeters.
- Under 3 mm: a T-molding or a flat seam binder works.
- 3 to 12 mm: a reducer is the right call.
- Over 12 mm: you need a reducer with a deeper leg or a threshold ramp.
Measure at three points along the seam, older subfloors are rarely level, and the tallest gap is the number that matters. Write it down and bring it to the showroom with a plank sample.
Bring a scrap of your actual LVP to the store, not just the SKU number. Color names vary between dye lots, and matching the transition to the plank in your hand beats matching it to a photo on a screen.
Types of LVP Transition Molding: T-Molding, Reducers, End Caps, and Stair Noses
Four profiles cover nearly every residential junction: T-molding, reducer, end cap, and stair nose. Each solves a different height and edge problem, and choosing the wrong one is the most common installation mistake we see.
T-Molding for Same-Height Floors
T-molding joins two floors of equal height with a flat top and a hidden leg that drops into the gap. Use it where LVP meets another floating floor, or where a doorway separates two rooms at the same level.
The profile floats with the floor rather than being screwed down: fastening a T-molding through a floating LVP locks the plank in place and can cause buckling at the seam over time.
Reducers for Uneven Floor Heights
A reducer slopes from the taller floor down to the shorter one, giving a gentle ramp instead of a step. It is the standard choice where LVP meets thinner carpet, older hardwood, or a concrete slab.
Pick the reducer by the height difference you measured, not the profile width. Too shallow leaves a lip; too deep sits proud and becomes a trip hazard.
Choosing the Best Material: Vinyl, Rubber, Wood, and Aluminum
| Material | Durability | Appearance Match to LVP | Moisture Performance | Best Use Case | Main Trade-off |
|---|---|---|---|---|---|
| Vinyl (PVC) | High, resists dents and scuffs | Best, sold in matching color lines | Excellent; impervious to standing water | Kitchens, baths, laundry, pet households | Can look flatter than textured plank |
| Rubber | Very high, absorbs impact | Poor, limited colors, matte only | Excellent | Exterior doors, mudrooms, rentals | Narrow palette; hard to color-match |
| Wood (oak, maple, walnut) | Moderate, dents and swells | Good if stained to match | Poor unless sealed | Living rooms, visible feature seams | Needs re-sealing; swells at edges in wet areas |
| Aluminum | Very high, resists rolling loads | Fair, metallic finishes only | Excellent | Stair noses, thresholds under carts or wheelchairs | Cold underfoot; scratches show on dark anodized finishes |
| Composite (WPC/SPC-core) | High, dimensionally stable | Good, often color-matched to LVP lines | Excellent | Whole-home transitions where color match matters | Slightly more expensive than basic vinyl |
Vinyl remains the default for most homes because it is the only material sold in color lines that match LVP plank finishes.
Rubber is the right answer at exterior doors and in rentals where durability beats appearance: it absorbs impact, grips underfoot, and shrugs off standing water.
Wood transitions suit visible, decorative seams in living and dining spaces.
Aluminum is the pick for stair noses and anywhere a cart, walker, or wheelchair rolls: strong, low-profile, and dimensionally stable.
Matching the Material to the Room
The room, not the plank, should drive the material choice. A few rules of thumb:
- Kitchen, bath, laundry: vinyl or composite. Wood is out unless fully sealed and kept away from the tub and shower.
- Entryways and mudrooms: rubber or aluminum. These take grit, water, and impact that vinyl will eventually show.
- Living and dining rooms: wood or composite where the seam is visible and decorative.
The Floating-Floor Constraint
One rule overrides material preference: the transition must not pin the floating LVP. The profile should either float with the plank (a track system that lets the molding slide) or be fastened only to the subfloor or the adjacent fixed floor, never screwed or nailed through the LVP itself. A wood transition screwed through the plank looks fine on day one and buckles by the first seasonal swing.
Skipping the moisture-resistant option in a bathroom or laundry room is a common mistake. A wood transition in a wet room can swell and lift within a season, and replacing it means pulling trim and redoing the seam.
Vinyl Plank Flooring to Carpet Transition: What Works Best
A reducer or a T-molding handles most vinyl plank flooring to carpet transitions, depending on pile height.
The trick is the carpet’s compressed height, not its loft: measure with a straightedge pressed down, not fluffed up.
For a clean finish, tuck the carpet edge under the profile lip rather than butting it against the strip. That hides fraying and keeps the carpet from working loose at the doorway.
LVP to Tile Transition: Matching Heights and Materials
Tile transitions come down to height and hardness.
If the tile and LVP sit at the same height, a T-molding works, but choose one with a slight flex so the floating LVP can move independently.
A common mistake is grouting right up to the transition. Leave a small gap at the tile edge and let the profile bridge it, so expansion has somewhere to go.
LVP Transition Molding Installation: Step-by-Step
Most installation guides treat a transition strip like any other piece of trim: cut it, fasten it, done. With luxury vinyl plank that fails, because the floor underneath is floating and has to keep moving. The method below secures a transition without pinning the plank, preserves the expansion gap, and checks the finished seam for trip hazards.
Before You Cut: Measure the Height Difference
Height difference decides the profile, so measure before you buy: lay a straightedge across the seam and measure the vertical gap from the top of the lower floor to the top of the LVP.
- Under 1/8 in. (about 3 mm): a T-molding or flat seam binder.
- 1/8 to 1/2 in. (about 3 to 12 mm): a reducer.
- Over 1/2 in. (about 12 mm): a reducer with a deeper leg or a threshold ramp.
Write the number down and bring it, plus a plank scrap, to the store. Color names vary between dye lots, and matching to the plank in your hand beats matching to a photo on a screen.
Track System vs. Adhesive: Pick the Fastening Method First
Two common methods secure a transition over a floating floor, and the choice affects every step that follows.
- Track system (floating): A base track is fastened to the subfloor, and the molding snaps or slides into it. The molding can move slightly with the plank, so the floor is never pinned. This is the safer choice over LVP and the one most manufacturers recommend.
- Adhesive: The profile is bonded to the subfloor or to the adjacent fixed floor with construction adhesive. It works, but only if the adhesive never bridges the LVP’s expansion gap. A bead of adhesive that grabs the plank edge will lock the floor and cause buckling at the seam.
If your profile came with a track, use it. If it did not, confirm with the manufacturer whether adhesive is approved over a floating floor before you open the tube.
Tools and Materials
Tape measure, utility knife, miter saw or hacksaw with a fine-tooth blade, tapping block, mallet, drill with a bit sized for the track screws, vacuum, and the track or adhesive specified for your profile. A scrap of the LVP is useful for test-fitting the profile height before you cut to length.
Step-by-Step
- Clean the seam. Vacuum out grit and scrape any dried adhesive so the profile sits flat. Grit under a track is the most common cause of a rocking molding.
- Dry-fit the molding. Cut it to length with a small gap at each wall, then set it in place and check the height against your measurement. Do not fasten anything yet.
- Cut and fasten the track. Cut the track to length and fasten it to the subfloor, not through the planks. Keep the screws at least the width of the required expansion gap away from the LVP edge so the plank can still move.
- Set the profile. Snap or slide the molding into the track. If your profile uses adhesive, apply it to the subfloor or the fixed adjacent floor only, never bridging the expansion gap.
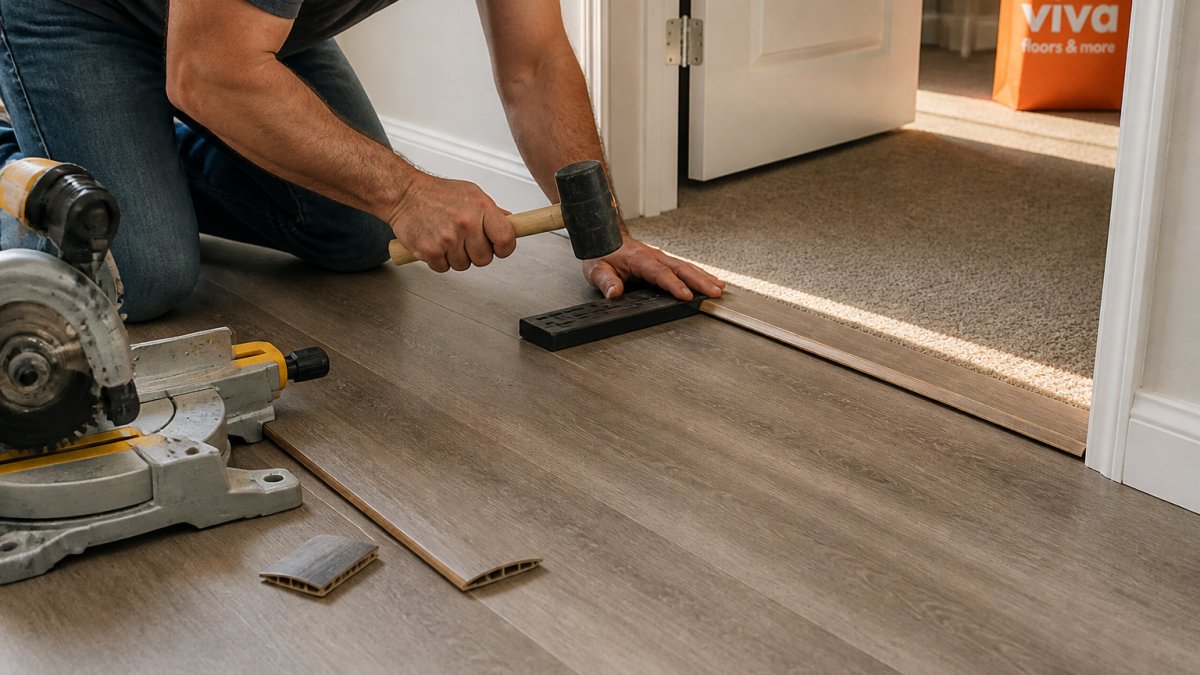
- Tap it home. Use a tapping block and mallet to seat the profile without denting the finish. Work along the length in small increments rather than striking one spot.
- Check the gap and the trip hazard. Confirm the floating floor still has room to move under the profile, then run a straightedge across the finished seam. A lip taller than about 1/4 in. is a trip hazard in a doorway; if you find one, the profile is the wrong height and should be exchanged before the trim goes back on.
Accessibility and Trip-Hazard Checks
Transition height, slope, and edge shape affect safe passage, especially for older adults, people using walkers or wheelchairs, and anyone carrying loads through a doorway. A few practical checks after installation:
- Height: keep the finished lip at or below about 1/4 in. where possible; anything taller should be ramped with a reducer rather than left as a step.
- Slope: a reducer should ramp gradually. A steep reducer is harder to roll over than a gentle one, even at the same height.
- Edge shape: beveled or rounded edges are more forgiving underfoot and under wheels than square edges.
The most important step is dry-fitting, and the most important rule is never fasten through the floating plank. A profile that fits without force and floats with the floor will stay put; one you have to muscle into place, or screw through the LVP, will lift at the edges within months.
Alternatives to Transition Strips: When You Can Skip the Molding
Sometimes you can skip the strip entirely. Alternatives to transition strips include flush seams, a glued-down plank at the junction, or a simple caulk line where the gap is tiny and hidden.
A flush seam works when two floors meet at exactly the same height and the manufacturer allows it. It looks clean, but it leaves the expansion gap exposed, so it is best where the seam sits under a door or against a wall.
For a small gap against a fixed object, a color-matched flexible filler can close the seam without a profile.
Where the junction is genuinely flat and hidden, doing nothing is a legitimate choice. Where it is visible or underfoot, a profile is the safer call.
Conclusion
The right transition comes down to three numbers: the height difference, the room’s moisture exposure, and how much traffic the seam will take. Measure carefully, match the material to the room, and let the floating floor move.
If you are sorting through options for a renovation in the Rio Grande Valley, our team at Viva Floors & More can help you match a profile to your plank and your subfloor. We have served homeowners, builders, and contractors since 1992, with two showroom locations and a deep inventory of trusted brands.
Request an estimate and get the transition sorted before the planks go down.
Frequently Asked Questions
Does LVP need transition pieces?
Yes, in most installations. LVP is a floating floor that expands and contracts with temperature and humidity, so transition pieces cover the required expansion gap at room edges and doorways. They also protect the exposed edge of the planks and create a finished look where LVP meets carpet, tile, or another flooring material. Skipping transitions can lead to buckling or gaps.
What is the best transition for LVP to tile?
A reducer or a T-molding works best for LVP to tile transitions, depending on the height difference. If the tile and LVP are nearly level, use a T-molding. If the tile is thicker, a reducer bridges the gap. Choose a vinyl or rubber transition that complements both materials and accounts for the tile’s grout line and the LVP’s expansion gap.
Can you install LVP without a transition strip?
In some cases, yes. A flush transition can be achieved by undercutting door jambs and weaving the planks through, or by using a borderless installation if both floors are the same height and the expansion gap is hidden under baseboards. However, for room-to-room transitions and where flooring heights differ, a transition strip is still recommended to cover gaps and prevent tripping.
How do you choose a transition strip for uneven floor heights?
Measure the height difference between the two floors. For differences up to about 1/4 inch, a T-molding often works. For larger differences, use a reducer that slopes from the higher floor to the lower one. If the drop exceeds 1/2 inch, consider a stair nose or a custom milled profile. Always leave the required expansion gap and secure the strip to the subfloor, not the floating planks.
