Category: Blog

  • Matching Kitchen Countertops With Cabinet Colors: 7 Steps

    Matching Kitchen Countertops With Cabinet Colors: 7 Steps

    Last Updated: November 4, 2026

    Quick Summary

    Match kitchen countertops with cabinet colors by comparing undertones rather than shade, since warm and cool tints decide whether a pairing looks intentional or clashing. Hold both samples side by side against plain white paper, then check them under your home lighting before you commit.

    • Undertones matter more than shade, so compare warm and cool tints side by side.
    • Place both samples against plain white paper to reveal hidden undertones.
    • Decide first whether you want the countertop to contrast with the cabinets or coordinate with them.
    • Check samples at home in morning, midday, and night light, since lighting shifts color.
    • Quartz needs no sealing but resin can scorch, so use trivets; granite needs periodic sealing.

    Table of Contents

    Why Undertones Matter More Than Shade When Matching Kitchen Countertops

    Most homeowners start with shade. They hold a cabinet sample next to one of the kitchen countertops options and ask whether the colors look close. Undertones decide whether a pairing feels calm or clashing, and two colors that look identical in the showroom can drift apart once they reach your kitchen.

    Undertones are the faint warm or cool tint sitting beneath a color. Beige can lean yellow, pink, or gray. White can lean creamy or blue. When the undertones match, the pairing looks intentional. When they clash, the kitchen looks mismatched even if both surfaces are technically “white.”

    A good test is to place both samples side by side against a plain white sheet of paper. The paper acts as a neutral reference, so warm and cool tints stand out clearly.

    • Warm undertones: yellow, peach, red, or golden tints
    • Cool undertones: blue, gray, green, or silver tints
    • Neutral undertones: balanced, with no obvious lean

    Keep undertones consistent across the room. A warm cabinet paired with a cool countertop often looks unfinished, even when each piece looks fine alone.

    Step 1: Decide Between Contrast and Coordination

    The first real decision is whether you want the countertop and cabinets to stand apart or blend together. Contrast creates a bold, defined look. Coordination creates a softer, more unified room.

    Contrast works well when you want the counter to act as a focal point. A dark quartz counter over white shaker cabinets is a common example. Coordination works better in smaller kitchens, where too many strong edges can make the space feel crowded.

    Ask yourself one question: do you want the eye to stop at the counter, or move smoothly across the room? Your answer points you toward one approach.

    Watch out: Mixing high contrast with busy backsplash tile often overwhelms the room. Pick one area to be the focal point and keep the rest calm.

    Step 2: Check Your Kitchen Lighting Before You Commit

    Lighting changes color more than most people expect. A sample that looks warm in a bright showroom can turn gray under cool LED bulbs at home. North-facing windows also cast cooler light all day, which shifts warm tones toward muddy beige.

    Take your samples home before you decide. Look at them in the morning, at midday, and under your kitchen lights at night. Note how each sample changes.

    Lighting temperature is measured in Kelvin (Understanding LED Color-Tunable Products). Warm bulbs typically fall around 2700K to 3000K, while daylight bulbs sit higher (Understanding LED Color-Tunable Products). Matching your bulb temperature to your sample choices is one of the simplest ways to avoid surprises.

    Best Countertop Materials for Kitchens and How They Pair With Cabinets

    Material affects color as much as paint does. A heavily veined granite reads very differently from a solid quartz with a matte finish, even when both share the same base shade. The material also decides how that color ages, how much upkeep it demands, and how forgiving it is in a busy household. That practical side is where most pairing guides stop short.

    Quartz. Engineered quartz blends ground stone with resin, so the pattern is consistent from slab to slab. Because quartz’s consistent pattern makes color coordination easier, carry the same care into nearby details and match grout with tiles so the whole kitchen feels cohesive.

    Granite. Natural granite brings variation and visible veining that works well with warm wood or neutral cabinets. Because every slab is different, bring the actual slab sample, not a small chip, to your cabinet door. Granite is generally considered heat-resistant and durable, but it is porous and typically needs periodic sealing. Dark granite hides stains but shows dust and fingerprints; light granite shows oil and wine spills.

    Marble. Marble offers soft veining and a luxurious look, and it pairs naturally with white, cream, and soft gray cabinets. Before committing, check the ongoing upkeep marble requires. It is also the most demanding surface on this list: marble is softer than granite or quartz, etches from acidic foods and cleaners, and needs regular sealing.

    Porcelain. Porcelain slabs are thin, durable, and available in matte and high-gloss finishes that mimic stone or concrete. Porcelain is commonly described as resistant to stains, heat, and scratches. Its pattern is printed and repeatable, though the edge profile is more limited than with stone.

    Soapstone and butcher block. Soapstone is non-porous and develops a patina over time, which suits dark, moody cabinet colors. Butcher block warms up white and gray kitchens but requires oiling and shows knife marks. Both are worth considering when the cabinet color is the star and you want the counter to stay quiet.

    Finish matters as much as material. A high-gloss cabinet next to a matte counter can look sharp and deliberate, while two glossy surfaces can create glare in a bright room. A common pattern is to let one surface carry the sheen and keep the other matte.

    Watch out: pairing a heavily veined natural stone with a busy backsplash and a patterned floor leaves no quiet surface, and the room starts to feel chaotic regardless of how well the colors match.

    Request Estimate →

    The article compares common countertop materials by how they resist wear, need upkeep, and pair with cabinets.

    Material Upkeep Key trade-off
    Quartz No sealing needed Resin can scorch; use trivets
    Granite Periodic sealing Porous; needs care
    Marble Regular sealing Etches from acidic foods
    Porcelain Low maintenance Limited edge profiles
    Soapstone Non-porous Develops patina over time
    Butcher block Regular oiling Shows knife marks

    Kitchen Cabinet and Countertop Color Combinations That Work

    Some pairings have proven reliable across many kitchens. Use these as starting points, then adjust for undertones, lighting, and the two factors most guides ignore: the size of the room and the metal finishes you plan to use.
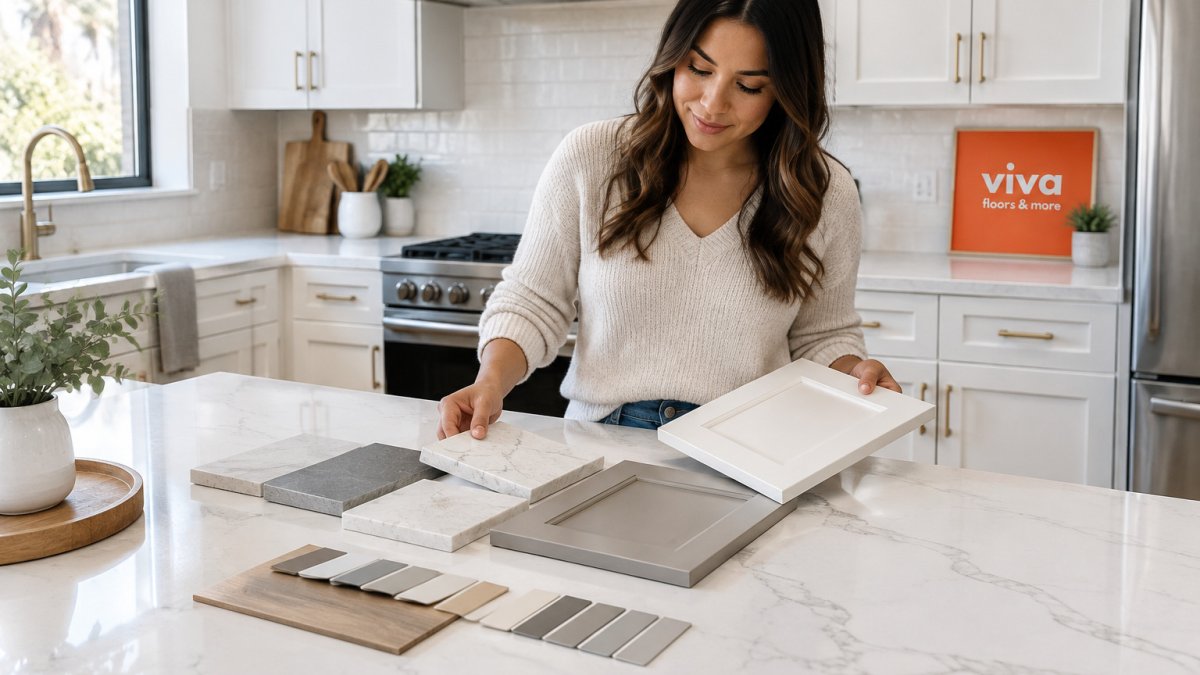
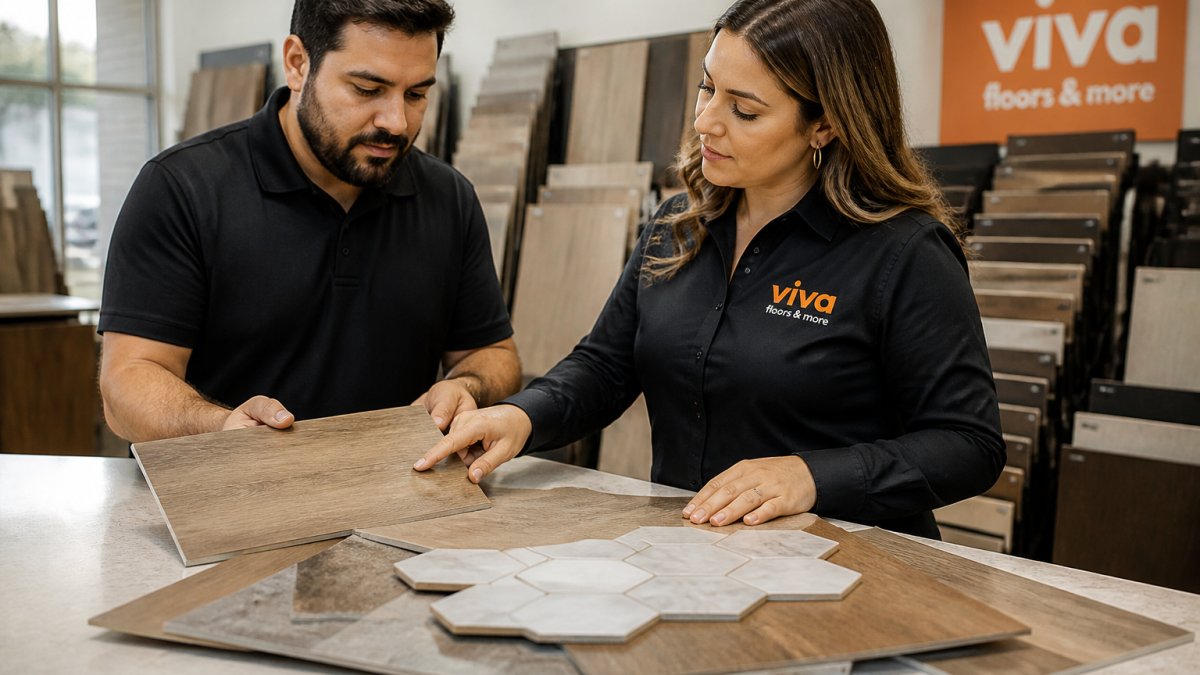
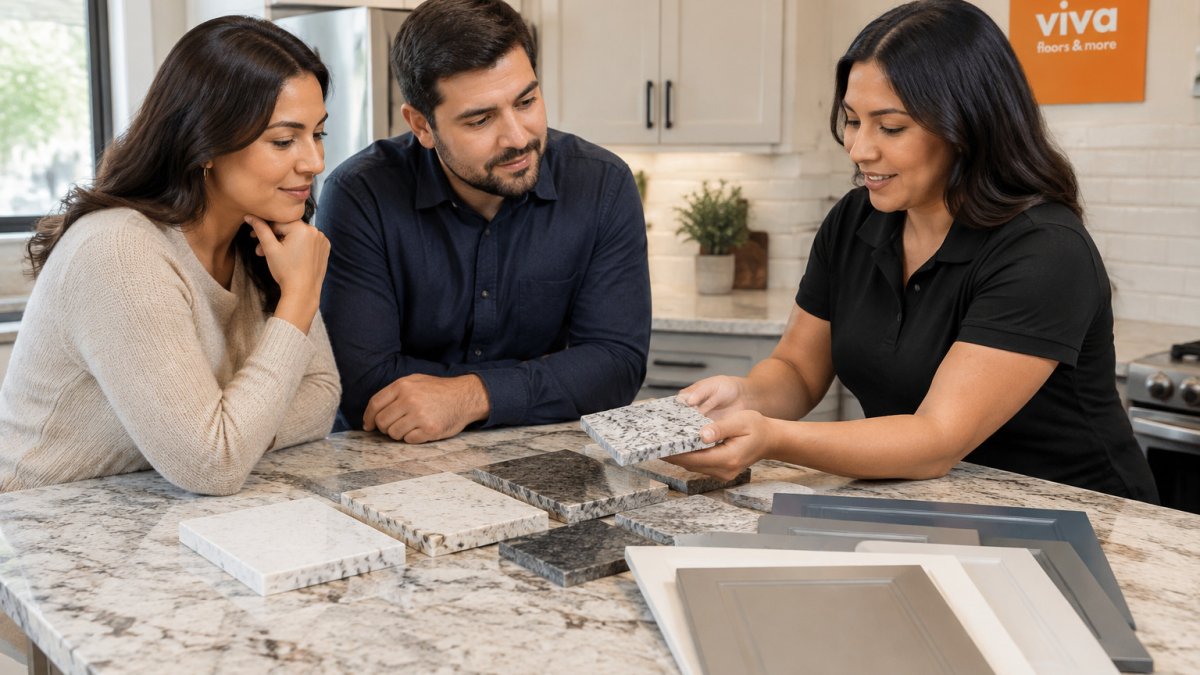
    Homeowner comparing material samples on light quartz kitchen countertops with white shaker cabinets
    Homeowner comparing material samples on light quartz kitchen countertops with white shaker cabinets
    • White shaker cabinets with light gray quartz and soft veining
    • Warm wood or stained cabinets with creamy granite
    • Navy or deep green cabinets with white or pale marble-look quartz
    • Gray cabinets with warm beige or taupe countertops for a soft, layered look
    • Black or charcoal cabinets with a white quartz and a warm wood floor to keep the room from going flat

    A monochromatic scheme uses different shades of one color family, such as taupe cabinets and a slightly darker taupe counter. It feels calm and cohesive, though it can look flat without texture. Complementary colors sit opposite each other on the color wheel; a deep green cabinet with a warm red-toned granite is one example. Use those pairings carefully, since strong complementary colors compete for attention.

    Small kitchens. In a compact kitchen, high contrast between cabinets and counters can chop the room into visual bands and make it feel tighter. A common pattern is to keep the cabinet and counter within a few shades of each other, then add contrast through the backsplash or hardware. Light counters and light cabinets bounce more light around a small room, which matters in galley layouts and basements with limited windows.

    Large kitchens. Big rooms can absorb stronger contrast and darker surfaces. A dark quartz or soapstone counter over white perimeter cabinets gives a large kitchen a focal point without closing it in. In open-plan spaces, repeat one color from the kitchen into the adjoining room so the palette does not stop at the doorway.

    Hardware and fixture integration. The metal finish is the third color in the room, and it changes how the cabinet and counter read together. Warm metals such as brushed gold, brass, and copper flatter cream, warm white, and wood-tone cabinets and pull warm undertones out of granite and quartz. Cool metals such as brushed nickel, chrome, and stainless steel sit naturally with gray, blue, and cool white palettes. Matte black hardware adds definition against white or light gray cabinets and pairs well with a dark counter or a dark island.

    Backsplash and floor as the tie-breaker. When the cabinet and counter sit close in tone, the backsplash and floor decide whether the room reads warm or cool. A warm wood floor can soften a cool gray kitchen, and a cool gray plank floor can calm a room with warm cabinets. Let at least one surface stay quiet so the eye has somewhere to rest.

    Watch out: choosing hardware after the cabinets and counters are installed often forces a compromise, because the metal finish can shift how warm or cool the whole pairing looks.

    Step 5: Match Kitchen Flooring to Cabinets and Countertops

    Flooring often gets chosen last, yet it covers a large part of the visual field. Aim to coordinate the flooring with the cabinet or counter undertones rather than matching exact shades.

    A light oak or warm vinyl floor can soften a cool gray kitchen. A cool gray plank floor can calm a room with warm cabinets. Check the flooring in the same room light as your countertop sample, since both shift under different bulbs.

    Matte finishes on flooring tend to hide scratches and dust better than high-gloss options. That matters most in busy households.

    Watch out: Pairing a busy patterned floor with a veined countertop and patterned backsplash can make the kitchen feel chaotic. Let at least one surface stay quiet.

    Planning Your Kitchen Color Pairing for Your Budget and Household

    Your budget and daily use should shape the final choice. Quartz and porcelain often suit busy households because they resist stains and scratches. Natural stone can look stunning, but it asks for more care.

    Think about who uses the kitchen. Families with young children may prefer a darker, forgiving counter that hides crumbs and smudges. Homeowners who cook often may want a surface that handles heat, oil, and acidic foods well.

    Before you buy, list your top three priorities. Common ones include stain resistance, low upkeep, resale appeal, and a specific look. Use that list to narrow your options quickly.

    Plan a small test area too. A sample board on the counter for a week shows how the pairing works in daily life.

    Bring Your Samples to Viva Floors & More and Request an Estimate

    At Viva Floors & More, we recommend bringing your cabinet door sample, countertop slab sample, and any flooring pieces you are considering. Seeing them together, then comparing them at home, helps you judge the pairing before you commit.

    Our team can help you think through undertones, finishes, and how each option fits your kitchen. Pricing depends on material, quantity, and delivery, so request an estimate for an accurate quote tailored to your project.


    Frequently Asked Questions

    Should countertops be lighter or darker than cabinets?

    Either works, but the choice sets the tone. A lighter countertop than cabinets keeps the kitchen airy and makes dark cabinets feel less heavy. A darker countertop grounds light cabinets and adds contrast. Whichever direction you choose, keep the undertones consistent: warm cabinets pair best with warm stone, and cool gray or white cabinets with cool-toned surfaces. Bring physical samples home and check them in your own daylight before committing.

    Does the countertop need to match the cabinets exactly?

    No. Exact matches often look flat, and the countertop does not need to be identical to be harmonious. Coordination means sharing an undertone, a finish, or a value level while differing in pattern or shade. Matte or honed finishes pair well with painted cabinets, while high-gloss surfaces can compete with glossy doors. Bringing your samples to our showroom can help you judge the match before ordering.

    What are the best countertop colors for white kitchen cabinets?

    Soft whites, warm creams, light grays, and subtle beige quartz or granite are reliable choices for white cabinets. Pure bright white countertops can make white cabinets look dingy by comparison, so look for a slight tint that matches the cabinet undertone. Pale stone with gentle veining adds interest without overwhelming the cabinets. Pricing depends on material, quantity, and delivery, so request a current quote from Viva Floors & More for your specific selections.

  • How Does Humidity Affect Flooring Installation Timelines?

    How Does Humidity Affect Flooring Installation Timelines?

    Last Updated: November 4, 2026

    Quick Summary

    Humidity affects flooring installation timelines by slowing acclimation, subfloor drying, and adhesive cure, so a humid room can add days to a schedule. Measure relative humidity and slab moisture first, then acclimate materials in conditioned air and hold the job until readings fall within the manufacturer’s range. Humidity flooring installation planning works best with buffer days built in.

    • Measure relative humidity and temperature at floor level, not only at the thermostat.
    • Test the slab with a moisture meter or calcium chloride test before installing anything.
    • Solid hardwood often needs 3 to 7 days or more of acclimation in the room.
    • Humid conditions can lengthen adhesive flash and cure times beyond the label’s typical numbers.
    • Add a day or two of buffer to the schedule when the room runs humid.

    Table of Contents

    How Humidity Changes the Installation Timeline

    Humidity is one of the biggest factors that sets how long a humidity flooring installation job takes. Warm, humid air moves into wood, vinyl, and adhesives long before a box is opened.

    Here is the basic timeline. Each stage depends on the air, the slab, and the product.

    • Delivery and staging: Cartons sit in the install room while they acclimate.
    • Subfloor check: Moisture readings confirm the slab is ready.
    • Product prep: Wood and laminate rest in the room for several days.
    • Adhesive and finish cure: Drying depends on temperature and relative humidity.
    • Final walk-through: Trim and transitions go in once the floor is stable.

    A humid week can add days to a schedule.

    Measuring Site Conditions Before You Start

    Before any humidity flooring installation work begins, record the conditions in the room. Use a digital hygrometer to measure relative humidity and temperature at floor level, not just the thermostat. Take readings at morning and afternoon for several days so you can see the real pattern.

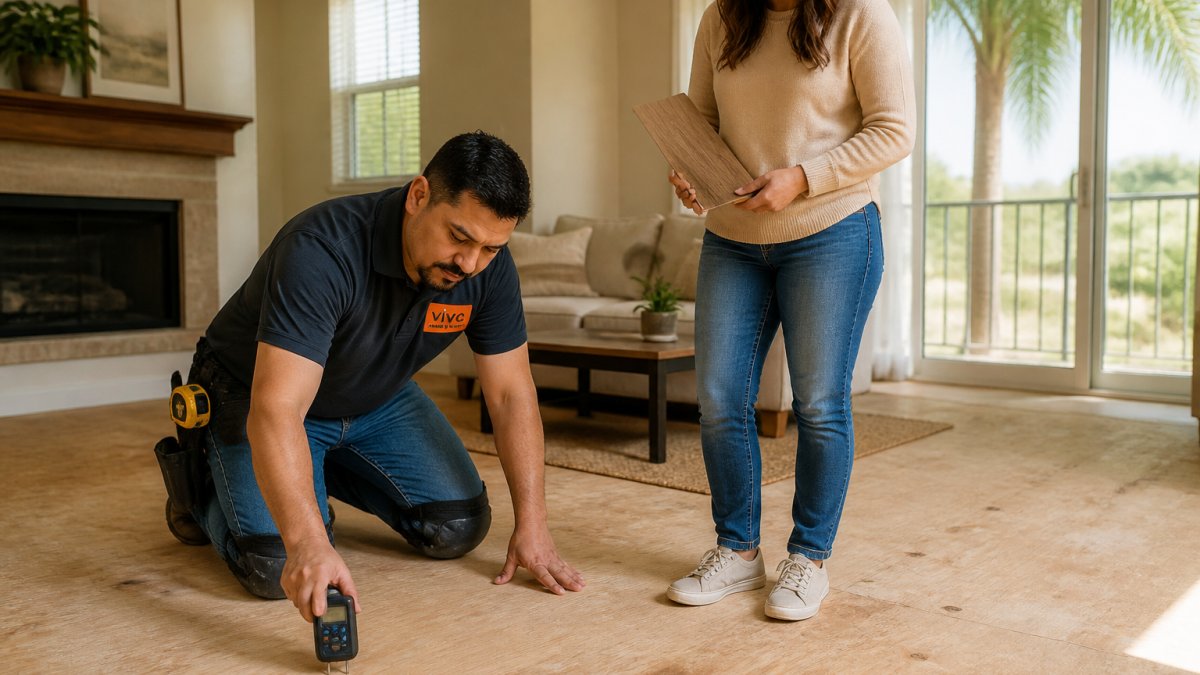
    Homeowner using a digital hygrometer to check moisture levels before starting a humidity flooring installation.
    Homeowner using a digital hygrometer to check moisture levels before starting a humidity flooring installation.

    Site log template

    • Date and time:
    • Room temperature (°F):
    • Relative humidity (%):
    • HVAC running? (yes/no):
    • Subfloor moisture reading:
    • Notes on doors, windows, or leaks:

    Writing these numbers down gives you proof if a delay or warranty question comes up later. It also shows whether the HVAC can hold steady conditions once the job starts.

    Subfloor Moisture Testing Before Flooring Installation

    Concrete slabs hold moisture for a long time, and that moisture can push up through flooring. Test the slab with a moisture meter or a calcium chloride test before installing anything.

    Watch out: a slab that tests dry on the surface can still hold moisture deeper down. Retest after any rain or humid stretch.

    If readings are high, the install waits. Fixing the slab first costs less than tearing out a failed floor.

    Ideal Humidity for Wood Flooring Installation

    Most manufacturers recommend keeping indoor relative humidity in a steady range during and after installation. A commonly cited target is about 35 to 55 percent, with temperatures kept comfortable and stable. Check the specific product’s installation guide, because some specify tighter limits.

    Keep the HVAC running before, during, and after installation. Swings in humidity cause expansion, contraction, gaps, and cupping. Stable conditions protect the job from the start.

    Flooring Acclimation Time by Material

    Acclimation is not a fixed waiting period; it is the process of bringing flooring to moisture equilibrium with the installation room. The mechanism matters: wood and bamboo are hygroscopic, meaning they exchange moisture with the air until their moisture content (MC) matches the room’s equilibrium moisture content (EMC).

    Use the product’s installation guide as the governing document, because limits vary by brand and construction. The ranges below are planning estimates, not warranties.

    Request Estimate →

    • Solid hardwood: Usually the longest acclimation, often 3 to 7 days or more in the room, with cartons opened and spacers between them so air reaches the boards. Solid wood moves the most with humidity because it is a single thick piece of wood; a 3/4-inch solid oak floor can move noticeably across a 20-foot span as indoor RH swings. Many guides require the wood MC to be within about 2 to 4 percentage points of the room EMC before installation.
    • Engineered hardwood: Often 48 to 72 hours, sometimes longer for thick wear layers or wide planks. The cross-ply core reduces movement compared with solid wood, but the face veneer still responds to humidity, and wide engineered planks can gap or cup if the room is not conditioned. Follow the guide for whether cartons stay sealed or are opened.
    • Laminate: Commonly 48 to 72 hours in the room with cartons unopened or opened per the guide. Laminate is dimensionally stable against moisture at the surface, but the core is usually HDF, which swells if liquid water reaches it. Acclimation here is mostly about temperature equalization and preventing condensation on cold cartons.
    • Luxury vinyl plank (LVP) and vinyl tile: Often 24 to 48 hours, and some manufacturers waive acclimation if the product is stored in a conditioned space. Vinyl is not hygroscopic like wood, so the main risks are adhesive temperature, carton condensation, and subfloor moisture rather than board movement.
    • Tile (ceramic and porcelain): No acclimation for the tile itself, but the setting materials, grout, and substrate need stable temperature. Mortar and grout cure by hydration, not by drying, so they need temperatures typically above 50°F and below about 100°F per the product data sheet.

    Watch out: acclimating cartons in a garage, on a porch, or in an unconditioned sunroom does not count, because those conditions differ from the installation room and can leave the flooring at the wrong moisture content when it goes down. Keeping cartons in the installation room helps prevent moisture-related delays, while the same acclimation window is one of several factors that can shape hardwood installation timelines.

    A common pattern in humid climates is that installers extend acclimation by a day or two when the room’s RH is above the manufacturer’s upper limit, because the flooring will not reach equilibrium until the HVAC or dehumidification brings the space into range. If the room cannot be conditioned before delivery, delay delivery rather than acclimating in unstable air.

    Acclimation times vary by material, as summarised below.

    Material Typical acclimation Key note
    Solid hardwood 3 to 7 days or more Moves most with humidity
    Engineered hardwood 48 to 72 hours Cross-ply core reduces movement
    Laminate 48 to 72 hours Core is usually HDF
    LVP and vinyl tile 24 to 48 hours Not hygroscopic like wood
    Tile No acclimation for tile Setting materials need stable temperature
    Carpet 24 hours Mainly lets backing relax

    How Long Flooring Adhesive Takes to Dry in Humid Conditions

    Adhesive timing is where humidity most directly rewrites an installation schedule, and the key is to separate four different clocks that product labels often list separately:

    • Open time (working time): how long the adhesive stays tacky enough to bond after troweling. High humidity and high temperature usually shorten open time because the adhesive skins over faster, while low humidity can extend it. If open time passes before the plank is placed, the bond is weak even though the adhesive feels dry.
    • Flash time: the wait after troweling before placing flooring, which lets water or solvent leave the adhesive. In humid air, flash time lengthens because moisture leaves more slowly.
    • Cure time: how long the adhesive takes to reach full strength. This is the number that controls when heavy traffic, appliances, or finish work can follow.
    • Return-to-traffic time: the manufacturer’s stated wait before walking or loading the floor, which is usually shorter than full cure but longer than open time.

    Product chemistry changes the humidity response:

    • Water-based (latex/acrylic) adhesives: cure primarily by water evaporation, so high RH slows cure noticeably. In a room above roughly 65 to 70 percent RH, expect longer flash and cure times than the label’s typical-condition numbers, and keep air moving with fans and HVAC.
    • Moisture-cure urethane and polyurethane adhesives: cure by reacting with moisture, so very dry air can slow them while high humidity can accelerate the surface skin. They are common for engineered wood and some LVP, and they typically have short open times, so trowel only what can be covered within the stated working time.
    • Pressure-sensitive adhesives for LVP: bond on contact and are less sensitive to humidity during cure, but they still require the substrate and room to be within the manufacturer’s temperature and RH range, and they can fail if installed over a damp slab.
    • Hardwood floor finishes (polyurethane, waterborne, oil-modified): waterborne finishes dry by water evaporation and are humidity-sensitive; oil-modified and oil-based finishes dry by solvent evaporation and oxidation, which also slows in cool, humid air. Between coats, follow the label’s recoat window rather than a fixed hour count, because recoating too early traps solvent and too late can cause adhesion problems.

    A practical planning rule is to add buffer to the label times when the room is outside the product’s stated typical conditions.

    Watch out: rushing traffic or stacking materials on uncured adhesive can shift planks and break the bond, and the failure often appears weeks later as hollow spots or lifted edges rather than immediately.

    Document the adhesive product, batch, trowel size, room temperature, RH, and time of placement in the same site log used for moisture readings.

    What to Do When Humidity Is Out of Range

    When readings fall outside the acceptable band, stop and fix the environment first. Options include running a dehumidifier, adjusting the HVAC setpoint, or sealing a leak. Once the room holds steady for several days, retest before continuing.

    Sometimes the right choice is a moisture-tolerant product for the project. Our guide on Best Waterproof Flooring for Renovations: 2026 Guide covers the tradeoffs.

    Scheduling Your Installation Around Humidity

    Build buffer days into the schedule. A simple plan works well:

    1. Confirm site conditions for at least three days before delivery.
    2. Schedule acclimation time based on the product guide.
    3. Retest the subfloor the day before installation.
    4. Hold an extra day or two for adhesive cure in humid weather.

    A professional walk-through before installation can help confirm these numbers and timing. Learn what a professional flooring consultation covers, from accurate measurements to expert material selection. When you are ready to plan your project, request an estimate from Viva Floors & More for current pricing and availability. You can connect with our team in Brownsville and Pharr to book your installation.

    Frequently Asked Questions

    How long does flooring need to acclimate before installation?

    Most manufacturers recommend keeping unopened flooring cartons in the installation room for 48 to 72 hours before installation, though some products, especially solid hardwood, may need longer. Stack the boxes flat, leave them unopened, and keep the room within the temperature and relative humidity range listed on the product packaging. Check the specific manufacturer instructions for your product, because acclimation requirements vary by material, width, and construction. Skipping acclimation is one of the most common causes of gaps and cupping after installation.

    What indoor humidity is best for installing wood floors?

    Many manufacturers specify an indoor relative humidity of roughly 35 to 55 percent during installation and afterward, along with a stable temperature. Measure with a hygrometer in the installation room for several days before work begins to confirm the space holds steady. If readings fall outside the range in the product guidelines, running a dehumidifier or humidifier and allowing the space to stabilize before installation is usually the correct response. Always follow the specific range printed in your flooring manufacturer’s installation instructions.

    How long should a subfloor dry before flooring is installed?

    Drying time depends on the subfloor material, how it was installed, and the moisture conditions in the house. A new concrete slab can take a considerable time to dry, and the flooring manufacturer’s moisture limits should be met before installation. Test wood subfloors and concrete with an appropriate moisture meter or a calcium chloride or in-situ relative humidity test, and record the results. If readings exceed the flooring manufacturer’s limits, delay installation until the subfloor reaches an acceptable level.

    Can humidity delay floor finish or adhesive from drying?

    Yes. High humidity slows evaporation, which can extend the drying and curing time for water-based finishes, polyurethane, and many adhesives. Products that rely on solvent evaporation or moisture-curing chemistry may remain tacky or soft longer than the label states. Read the product data sheet for drying and cure times, allow for extra time in humid conditions, and avoid walking on or furniture loading the floor until the product has fully cured.


    Humidity will shape your timeline whether you plan for it or not. Measure the room, test the slab, and give materials time to settle. Viva Floors & More can help you build that schedule before the first board goes down. Request an estimate and we will walk through the plan with you.

  • How to Estimate the Cost of Installing Granite Countertops

    How to Estimate the Cost of Installing Granite Countertops

    Quick Summary

    The cost of installing granite countertops depends on more than the slab itself, since installed totals include fabrication, templating, cutouts, removal, delivery and labor. Ask each installer for an itemized quote so you can compare the full project price, not just the slab sticker price.

    • Ask for installed rate and slab price separately to see where the gap comes from.
    • Confirm whether the per-square-foot rate applies to measured area or slab area.
    • Fixed costs like templating and delivery make small jobs cost more per square foot.
    • A complete 40-square-foot quote should list at least eight to ten line items.
    • Compare bids line by line, since the lowest total may exclude removal or sealing.

    Table of Contents

    How to Estimate the Cost of Installing Granite Countertops

    Last Updated: November 2, 2026

    What Installed Granite Countertops Actually Cost

    If you want to know the cost of installing granite countertops, the honest answer is that it depends on far more than the stone itself. The quotes that surprise people most often leave out labor, removal, or fabrication. Granite prices vary by slab grade, color, and availability, and installed totals also reflect template visits, cutouts, sealing, and disposal of the old top.

    Installed cost is the full figure you pay: material, fabrication, delivery, and labor, combined. Material is only one line. A quote that lists only slab prices is not a complete estimate, and it is worth asking for the all-in number before you compare installers.

    Plan your budget around the total project, not the slab sticker price. Ask every installer for an itemized quote so you can see exactly what each figure covers.

    Granite Countertop Cost Per Square Foot Installed

    Per-square-foot pricing is the single most useful number for comparing granite bids, but only if you know which square foot the installer is charging for. Most shops quote an installed rate that bundles slab, fabrication, and basic installation into one figure, then add removal, cutouts, edges, and backsplash as separate lines.

    Granite pricing generally falls into rough tiers. Entry-level granite, such as common speckled and salt-and-pepper patterns in 2 cm or 3 cm slabs, usually sits in the lower tier. Mid-grade slabs with more movement or a preferred color fall in the middle, and exotic, book-matched, or very large-format slabs sit in the top tier. Treat any single national average with suspicion: the same slab can quote very differently from one market to another because fabrication labor, delivery distance, and shop capacity all move the number.

    Pro Tip
    Ask each installer for the installed rate and the slab price separately. If the two numbers are far apart, the gap is fabrication and labor, and that is the line worth negotiating.

    Measured area vs. slab area

    The square footage on a quote is often not the same as the square footage of your countertop. Two different numbers are commonly in play:

    • Measured area is the actual surface of the finished top, the number you get by measuring each run and multiplying by depth.
    • Slab area is the material the shop has to buy and cut. Because slabs come in fixed sizes and seams and edge cuts create waste, the slab area charged can be higher than the measured area, more so on an L-shaped or U-shaped layout with several seams.

    Ask the installer which number the rate applies to. A bid at a low rate on slab area can cost more than a bid at a higher rate on measured area. Comparing rates without confirming the basis is an easy way to be misled.

    What moves the per-square-foot rate

    • Slab grade and color, rare colors and book-matched slabs cost more per square foot and take longer to fabricate.
    • Thickness, 3 cm slabs are standard; 2 cm slabs often need a built-up edge, which adds fabrication.
    • Edge profile, an eased edge is typically included; ogee, bullnose, and built-up edges are priced per linear foot.
    • Cutouts, each sink, cooktop, and faucet hole is a line item.
    • Delivery distance and access, stairs, elevators, and long carries add labor.
    • Job size, small jobs carry the same fixed templating and delivery costs spread over fewer square feet, so the effective rate rises.

    For a current rate on a specific slab, the only reliable number is a written quote against your measurements. natural stone institute consumer resources publishes general guidance on stone selection and fabrication standards that is worth reading before you compare bids.

    Granite Countertop Cost Calculator: Building Your Own Estimate

    A simple calculator is easy to build on your own. Start with your total countertop square footage, multiply it by the installed rate quoted for your chosen slab, then add separate line items for removal, sink and faucet cutouts, backsplash, and any custom edges.

    1. Measure each run of countertop in linear feet and convert to square feet using depth.
    2. Multiply total square footage by the installed rate for your chosen grade.
    3. Add removal and disposal of the existing countertop.
    4. Add cutouts for the sink, faucet, and cooktop.
    5. Add edge profile upgrades and backsplash.
    6. Add a contingency of about 10 percent for surprises once the old top is pulled.

    Use this method to check that each bid covers the same items. Two quotes can look far apart simply because one includes removal and the other does not.

    Cost of 40 Square Feet of Granite Countertops

    Forty square feet is a useful benchmark because it is close to a typical single-run kitchen with a sink and a cooktop. The point of a worked example is not to predict your exact price, it is to show you which line items a complete quote should contain so you can check that every bid covers the same scope.

    Here is how a 40-square-foot project breaks down conceptually, using placeholder rates you should replace with your installer’s actual numbers:

    Line item Basis What to confirm
    Granite slab 40 sq ft measured, plus waste allowance Whether the rate is on measured or slab area
    Fabrication Per sq ft, plus per linear ft for edges Which edge profile is included
    Templating Flat visit fee Whether it is credited against the order
    Sink cutout Per cutout Undermount vs. drop-in
    Cooktop cutout Per cutout Whether it includes a radius polish
    Faucet holes Per hole Number and spacing
    Removal and disposal Flat or per sq ft Whether plumbing disconnect is included
    Delivery Flat, by distance Stairs and access charges
    Backsplash Per sq ft or per linear ft Height and material match
    Sealing Included or add-on Whether it is a return visit
    Sales tax On material and labor as applicable Local rate
    Key Takeaway
    A complete 40-square-foot quote should have at least eight to ten line items. A single lump sum is not a comparable bid, ask for the breakdown before you compare totals.

    Why small jobs cost more per square foot

    Fixed costs are the reason. Templating, delivery, and the shop’s setup time are roughly the same whether the job is 40 square feet or 80. Spread over 40 square feet, those fixed costs push the effective rate up; spread over 80, they shrink. That is why a 40-square-foot bid can look expensive next to a larger job’s advertised rate, the two are not quoting the same thing.

    A second factor is waste. A 40-square-foot kitchen with a sink cutout, a cooktop cutout, and one seam may require more slab area than the measured surface suggests, because the cutouts and seam placement constrain how the shop can lay out the cuts. Ask the installer to show you the slab layout before fabrication; a good shop will walk you through it. Understanding how these material constraints influence your final bill provides a clearer perspective on the broader scope of kitchen remodel expenses.

    Request Estimate →

    How to use this example

    Take the table above to every installer and ask them to fill in their own numbers against the same 40-square-foot scope. When the bids come back, compare line by line rather than total to total. The lowest total can be the bid with the most exclusions, such as missing removal, missing sealing, or a backsplash that was never in scope. The most useful comparison is the one where every bid covers the same items.

    For a written estimate against your actual measurements, request a quote from Viva Floors & More and ask for the itemized breakdown described above.

    Granite Countertop Removal and Installation Cost

    Removing an old countertop is a separate cost that many homeowners overlook. Removal labor, disconnecting the sink and plumbing, and hauling away the old material can add to the total. Some installers include removal in the base rate, while others bill it as a separate line, so read the quote carefully.

    Installation itself covers setting the slab, securing it, sealing seams, and reconnecting fixtures. Installers may also charge for a return visit to address any final adjustments. Ask whether the price includes these visits so there are no surprises at the end of the job.

    Removal and installation labor varies by job complexity and location. Viva Floors & More can walk you through what a full removal and install involves for your home.

    How Edges, Cutouts, and Backsplashes Change the Price

    Small design choices add up quickly. Ogee, bullnose, and other decorative edges cost more than a simple eased edge because they require extra fabrication time. Each sink, cooktop, or faucet cutout is another step, and a backsplash adds both material and labor.

    Here is a quick list of the features that most often raise a quote:

    • Decorative or built-up edge profiles
    • Undermount sink cutouts
    • Cooktop or range cutouts
    • Full-height or partial backsplashes
    • Waterfall ends or custom shapes

    Decide which features matter most to you before you request bids. That way every installer prices the same specification.

    Reading an Installer’s Quote and Planning Your Timeline

    A clear quote lists materials, fabrication, installation, removal, cutouts, edges, and delivery as separate items. If a bid is one lump sum with no breakdown, ask for the details before you sign. Confirm the slab you are buying is the one shown to you, and note the warranty terms.

    Homeowner and installer reviewing a quote while installing granite countertops in a kitchen under construction
    Homeowner and installer reviewing a quote while installing granite countertops in a kitchen under construction

    Timelines matter too. Templating, fabrication, and installation usually happen in stages, and slab availability can affect when work begins. Ask the installer to walk you through the schedule so you can plan around cooking and bathroom use during the project.

    The most common mistake is signing a quote without knowing what is excluded. Read every line and ask questions until the total makes sense.

    Request Your Estimate for Your Granite Countertop Project

    Ready to see real numbers for your kitchen or bathroom? Viva Floors & More serves homeowners, builders, and contractors across the Rio Grande Valley with a wide selection of flooring and countertop solutions. Our team can help you compare options, understand what goes into a quote, and plan your project. Request an estimate today and get an itemized picture of what your countertop project will cost.

    Frequently Asked Questions

    What is the average cost per square foot to install granite countertops?

    Installed granite countertop pricing varies with slab grade, color, fabrication complexity, and local labor rates, so no single figure applies to every project. Material and fabrication are usually the largest portion of the bill, while labor, templating, and removal add to it. Viva Floors & More can provide a current installed estimate based on your specific layout and material choice. Request an estimate from our team for pricing tied to your project rather than a generic average.

    Does granite countertop installation include removal of old countertops?

    Removal of an existing countertop is often quoted as a separate line item from installation. Scope depends on whether the old top is laminate, tile, or stone, how it is attached, and whether disposal is included. Ask any installer to state in writing whether removal, disposal, and plumbing or electrical reconnection are included. Viva Floors & More can walk you through what a complete quote should cover before you commit.

    How much do granite edges, cutouts, and backsplashes add to the cost?

    Edge profiles, sink and cooktop cutouts, faucet holes, and backsplashes are typically priced as add-ons, with more complex profiles and multiple cutouts increasing fabrication time. Ask for each of these to be itemized so you can see which choices drive the total. Pricing for these options depends on your layout and selected material, so confirm current figures directly with Viva Floors & More before finalizing your design.

    How long does it take to install granite countertops?

    Timelines usually include a template visit, fabrication at the shop, and the installation day itself, so the calendar span is longer than the install alone. Lead times depend on slab availability and the fabricator’s schedule. Plan for the full sequence rather than only the installation date, and confirm the schedule in writing when you receive your quote.

  • 5 Steps to Take When Flooring Planks Separate in Winter

    5 Steps to Take When Flooring Planks Separate in Winter

    Last Updated: November 1, 2026

    Quick Summary

    When flooring planks start separating in winter, first measure the gap width and indoor humidity, since dry heated air causes most seasonal shrinkage. Stabilize humidity in the manufacturer’s middle range before deciding on any repair, and wait for gaps to close, because flooring planks separating from seasonal dryness often resolve on their own.

    • Measure gaps at several spots and log indoor humidity at floor level for three to five days.
    • Hold indoor humidity steady in the flooring manufacturer’s recommended range rather than chasing the highest reading.
    • Give the floor two to four weeks at stable humidity before judging whether gaps are closing.
    • Do not fill laminate or hybrid gaps with caulk or putty, since it interferes with floating movement.
    • Contact your installer or warranty provider if gaps are wide, growing, or if boards move underfoot.

    Table of Contents

    Why Flooring Planks Separate in Winter

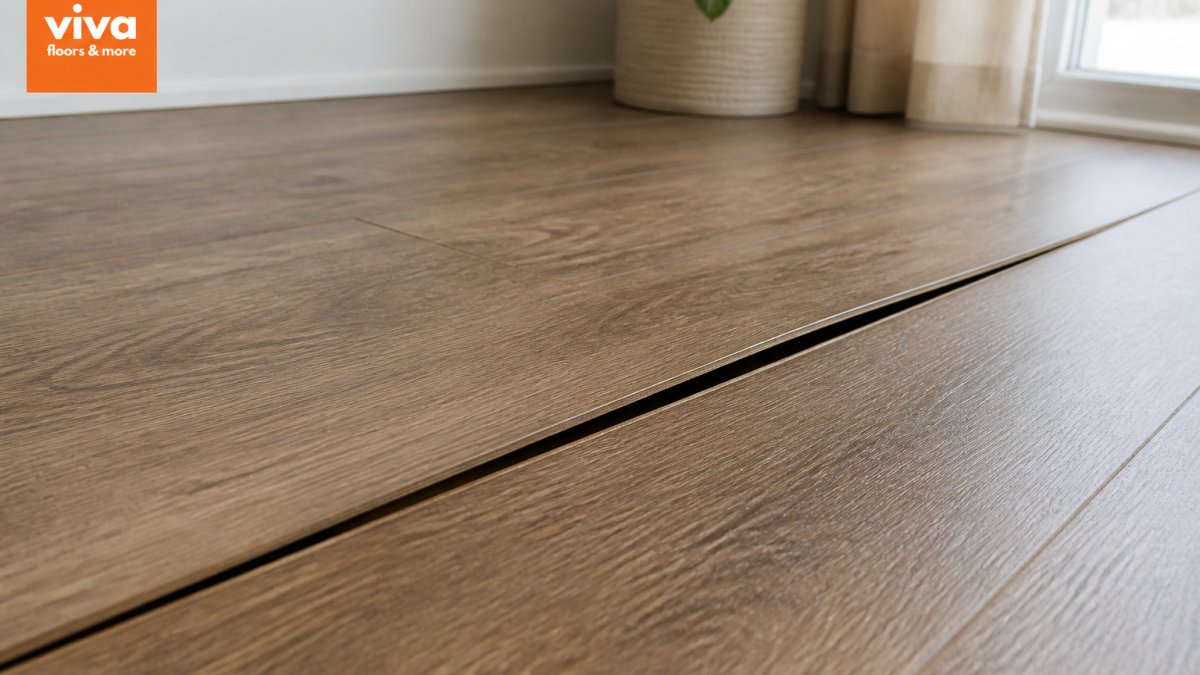
    Flooring planks often separate in winter because indoor air gets dry, and flooring planks separating is the most common result of that shrinkage.

    Seasonal gaps are common and usually harmless, though flooring planks separating in a single area can still signal a problem worth checking.

    Flooring separation is the visible gap that forms between boards when they shrink. It happens most often in hardwood, engineered wood, and laminate flooring during heating season.

    How low indoor humidity affects wood and laminate

    Wood is hygroscopic. That means it takes in and gives off moisture as the air around it changes. In dry winter air, boards release moisture and shrink across their width. Laminate and engineered wood can react the same way, though their cores often limit how much movement you see.

    Watch out: do not assume a gap is cosmetic until you have checked the humidity. Repeated drying can stress the boards and the joints between them.

    What Causes Gaps in Hardwood Floors Beyond Seasonal Change

    Seasonal shrinkage is the most common cause, but it is not the only one. Gaps can also come from:

    • Poor installation, such as missing expansion space at the walls
    • Subfloor movement or uneven support underneath
    • Boards that were not acclimated before installation

    If gaps appear suddenly, appear in only one area, or keep growing, look beyond the weather. Those patterns point to a structural or installation issue.

    Step 1: Measure Your Gaps and Indoor Humidity

    Before you fix anything, measure what you have. Two numbers matter most: the gap width and the indoor relative humidity.

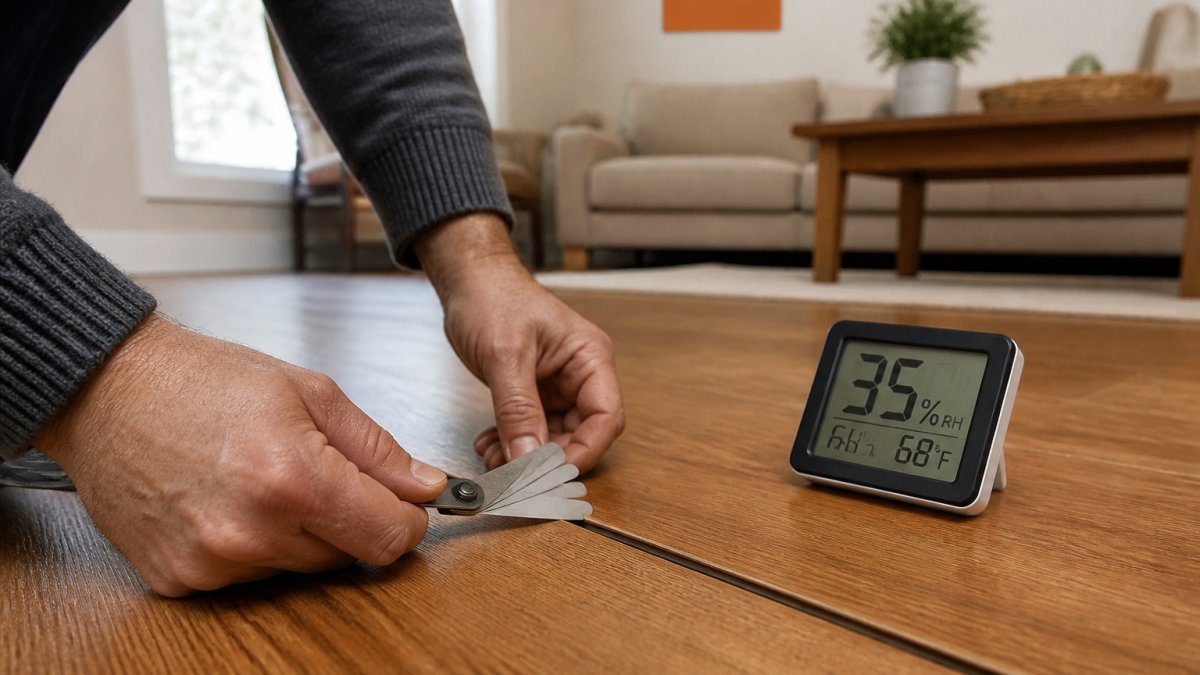
    Homeowner using a feeler gauge to measure flooring planks separating in a hardwood living room floor.
    Homeowner using a feeler gauge to measure flooring planks separating in a hardwood living room floor.
    • Use a feeler gauge or a thin ruler to measure the gap at several spots
    • Place a hygrometer in the room at floor level, away from vents and heaters
    • Record readings over a few days so you see the pattern

    Normal seasonal gaps versus problematic separation

    A thin seasonal gap that closes when humidity rises is usually normal. A gap that stays wide year-round, grows over time, or lifts board edges needs a closer look. Note whether the gap closes in spring and summer. That tells you a lot about the cause.

    Before choosing a fix, compare the key measurements and the most common causes so you know what to check.

    Item Check Why it matters
    Gap width Measure at several spots Thin, even gaps are usually seasonal
    Humidity reading Hygrometer at floor level Shows whether air is too dry
    Reading pattern Log for 3 to 5 days Reveals daily swings
    Gap behavior Does it close in spring? Points to seasonal cause
    Gap pattern Even or clustered? Clusters suggest localized causes
    Board condition Cupping, lifting, rocking Signals moisture or structural issues

    Ideal Indoor Humidity for Wood Floors and How to Reach It

    Wood flooring generally performs best when indoor relative humidity stays in a steady middle range through the year. Flooring manufacturers publish their own humidity targets, so check the guidance for your specific product because targets vary. The number matters less than the stability: a floor held at 40% all winter moves far less than one that swings between 25% and 50%.

    Measure before you humidify

    A humidifier without a target is guesswork. Do this first:

    • Get a hygrometer. A digital indoor hygrometer is an inexpensive tool available at most hardware stores and home centers. Calibrate it if the instructions allow, or cross-check it against a second meter.
    • Place it at floor level. Relative humidity stratifies, air near the ceiling can read several points drier or wetter than air at the boards. Set the meter on the floor in the room with the gaps, away from exterior doors, supply vents, and direct sun.
    • Log readings for 3 to 5 days. Record morning and evening numbers so you see the daily swing, not a single snapshot. A floor that reads 28% at night and 45% by afternoon is being cycled, and cycling drives movement.
    Pro Tip
    Write your readings down with the date and time. If you later contact your installer or manufacturer, a humidity log is far more persuasive than a description.

    Raise humidity gradually and hold it

    Once you know your baseline, close the gap to the target range over one to two weeks rather than all at once:

    Request Estimate →

    • Whole-home humidifier: A furnace-mounted bypass or fan-powered humidifier is the most consistent option for a whole house. Adjust the humidistat in small increments while watching the hygrometer, and stay within your flooring manufacturer’s range. Follow the unit’s manual for the correct setpoint at outdoor temperatures, most manufacturers publish a table that lowers the indoor setpoint as it gets colder outside to prevent window condensation.
    • Portable humidifier: Size it to the room, not the house. Portable humidifiers are rated for specific room sizes, so choose one sized to the room you are treating. Refill with distilled or filtered water if hard-water mineral dust is a concern.
    • Keep the thermostat steady: Large temperature setbacks overnight or while you are away let humidity fall and then spike when heat returns. A steady setpoint reduces the swing.

    Monitor the hygrometer after each change and give the floor two to four weeks at a stable reading before you judge whether gaps are closing. Wood responds slowly; a gap that looks unchanged after three days may still be recovering.

    Watch Out
    Do not chase the highest possible humidity reading. Pushing indoor relative humidity above your flooring manufacturer’s upper limit in cold weather can cause condensation on windows and cold surfaces, and sustained high humidity can swell boards and cause cupping. The goal is the middle of the range, held steady.

    Step 2 to 4: How to Fix Gaps Between Floor Planks Safely

    Once you have measured and stabilized humidity, work through these steps in order. The sequence matters: repairing before the floor has stabilized can mean filling a gap that would have closed on its own, or locking a board in place while it is still moving.

    Step 2: Inspect the floor and room conditions

    Before touching a gap, walk the floor and note what you find:

    • Gap pattern: Are gaps evenly distributed across the room, concentrated along one wall, or clustered near a doorway or vent? Even distribution points to seasonal shrinkage; a single cluster points to a localized cause.
    • Board condition: Look for cupped edges (edges higher than the center), crowned centers, lifted ends, or boards that rock underfoot. Cupping and crowning are moisture-related and are not fixed by filling gaps.
    • Fasteners and joints: Squeaks, movement underfoot, or visible loose boards suggest a subfloor or fastener problem rather than seasonal shrinkage.

    Step 3: Match the fix to the flooring type

    Repair options differ by product, and using the wrong one can damage the floor or void a warranty. Use this as a general guide and confirm against your manufacturer’s instructions:

    • Solid hardwood: Solid boards move the most across their width. Small seasonal gaps are usually left alone. If a gap persists after humidity is stable, a flooring professional may recommend sliver filling or a flexible filler matched to the finish; rigid epoxy or hard wax fillers can crack or be pushed out as the floor moves.
    • Engineered wood: The cross-ply core limits movement, so gaps tend to be smaller. Persistent gaps often trace to installation or subfloor issues rather than humidity alone. Filler must be compatible with the wear layer and finish; check the manufacturer’s guidance before filling.
    • Laminate: Laminate is a floating floor and moves as a unit. Gaps at plank ends or along a wall often mean the floor is binding against a wall, cabinet, or transition strip, or that the expansion space was undercut. Filling laminate gaps with caulk or putty is generally not recommended because it interferes with the floating movement; the better fix is usually to relieve the binding point.
    Key Takeaway
    If you are unsure of your flooring type or its warranty terms, stop before filling. A photo of the gap and a call to the manufacturer’s technical line is cheaper than a repair that voids coverage.

    Step 4: Decide whether to fill, wait, or escalate

    Use this decision order:

    1. Wait if the gap is small and seasonal. If the gap is narrow, even, and appeared during heating season, hold humidity in the target range for several weeks and reassess. Many gaps close on their own.
    2. Fill only if the gap persists and the flooring type allows it. Use a product approved for your specific flooring and follow the manufacturer’s instructions exactly. Test in an inconspicuous spot first.
    3. Escalate if any warning sign is present. Wide or growing gaps, cupped or buckled boards, movement underfoot, or gaps that appear shortly after installation should be inspected before any repair.

    When not to fill a gap yourself

    Do not fill a gap yourself if:

    • The gap is wide, growing, or appears across the whole floor
    • Boards are cupped, buckled, or lifting
    • The floor is a floating laminate or hybrid product and the gap may be a binding or expansion issue

    In those cases, stop and contact a professional. Filling the wrong gap can hide a problem that gets worse, and rigid fillers can crack or be forced out when the floor moves back in spring.

    Why Floor Planks Moving When Walking Signals a Bigger Problem

    Boards that shift or creak under foot often point to a loose subfloor, fasteners that have worked loose, or joints that are no longer locked together. Seasonal shrinkage alone rarely causes boards to move underfoot. Treat movement as a warning sign and have the floor inspected before it spreads.

    When to Contact Your Installer or Warranty Provider

    Contact your installer or the flooring manufacturer’s warranty provider if you see any of the following:

    • Gaps wider than the manufacturer’s guidance allows
    • Boards that move, lift, or make noise when walked on
    • Gaps that appear shortly after installation

    Keep your purchase records, installation paperwork, and photos of the gaps. These help the installer or warranty provider evaluate the claim quickly.

    Scheduling Your Flooring Assessment With Viva Floors & More

    If the gaps persist after you have stabilized humidity, or if you see warning signs, a professional assessment can sort out the cause. Our team at Viva Floors & More can help you decide whether the issue is seasonal, installation-related, or something that needs repair. Request an estimate to get started, and bring your humidity readings and photos so we can review them with you.

    Frequently Asked Questions

    Is it normal for hardwood floor gaps to appear in winter?

    Yes, small seasonal gaps are normal. Wood shrinks slightly when indoor air is dry, usually during heating season, and planks often return closer together in spring or summer. Gaps that are narrow, even, and disappear as humidity rises are generally harmless. Gaps that stay wide all year, grow steadily, or come with cupping, squeaking, or loose boards point to a different cause and deserve a professional inspection.

    Can low humidity cause laminate flooring to separate?

    Yes. Laminate and engineered wood are built from wood-based cores that respond to moisture changes, so dry indoor air in winter can pull seams apart. Keeping relative humidity in a stable range helps limit this movement. Use a hygrometer to check conditions, and run a humidifier if readings stay low for long stretches of the heating season.

    Should I fill floor gaps that appear in winter?

    Usually no. Seasonal gaps normally close as humidity returns, and filling them with wood filler or caulk can trap the planks, causing buckling when the wood expands in summer. Filling is only worth considering when a gap is permanent and the flooring manufacturer approves a specific method. Check your warranty first, since some repairs performed without authorization can void coverage.

    How do I fix gaps between floor planks that stay open?

    Start by confirming the cause: measure the gap, check humidity, and make sure the floor is not moving over an uneven subfloor. Then raise indoor humidity and monitor for a few weeks. If the gap remains, ask a flooring professional to assess whether the boards need re-securing, re-acclimating, or a manufacturer-approved repair. Avoid DIY fixes on floating floors without guidance, as they can cause further damage.

  • Is Marble Worth the Upkeep for Your Kitchen Counters?

    Is Marble Worth the Upkeep for Your Kitchen Counters?

    Last Updated: October 30, 2026

    Quick Summary

    Marble countertops are worth the upkeep if you value their natural, one-of-a-kind look and don’t mind sealing them periodically and wiping up spills promptly. They are a poor fit for busy households that want a low-effort surface, since marble is porous and etches when acidic foods or cleaners touch it.

    • Marble is porous, so it absorbs liquids unless it is sealed.
    • Acidic foods and cleaners, such as lemon juice and vinegar, etch the surface.
    • Test sealing with a few drops of water; if they darken the stone, reseal.
    • Plan 1.5 to 2.5 hours of active work per sealing session, plus cure time.
    • Quartz or porcelain suit anyone who wants low maintenance over natural character.

    Table of Contents

    Why Homeowners Choose Marble Countertops

    Marble has stayed popular in kitchens for good reason. Marble is a natural stone, and no two slabs look alike. Its soft veining and polished finish give a kitchen a look that engineered surfaces often try to copy but rarely match.

    Many homeowners choose marble because it feels like a true upgrade. It has a classic, timeless appearance that pairs well with both traditional and modern cabinetry. For people who love natural materials, that authenticity is often the deciding factor.

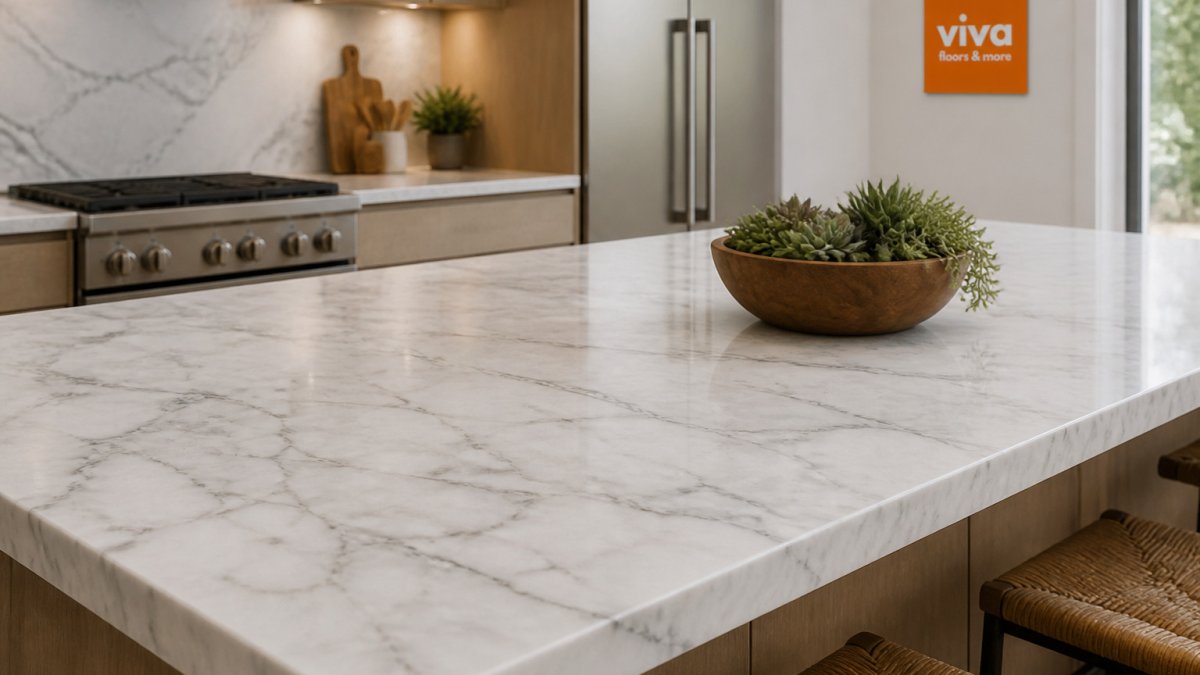
    Sunlight hits a polished white island with marble countertops in a bright South Texas kitchen kitchen setting.
    Sunlight hits a polished white island with marble countertops in a bright South Texas kitchen kitchen setting.

    Marble Countertop Pros and Cons

    Marble has real strengths, but it also asks more of its owner than many other surfaces do. Knowing both sides helps you decide if it fits your kitchen.

    Pros:

    • Distinctive, one-of-a-kind veining

    • Classic look that holds its appeal over time

    Cons:

    • Porous, so it absorbs liquids unless sealed
    • Etches when acidic foods or cleaners touch it
    • Scratches and can chip under hard impact
    • Requires regular cleaning habits and periodic sealing

    Marble is not the right pick for every household. If you want a low-effort surface, its care needs may feel like a burden. If you enjoy the ritual of caring for natural stone, the trade-off can feel worthwhile.

    Stains, Etching, and Scratches: What Marble Really Tolerates

    Marble stains more easily than many countertop materials because it is porous. Oil, wine, and coffee can soak in if they sit too long.

    Etching is the marble-specific issue most owners notice first. Lemon juice, vinegar, and many common cleaners contain acids that dull the polished surface.

    • Wipe up acidic spills, such as citrus or wine, right away
    • Use cutting boards, since knives can scratch the surface
    • Keep coasters near drinks and hot cookware

    Scratches and chips are less common in daily use, but they can happen with heavy pots or dropped items.

    How to Clean Marble Countertops Without Damaging Them

    Routine cleaning is simple once you know the rule: avoid acids. Use a pH-neutral stone cleaner or warm water with a small amount of mild dish soap. Wipe with a soft microfiber cloth and dry the surface afterward.

    Avoid vinegar, lemon-based cleaners, and abrasive scrubbers. These can etch the finish over time. Quick cleanups after spills matter more than deep cleaning once a week.

    Simple cleaning routine:

    Request Estimate →

    1. Rinse the surface with warm water.
    2. Apply a pH-neutral stone cleaner or a drop of mild dish soap.
    3. Wipe gently with a soft cloth.
    4. Rinse with clean water and dry completely.

    How Often to Seal Marble Countertops and What It Costs in Time

    Sealing is the maintenance task that most clearly separates marble from engineered surfaces, and it is the one homeowners underestimate. Because marble is porous, a sealer fills the microscopic pores near the surface and slows liquid absorption. It does not make the stone waterproof, and it does not prevent etching from acids, it only buys you time to wipe up a spill before it soaks in.

    A realistic sealing schedule

    There is no single correct interval. Sealer type, finish, and how hard the kitchen works all shift the timeline.

    The water-drop test

    Rather than guessing, test the surface. Place a few drops of water on an inconspicuous area and wait 10 to 15 minutes. If the stone darkens or the water absorbs, the sealer is failing and it is time to reseal. If the drops bead on the surface, the sealer is still working. Check once or twice a year, and always before entertaining season or after any renovation that exposes the stone to new cleaners.

    What sealing actually takes in time and money

    Plan on roughly 1.5 to 2.5 hours of active work per sealing session, plus cure time when the counter should stay dry. A quality penetrating sealer generally runs about $25 to $60 per bottle at home centers, and one bottle usually covers multiple applications for a typical kitchen. Professional sealing, if you prefer it, is commonly quoted in the low hundreds of dollars per visit depending on square footage and local labor rates.

    The total-cost view

    Sealing is only one line item in marble ownership.

    Sealing is the upkeep task that most separates marble from other surfaces, so here is what it involves in time and cost.

    Item Value Note
    Active work per sealing session 1.5 to 2.5 hours Plus cure time with the counter kept dry
    Penetrating sealer price $25 to $60 per bottle One bottle often covers several applications
    Professional sealing Low hundreds of dollars per visit Depends on square footage and local labor rates
    Water-drop test time 10 to 15 minutes Drops that bead mean the sealer still works

    Marble vs Quartz Countertops: Which Fits Your Kitchen

    Quartz is the most common alternative homeowners weigh against marble, but it is not the only one. A fair decision looks at marble against quartz, granite, and porcelain on the dimensions that actually drive satisfaction: maintenance, durability, appearance, and cost.

    Maintenance

    • Marble: porous, so it needs periodic sealing and prompt spill cleanup. Acids etch the surface, and polished finishes show dull spots more readily than honed ones.
    • Quartz: engineered with resin binders, so it is nonporous and does not require sealing. It resists stains and stands up to acidic foods without etching, which removes marble’s two biggest care concerns.
    • Granite: natural and porous like marble, so it needs sealing, but it is generally harder and less acid-sensitive than marble. It resists etching better, though it can still stain if a spill sits.
    • Porcelain: nonporous and highly stain- and etch-resistant, with no sealing required. It is the lowest-maintenance option of the four, though edges and seams need careful installation.

    Durability

    • Marble: softer than granite or quartz, so it scratches and chips more easily under heavy impact. Heat tolerance is good for everyday cooking, but a trivet is still wise.
    • Quartz: hard and impact-resistant, though very high heat can damage the resin binder, so hot pans should not sit directly on it.
    • Granite: hard and heat-tolerant, one of the most durable natural options, though it can chip at edges.
    • Porcelain: hard and heat-resistant, but thin profiles can crack under concentrated impact if not properly supported.

    Appearance

    • Marble: one-of-a-kind veining and a classic, natural look that engineered surfaces try to imitate. It develops a patina with use, which some owners love and others dislike.
    • Quartz: consistent, uniform patterns with little variation between slabs, an advantage for matching and a drawback for those who want natural character.
    • Granite: natural variation and speckled or veined movement, generally busier than marble.
    • Porcelain: can mimic marble or stone closely, but the pattern is printed and repeats, so it lacks the depth of real stone.

    Cost

    • Marble: natural stone; pricing depends on slab, thickness, edge profile, and installation complexity. Viva Floors & More can provide current pricing on request.
    • Quartz: pricing depends on brand and slab size.
    • Granite: pricing depends on the slab selected.
    • Porcelain: pricing depends on the product and installation.
    Key Takeaway
    If low maintenance is the priority, quartz or porcelain wins. If natural character matters more than convenience, marble or granite is the better fit, and between those two, granite is the more forgiving everyday surface.

    Which fits your kitchen

    Choose marble when the look is the point and you are willing to seal, wipe promptly, and accept some patina. Choose quartz when you want the stone look with near-zero upkeep. Choose granite when you want natural stone with more forgiveness. Choose porcelain when budget and easy care top the list. If you are weighing these options, you can request an estimate from Viva Floors & More for current pricing and selections. You can also National Kitchen & Bath Association guidance on countertop materials to understand general material differences before you shop.

    Deciding Whether Marble Is Worth It for Your Household

    Marble is worth the upkeep when the look matters to you and you are willing to care for the surface. It can be a poor fit when you want a set-and-forget counter, especially in a busy kitchen with children or frequent cooking.

    Ask yourself a few direct questions. Do you cook with acidic ingredients often? Do you enjoy caring for natural materials? Are you comfortable with periodic sealing? If most of your answers are yes, marble may be a strong choice.

    If you are still unsure, a professional consultation can help you compare marble with other options against your budget and daily routine. Viva Floors & More offers expert consultation and flooring advice.

    Frequently Asked Questions

    Is marble good for kitchen countertops?

    Marble is good for kitchen countertops if you value its appearance and are willing to care for it. It is a natural stone with distinctive veining. The trade-off is that it is porous, so it stains and etches more easily than engineered surfaces like quartz. Homeowners who cook lightly, wipe up spills quickly, and accept a patina over time usually find marble rewarding. Households with heavy daily cooking, acidic foods, or young children often find it demanding and may prefer quartz.

    Can I use Dawn dish soap on marble?

    A mild dish soap diluted in warm water can be used for occasional cleaning, but a pH-neutral stone cleaner is a safer everyday choice. Many dish soaps are slightly acidic or leave residue that dulls the finish over time. A pH-neutral stone cleaner is the safer default for daily use. Reserve dish soap for occasional deep cleaning, rinse thoroughly, and dry the surface with a soft cloth so no film builds up.

    Is marble hard to maintain?

    Marble is more demanding to maintain than most countertop materials, but the work is routine rather than difficult. Expect to wipe spills promptly, clean with a stone-safe product, avoid acidic cleaners, and reseal on a regular schedule. Basic upkeep involves regular cleaning and periodic sealing. The bigger commitment is accepting that some etching and surface wear will occur, especially on honed or polished finishes used daily.

    Do marble countertops stain or etch easily?

    Marble stains and etches more readily than quartz, granite, or other nonporous surfaces. Oils, wine, and coffee can soak in if left on the stone, and acidic foods such as lemon juice, vinegar, and tomatoes can dull the polish by etching the surface. Sealing reduces staining considerably, and quick cleanup prevents most problems. Etching cannot be fully prevented, and it may remain visible over time.


    Ready to explore marble for your kitchen? Request an estimate from Viva Floors & More, and our team will help you find the right material for your home.

  • 7 White Oak Flooring Facts Before You Buy

    7 White Oak Flooring Facts Before You Buy

    Quick Summary

    White oak flooring is a solid or engineered hardwood cut from the white oak tree, valued for its neutral tone, tight grain, and closed-cell structure that resists moisture better than many domestic hardwoods. It suits both traditional and modern interiors. The right choice depends on your subfloor, budget, and how the finish will look in your space.

    • White oak has a closed grain structure, making it more moisture resistant than many other domestic hardwoods.
    • Grain pattern and tone vary from board to board, so ask to see several boards before committing.
    • Engineered white oak suits concrete slabs and basements, while solid boards need a stable, above-grade subfloor.
    • Order 5% to 10% extra material to cover waste, and keep leftover boards for future repairs.
    • Ask for the wear layer thickness in millimeters, since thicker layers can be refinished more times.

    Table of Contents

    What Makes White Oak Flooring Stand Out

    Last Updated: October 28, 2026

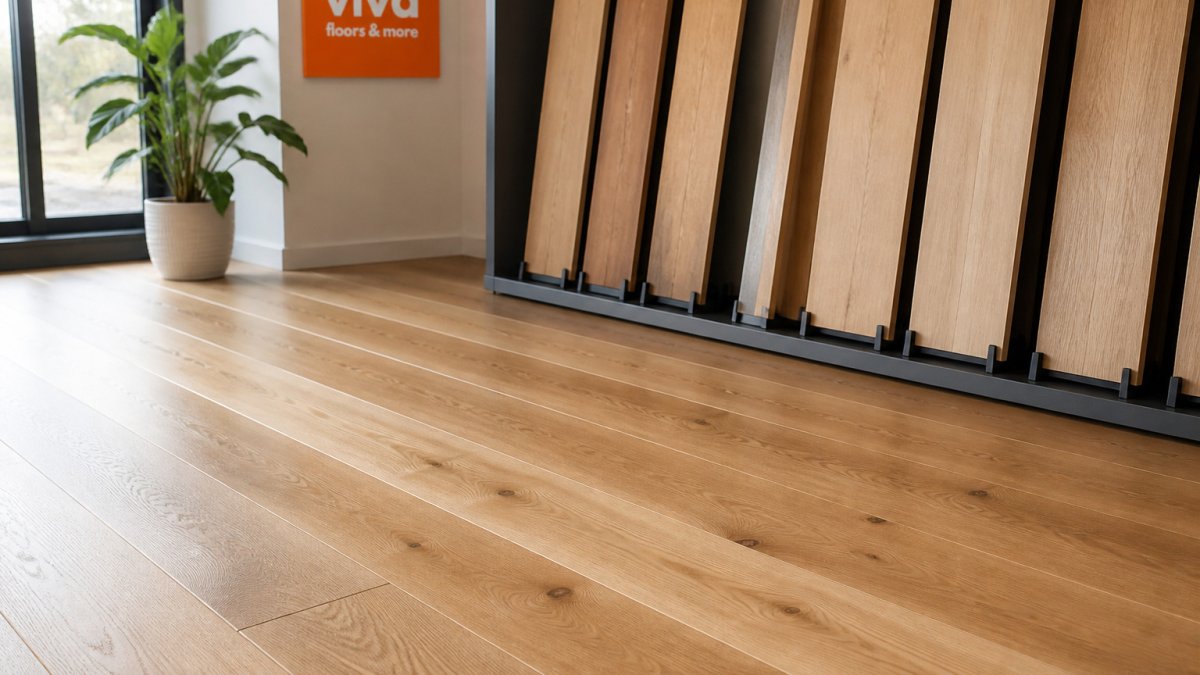
    Infographic showing the grain patterns and matte finish of premium white oak flooring in a bright room
    Infographic showing the grain patterns and matte finish of premium white oak flooring in a bright room

    White oak flooring is one of the most requested hardwood options for Rio Grande Valley homes, and for good reason. White oak is known for its neutral tone, tight grain, and ability to suit a range of interior styles. White oak flooring is a solid or engineered hardwood cut from the white oak tree, prized for its closed-cell structure and its versatility in both traditional and modern rooms.

    Before you buy, it helps to understand what sets white oak apart from other hardwoods. Here are seven facts that matter most for your decision.

    1. White oak has a closed grain structure. This makes it more resistant to moisture than many other domestic hardwoods.
    2. Grain pattern varies from board to board. Expect natural differences in figure, ray flecks, and tone.
    3. Finish choice changes the final look dramatically. A clear matte finish and a smoked stain can produce very different floors from the same board.
    4. Engineered and solid versions both exist. Each suits different subfloors and budgets.
    5. Plank width affects the overall feel. Wider planks show more of the grain and read as more contemporary.
    6. Installed cost goes beyond the board price. Underlayment, subfloor prep, and labor all add to the total.
    7. Care requirements depend on the finish. The right sealer and cleaning routine extend the life of the floor.

    Grain Patterns and Natural Variation

    White oak grain is one of its most distinctive features. Quarter-sawn boards show tight, straight lines, while plain-sawn boards display broader cathedral figures. Neither is better; they simply create different looks. Plan for natural variation across the room, and ask to see several boards before committing so you can judge the pattern yourself.

    Color, Tone, and How Finishes Change the Look

    White oak tends toward warm, honey-leaning tones in its natural state. A clear finish keeps that warmth, while a wash or gray stain can cool the floor significantly. Lighting also plays a role. A floor that looks golden in a showroom can read softer or cooler at home, so view samples in your own space when possible.

    White Oak Flooring Pros and Cons

    White oak offers real advantages. It is hard, durable, and holds up well to daily foot traffic. Its natural resistance to moisture makes it a reasonable choice for kitchens and living areas. It also takes stain predictably, which gives designers flexibility.

    The drawbacks are worth knowing. Grain variation means some customers find the floor less uniform than they expected. White oak can also cost more than common engineered alternatives, and it requires professional installation to perform well. Solid boards need proper acclimation, and any hardwood can show scratches under heavy pet traffic. A quick review of your household needs will show whether those trade-offs make sense.

    White Oak Flooring Cost Per Square Foot and Budgeting

    What buyers need is a budgeting framework: which line items drive the total, which ones are fixed, and which ones they can control.

    The five cost layers of a white oak floor

    1. Trim and transitions. Baseboards, shoe molding, stair nosings, reducer strips, and threshold pieces where white oak meets tile, carpet, or concrete.

    How the material price moves

    Because these variables interact, the honest answer to “how much is white oak flooring per square foot” is a range, not a point. Ask any supplier to quote material, labor, and finishing as separate line items so you can compare bids apples to apples.

    The waste allowance most homeowners forget

    Order 5% to 10% extra material over the measured square footage. Straight-lay installations in simple rectangular rooms sit near the low end; diagonal layouts, herringbone, and rooms with many corners and doorways push toward the high end. Keep the leftover boards, they are your repair stock for future damage, and matching a dye lot later is difficult.

    A budgeting checklist

    Before you sign a quote, confirm it addresses each of these:

    • Measured square footage and the waste percentage applied

    For current pricing on specific white oak products and a project-specific quote, contact Viva Floors & More directly.

    White Oak vs Red Oak Flooring: Which Fits Your Home

    Red oak and white oak look similar at first glance, but they differ in important ways. Red oak has a more open grain and a pinkish undertone, while white oak is generally more neutral and tighter-grained. White oak’s closed cell structure gives it better moisture resistance, which matters in humid South Texas homes. Red oak can be a fine choice for dry interiors and a more traditional look.

    Request Estimate →

    Solid or Engineered White Oak: Choosing the Right Construction

    Solid and engineered white oak are both real white oak on the surface. The difference is what sits underneath, and that difference determines which subfloors, rooms, and installation methods will work in your home. This is the decision that most often gets made on price alone, and most often gets regretted.

    What each construction actually is

    Solid white oak is milled from a single piece of hardwood, typically 3/4 inch thick. Because the whole board is oak, it can be sanded and refinished multiple times over its life, a meaningful advantage in a long-term home.

    Engineered white oak uses a real white oak wear layer bonded to a plywood or high-density fiber core. The wear layer thickness is the number that matters: a thicker wear layer (roughly 3 mm and up) can be refinished at least once or twice, while a thin veneer (around 1-2 mm) is effectively a one-finish floor. Always ask for the wear layer thickness in millimeters, not just the overall board thickness.

    Subfloor compatibility

    This is where the two constructions diverge most sharply.

    • Solid white oak needs a stable, dry, above-grade subfloor, typically plywood or oriented strand board over a wood-framed floor. It is nailed down. It is generally not recommended over concrete slabs or in basements because it moves too much with moisture changes.
    • Engineered white oak is dimensionally stable enough to glue down directly to a concrete slab, float over an underlayment, or nail to a wood subfloor. That flexibility is why engineered is the usual choice for slab-on-grade homes, basements, and rooms over radiant heat.

    If your home sits on a slab, common in warm, humid climates, engineered white oak is usually the practical default, and solid white oak is usually ruled out unless a plywood sleeper system is built first.

    Installation methods, briefly

    Method Works with Notes
    Nail-down Solid and engineered over wood subfloor Most traditional; requires a nailer and a sound subfloor
    Glue-down Engineered over concrete or wood Strong, quiet, and dimensionally stable; adhesive choice matters in humid rooms
    Floating Engineered over underlayment Fastest; the floor expands and contracts as one unit

    Acclimation and moisture testing

    No installation should begin until the flooring has acclimated to the indoor environment and the subfloor moisture has been measured. For wood subfloors, a moisture meter reading is standard practice; for concrete, a calcium chloride or in-situ relative humidity test is the usual check. Skipping this step is the single most common cause of cupping, gapping, and buckle, and it voids most manufacturers’ warranties.

    Which one fits your project

    Choose solid white oak if you have a wood-framed, above-grade subfloor, want the longest possible refinishing life, and plan to stay in the home long enough to justify it. Choose engineered white oak if you have a concrete slab, a basement, radiant heat, or a tighter budget, and confirm the wear layer thickness before you buy. Either way, the installation method and moisture testing matter more to how the floor performs than the construction label on the box.

    Durability, Moisture, and Installation Requirements

    White oak’s hardness makes it well suited to busy households, but no hardwood is immune to moisture or heavy wear. Keep indoor humidity steady, use mats at entries, and address spills promptly. Installation requirements differ by construction type: solid floors need proper acclimation and nailing to a suitable subfloor, while engineered floors can often float or glue down. Height differences where white oak meets other flooring can be managed with the right transition pieces.

    Choosing Your White Oak Floor With Viva Floors

    At Viva Floors & More, our team helps Rio Grande Valley homeowners, builders, and contractors with expert flooring guidance. Visit one of our showrooms in Pharr or Brownsville, or request an estimate to start planning your project.

    Frequently Asked Questions

    How much is white oak hardwood flooring per square foot?

    For current pricing on the products you are considering, request an estimate from Viva Floors & More.

    Is white oak a hardwood?

    Yes. White oak is a hardwood, meaning it comes from a broadleaf deciduous tree rather than a conifer. It is a dense, closed-grain species that is widely used for flooring, cabinetry, and furniture. Its hardness and tight grain make it a common choice for high-use residential and light commercial spaces. Because it is a natural material, its color and grain vary from board to board, which is part of its appeal.

    Does white oak flooring look gray or yellow?

    White oak can look gray, golden, or somewhere between depending on the stain, finish, and lighting in the room. Clear or matte finishes tend to show the natural warm tone of the wood, while gray-toned stains and certain finishes push it cooler. Natural daylight and the color of your walls and cabinetry also change how the floor reads. Viewing sample boards in your own space before committing is the most reliable way to judge the final look.

    Can white oak flooring be refinished?

    Solid white oak flooring can usually be sanded and refinished several times, provided the wear layer is thick enough to allow it. Engineered white oak can be refinished only if it has a sufficiently thick hardwood top layer, which varies by product, so check the specifications before buying. Refinishing lets you change the stain color or restore the surface after years of traffic. Regular cleaning and protective maintenance extend the time between refinishing projects.

  • Which Flooring Brands Are Best for Builders?

    Which Flooring Brands Are Best for Builders?

    Last Updated: October 25, 2026

    Quick Summary

    The best flooring brands for builders are those with published wear-layer specs, stable dye lots, real warranty terms, and stock you can reorder mid-build. Brand reputation matters less than lot consistency, so a mid-tier brand with steady inventory beats a premium brand that discontinues your color mid-project.

    • Builders should judge brands on spec transparency, supply reliability, and installation tolerance.
    • Wear layer is the single most predictive spec for service life, measured in mils.
    • Rigid-core LVP with a 20 mil wear layer or higher suits market-rate rentals.
    • Laminate is not waterproof, so keep it out of bathrooms and laundry rooms.
    • Plan for 5-10% waste on simple rooms and 10-15% on rooms with many angles.

    Table of Contents

    What Builders Actually Need From a Flooring Brand

    Builders shopping for the best flooring brands for builders rarely need the flashiest catalog. They need consistent inventory, honest specs, and a supplier who answers the phone in week six of a project.

    Here is the short answer. The best flooring brands for builders are the ones with published wear-layer specs, stable dye lots, real warranty terms, and stock you can reorder mid-build.

    Three criteria decide whether a flooring brand belongs on a builder’s approved list:

    • Spec transparency: wear layer measured in mils, thickness in millimeters, and a written warranty you can read before you buy
    • Supply reliability: the SKU you sampled in March still exists in July, in the same color
    • Installation tolerance: planks that click cleanly over a subfloor that is not perfectly flat, because job-site subfloors rarely are

    What most guides miss is that brand reputation matters less than lot consistency. If you are sourcing in volume for multiple units, our guide to bulk flooring supplies for local contractors covers how to plan orders around build schedules.

    Best LVP Flooring Brands for High-Traffic Builds

    Luxury vinyl plank is the default choice for rental units, multi-family builds, and commercial lease spaces, and for good reason. It handles moisture, cleans easily, and installs fast.

    A builder and a flooring specialist examining planks of luxury vinyl flooring in a warehouse showroom, with rows of flooring samples and product boxes visible in the background
    A builder and a flooring specialist examining planks of luxury vinyl flooring in a warehouse showroom, with rows of flooring samples and product boxes visible in the background

    Our shortlist for high-traffic work:

    1. Commercial-grade LVT lines for offices, clinics, and schools, where the spec sheet lists a thicker wear layer and a commercial warranty
    2. Rigid-core LVP for rentals and multi-family units, since the rigid backing hides minor subfloor imperfections
    3. Standard glue-down LVT for lease spaces where budget drives the decision and traffic is moderate

    A common mistake is specifying residential LVP for a commercial corridor. For projects that need commercial specifications and volume pricing, see our commercial flooring options for the Rio Grande Valley.

    Builder-Specific Criteria for LVP Selection

    Most LVP roundups rank brands by homeowner preferences, color, feel, and price per square foot. Builders need a different scorecard. Before you approve an LVP brand for a multi-unit or phased project, run it through these five filters:

    • Volume pricing tiers and order minimums. Ask for the brand’s builder price sheet, not the retail tag. Most manufacturers publish tiered pricing that drops at pallet or truckload quantities. Confirm whether the tier applies per SKU or per total order, and whether mixed-color orders count toward the same tier.
    • Lead times and stock depth. A brand that quotes two weeks on a sample may quote eight weeks on a 20,000-square-foot order. Request current lead times in writing and ask whether the SKU is stocked domestically or made to order. Domestic stock shortens the reorder cycle when a crew runs short.
    • Discontinued-product risk. Manufacturers retire colors and constructions on rolling cycles. Before you spec a color across 40 units, ask the rep how long that SKU has been in the line and whether a replacement is already listed. A color that has been active for years is safer than a new introduction.
    Pro Tip
    Build a one-page spec sheet for each approved LVP brand listing wear layer in mils, overall thickness in millimeters, commercial warranty term, current lead time, and dye-lot policy. Require the rep to sign it. That sheet settles most mid-project disputes before they start.

    Matching LVP Construction to Project Type

    Not every LVP construction belongs in every unit. Use this quick mapping:

    Project Type Recommended Construction Why
    Market-rate rentals Rigid-core LVP, 20 mil wear layer or higher Hides minor subfloor variation; resists tenant abuse
    Affordable housing Glue-down LVT, 12-20 mil Lower material cost; stable under heavy furniture
    Multi-family common areas Commercial-grade LVT, 28 mil or higher Meets commercial traffic; easier to clean
    Light-commercial lease spaces Commercial glue-down LVT Replaceable in sections; commercial warranty
    Model homes and sales centers Rigid-core LVP with enhanced visuals Presentation quality without hardwood cost

    Wear layer is the single most predictive spec for service life. A 12 mil wear layer suits light residential traffic; 20 mil handles rentals and pets; 28 mil and above enters commercial territory. Ask for the number in mils, in writing, and compare like for like, some brands publish wear layer in millimeters, which requires conversion.

    For projects that need commercial specifications and volume pricing, see our commercial flooring options for the Rio Grande Valley.

    Best Hardwood Flooring Brands When Buyers Expect Real Wood

    Hardwood belongs in custom homes and higher-end resales, where the buyer inspects the floor as a feature, not a surface.

    Solid hardwood moves with seasonal moisture. Engineered hardwood handles that movement better in our climate, which is why we steer most South Texas builds toward engineered planks with a thick wear veneer.

    Watch out: buying hardwood by price per square foot alone usually means a thinner veneer that cannot be refinished. You can review the hardwood lines we stock to compare veneer thickness across brands before you spec.

    Flooring Type Best For Key Spec to Check Maintenance Level
    Rigid-core LVP Rentals, multi-family Wear layer in mils Low
    Glue-down LVT Commercial lease spaces Commercial warranty Low
    Engineered hardwood Custom homes Veneer thickness Medium
    Laminate Budget builds AC rating Low
    Carpet tile Offices, clinics Face weight Medium

    Best Laminate Flooring Brands for Budget-Conscious Projects

    Laminate is the value play, and it has earned back trust after years of being dismissed as a cheap alternative. The best laminate flooring brands for builders offer realistic wood-look visuals at a lower installed cost than hardwood, with better scratch resistance than most people expect.

    Two specs separate good laminate from bad:

    Request Estimate →

    • AC rating: the abrasion class rating tells you how the surface holds up under traffic
    • Core density: denser cores resist moisture swelling at the seams

    For rental properties and spec homes, laminate delivers the real-wood feel buyers want without the maintenance conversation. Where it falls short is water exposure. Laminate is not waterproof flooring, so keep it out of bathrooms and laundry rooms.

    Installed Cost and Lifecycle Economics

    Material price per square foot is only the first line of a laminate budget. Builders should compare laminate against LVP and engineered hardwood on installed cost, waste allowance, and expected service life:

    • Material cost: laminate typically lands below engineered hardwood and near the low end of LVP. Ask for builder pricing at pallet quantities.
    • Underlayment: most laminate requires an underlayment for sound and moisture control. Some brands attach it to the plank; others sell it separately. Confirm which applies to your SKU.
    • Subfloor tolerance: laminate demands a flatter subfloor than rigid-core LVP. Budget for leveling compound on older slabs, or the floor will telegraph imperfections and click seams will fail.
    Watch Out
    Laminate is not waterproof. A single supply-line leak or an overflowing tub can swell the core beyond repair. For bathrooms, laundry rooms, and basements, spec LVP or tile instead.

    Brand-Level Guidance for Builders

    Rather than naming a single winner, evaluate laminate brands on the same builder criteria you apply to LVP:

    • AC rating transparency: the brand should publish the AC rating on the spec sheet, not bury it in marketing copy. AC3 suits residential; AC4 and AC5 handle heavier traffic.
    • Core construction: high-density fiberboard cores resist swelling better than standard cores. Ask for the density figure and the brand’s moisture warranty terms.
    • Warranty exclusions: laminate warranties often exclude moisture damage and require specific underlayment. Read the exclusions before you spec.

    For a deeper breakdown of wear resistance and long-term performance, our durable flooring buyer’s guide walks through how each spec affects lifespan in high-traffic rooms.

    How to Choose Quality Vinyl Flooring: Specs That Decide Performance

    Quality vinyl flooring is defined by four numbers, and every one of them appears on the product spec sheet. If a brand will not show you these, walk away.

    1. Wear layer, measured in mils: this is the clear top film that takes the abuse. Thicker wear layers last longer under pets, carts, and chairs
    2. Overall thickness, in millimeters: thicker planks feel more solid and tolerate subfloor variation better
    3. Construction: rigid-core, WPC, or glue-down, each suited to different rooms and traffic
    4. Warranty terms: read the exclusions, because most claims fail on installation or moisture grounds, not product defect

    A common mistake is comparing wear layers across brands that measure differently. Ask for the number in mils, in writing.

    For a deeper breakdown of wear resistance and long-term performance, our durable flooring buyer’s guide walks through how each spec affects lifespan in high-traffic rooms.

    Comparing Whole-Home Flooring Costs and Installation Economics

    Whole-home projects reward planning, because the cheapest floor per square foot is rarely the cheapest floor per project. Installation economics decide the real number.

    Three cost drivers builders underestimate:

    • Subfloor prep: leveling and patching can rival material cost on older slabs
    • Transition pieces: every doorway and material change adds trim and labor
    • Waste factor: complex room shapes push waste higher, and reordering a discontinued SKU costs more than the original order

    A practical approach is to price the whole home in one pass, room by room, with one installer. Fewer material changes mean fewer transitions and a faster crew. Our breakdown of professional flooring installation costs gives current figures you can drop into a build budget.

    Request a Flooring Estimate for Your Next Build

    The hardest part of flooring a build is not picking a color. It is locking a spec, a quantity, and a delivery window that survives the schedule. Most delays we see trace back to a brand change mid-project, not a bad product.

    Viva Floors & More carries Cali, Robbins, Mohawk, Shaw, and MSI across two showrooms, with expert consultation for builders, remodel contractors, and DIYers alike. We help you compare wear layers side by side, confirm stock before you spec, and match product to budget across every room.

    Get started with Viva Floors & More and spec your next build with brands you can reorder with confidence. Request an estimate and we will walk your plans room by room.

    Frequently Asked Questions

    Which flooring brands offer the best options for builders?

    The best flooring brands for builders balance durable wear layers, clear warranties, and reliable supply. For vinyl plank, look for a wear layer of at least 12 mil on residential builds and 20 mil or higher for commercial or rental units. Hardwood brands should offer consistent milling and finish warranties. Laminate brands need strong AC ratings and moisture-resistant cores. Viva Floors & More carries trusted names like Cali, Mohawk, Shaw, Robbins, and MSI, so builders can compare specs side by side.

    How can you tell if a vinyl floor is good quality?

    Check the wear layer thickness first: 6 to 8 mil suits light residential use, 12 to 20 mil handles busy households and pets, and 20 mil or more is commercial-grade. Next, look at the core construction. A rigid core resists indentation and moisture better than a flexible one. Ask about the warranty terms, especially what voids coverage, such as improper subfloor prep. Finally, confirm the plank thickness, since 5 mm and up feels more solid underfoot and hides subfloor imperfections.

    What is the most durable flooring for commercial use?

    Commercial spaces need flooring that resists heavy foot traffic, rolling loads, and moisture. Luxury vinyl plank and tile with a 20 mil or higher wear layer are common choices for retail and office builds because they handle abuse and are easy to replace in sections. Porcelain tile offers the highest scratch and moisture resistance. For commercial projects, confirm the product meets the manufacturer’s commercial warranty requirements and check local building code requirements for slip resistance in your space.

    What should builders compare when choosing a flooring brand?

    Compare four things: wear layer or finish durability, warranty length and claim limitations, supply consistency, and total installed cost. A low price per square foot means little if a brand runs out of stock mid-project or denies claims over installation method. Ask for current lead times, confirm the same dye lot is available across the whole order, and review what the warranty excludes. Viva Floors & More helps builders compare these factors across brands before committing to a full order.

  • How to Choose Expert Flooring Installation Services

    How to Choose Expert Flooring Installation Services

    Last Updated: October 25, 2026

    Quick Summary

    Choosing expert flooring installation services south in Texas means confirming the quote covers subfloor inspection, moisture testing, material acclimation, precise fitting, and a written workmanship warranty. Compare bids on scope, not price, because the lowest bid usually omits prep, trim, or disposal and bills those later.

    • A complete quote itemizes subfloor prep, removal and disposal, trim, transitions, and sales tax.
    • Engineered hardwood holds up better than solid wood in South Texas humidity swings.
    • Luxury vinyl plank is waterproof and the practical favorite for busy households with pets.
    • A single room of carpet or LVP often finishes in one day, while tile takes longer.
    • Ask for the warranty document itself, not a verbal promise of lifetime coverage.

    Table of Contents

    What Expert Flooring Installation Services Should Include

    Choosing expert flooring installation services south in Texas starts with knowing what a complete job actually contains. A proper installation covers subfloor inspection, moisture testing, floor measurement, material acclimation, precise fitting, and a written workmanship warranty.

    Installer uses a moisture meter on a subfloor during expert flooring installation services south in Texas
    Installer uses a moisture meter on a subfloor during expert flooring installation services south in Texas

    The subfloor is where most problems begin. A flooring installer who skips moisture checks or patch work is setting you up for buckling, gapping, and callbacks six months later.

    Here is what a complete scope of work should name in writing:

    • Subfloor preparation: leveling, patching, and moisture testing before any material goes down
    • Floor measurement and a room-by-room material takeoff, so you buy the right quantity
    • Material acclimation in your home before installation begins
    • Removal and disposal of old flooring, if needed
    • Trim, transitions, and thresholds included in the quote, not billed later
    • A written workmanship warranty separate from the manufacturer’s product warranty

    The difference between a cheap bid and a professional one usually lives in that list. Ask for each item by name before you compare numbers.

    Flooring Materials That Fit South Texas Homes

    Humidity decides which floors survive here. For a deeper look at how each option performs locally, see our guide to choosing flooring for humid South Texas.

    Carpet suits bedrooms and low-traffic spaces.

    Hardwood brings warmth and resale value, yet solid wood moves with humidity swings. Engineered hardwood holds up better in this climate because its cross-ply core resists expansion.

    Tile is the safest bet for kitchens, baths, and anywhere moisture lives. Ceramic and porcelain tile shrug off water, and porcelain handles heavy foot traffic without wear.

    Laminate offers a wood look at a lower cost, though standing water is its enemy. Keep it out of bathrooms and laundry rooms.

    Luxury vinyl plank has become the practical favorite for busy households.

    Carpet, Hardwood, Tile, and Laminate Compared

    Material Best Rooms Moisture Resistance Maintenance
    Carpet Bedrooms, closets Low Vacuum, periodic deep clean
    Engineered hardwood Living, dining Moderate Dry mop, humidity control
    Ceramic and porcelain tile Kitchens, baths High Sweep, damp mop
    Laminate Living, hallways Low Dry mop only

    You can browse the flooring catalog to see real options and preview any floor in a photo of your own room before you commit.

    What Flooring Installation Cost Really Covers

    Flooring installation cost reflects labor, materials, and the prep work nobody sees. Pricing depends on the material, room size, subfloor condition, and whether old flooring needs removal, so no honest estimate comes before an on-site measure. What most listings never tell you is how those variables translate into a number. Here is the framework a professional estimator actually uses.

    The four cost drivers, in order of impact

    1. Material choice. This is the single largest swing. Carpet and laminate sit at the low end per square foot; luxury vinyl plank sits in the middle; ceramic and porcelain tile, engineered hardwood, and natural stone climb from there. The same 200-square-foot room can land in very different territory depending on what goes down.
    2. Subfloor condition. A flat, dry, sound subfloor is cheap to work with. A slab with low spots, cracks, or high moisture readings adds self-leveler, patching compound, and moisture-mitigation time. On slab-on-grade construction common in this region, moisture testing is not optional, it is a line item.
    3. Removal and disposal. Tearing out carpet is fast. Tearing out glued-down tile or thinset residue is slow, dusty work that requires chipping, hauling, and dump fees. Ask whether disposal is included or billed by the load.
    4. Layout complexity. A rectangular bedroom is straightforward. Herringbone, diagonal runs, stairs, multiple doorways, and rooms that require transitions all add labor hours per square foot.

    What a complete quote should itemize

    • Materials: flooring, underlayment, adhesive or mortar, grout, trim, and transition strips
    • Labor: square-footage rate or flat room price, with the rate stated in writing
    • Subfloor prep: leveling, patching, and moisture testing as separate lines
    • Removal and disposal: old flooring haul-away and dump fees
    • Furniture moving and appliance disconnect: confirm inclusion
    • Trim and baseboard: removal, replacement, and paint touch-up
    • Sales tax and any delivery charges
    Watch Out
    The lowest bid is usually lowest because it omits subfloor prep, trim, or disposal. Those gaps get billed later, and the final invoice lands well above the original number. Compare quotes on scope, not on the bottom line alone.

    How to compare two bids fairly

    Put both quotes side by side and check that each one names the same square footage, the same material and grade, the same prep scope, and the same warranty. If one quote is silent on moisture testing or trim, price that silence in before you decide. A bid that is 15% higher but includes prep and disposal is often the cheaper project in the end.

    Our 2026 installation cost breakdown walks through what a professional quote should include line by line, so you can spot an incomplete bid before you sign.

    The Flooring Installation Process, Step by Step

    The flooring installation process follows a predictable path when a contractor runs it well. Here is the sequence we walk customers through:

    Request Estimate →

    1. Consultation and measurement. An on-site estimate confirms square footage and subfloor condition.
    2. Material selection and ordering. You choose flooring, and the installer calculates quantity with a waste allowance.
    3. Acclimation. Materials rest in your home so they adjust to local humidity.
    4. Subfloor preparation. Crews level, patch, and test for moisture.
    5. Installation. Planks, tile, or carpet go down room by room.
    6. Trim and transitions. Baseboards, thresholds, and stair nosing finish the edges.
    7. Final walkthrough. You inspect the work and receive care instructions.

    Each step protects the next. Skipping acclimation or moisture testing is the most common cause of floor failure, and it is entirely avoidable.

    Flooring Installation Timeline: What to Expect

    A flooring installation timeline runs from a few days to a few weeks depending on scope. A single room of carpet or LVP often finishes in one day. Tile work takes longer because of mortar cure times. A whole-home project with subfloor repairs can stretch across two or three weeks.

    Plan for these phases:

    Phase Typical Duration
    Consultation and on-site estimate 1-2 days
    Material ordering and delivery 3-10 days
    Acclimation 2-5 days
    Installation 1-5 days per area
    Trim, cleanup, walkthrough 1 day

    Supply chain delays are the wild card. Confirm stock before you set a start date, especially on special-order material.

    Flooring Contractor Questions to Ask Before You Hire

    The right questions separate a flooring contractor from a salesperson with a truck. But questions only matter if you verify the answers. This section gives you both: what to ask, and how to confirm it before money changes hands.

    Credentials: what to ask and how to check

    • Licensing. Ask whether the contractor holds any state or local license required for the work, and request the license number in writing. Verify it through the issuing agency’s public lookup rather than trusting a logo on a truck.
    • Insurance. Ask for a certificate of general liability insurance and, if they employ crews, workers’ compensation coverage. Call the insurer listed on the certificate to confirm the policy is active and the coverage limits are real. An uninsured crew on your property is your liability.
    • Bonding. If your jurisdiction requires a contractor bond, ask for the bond number and confirm it is current.
    • Business identity. Confirm the legal business name, address, and years in operation match what appears on the estimate and contract.

    Warranty mechanics: read the fine print

    A workmanship warranty and a manufacturer’s product warranty are two different things, and homeowners often confuse them.

    • Workmanship warranty: covers installation defects, lippage, hollow tile, gapping, buckling, failed seams. Ask how long it runs, what it excludes, whether it is prorated, and whether it transfers if you sell the home.
    • Product warranty: covers the material itself and is issued by the manufacturer, not the installer. Ask who files the claim and who handles labor if a product fails.
    • Exclusions: most workmanship warranties exclude damage from moisture intrusion, improper maintenance, settling, and acts of nature. Get the exclusions in writing before you sign.
    Pro Tip
    Ask for the warranty document itself, not a verbal promise. A one-page written warranty with clear exclusions beats a brochure claim of “lifetime coverage.”

    How to evaluate reviews and references

    Directory star ratings are a starting point, not proof. Look for reviews that describe the specific project, material, room count, timeline, and how the contractor handled a problem. A handful of detailed reviews beats dozens of one-line ratings. Ask for two or three recent local references and call them. Ask each reference: Did the crew show up when promised? Was the final invoice close to the estimate? Would you hire them again?

    Questions that reveal how a crew operates

    • Who performs the work: your employees or subcontractors?
    • Will the same crew that starts the job finish it?
    • How do you handle moisture testing and subfloor prep, and will results be documented?
    • Is the estimate written, itemized, and fixed, or subject to change?
    • What is your process if I find a problem after the walkthrough?

    Honesty and integrity show up in how a contractor answers and whether they put those answers in writing. You can review our flooring services to see the scope we cover for homeowners and builders.

    Requesting Your In-Showroom Flooring Consultation

    A showroom visit answers the questions a website cannot. You see flooring styles under real lighting, feel the textures, and compare materials side by side with an expert nearby.

    At Viva Floors & More, our consultation takes the guesswork out of flooring selection. We help you match material to room, budget, and household, and we carry trusted brands including Cali, Robbins, Mohawk, Shaw, and MSI. Family-owned since 1992, we serve homeowners, builders, and contractors from two showroom locations in Pharr and Brownsville.

    Bring your room measurements and photos. We will walk you through options, explain what installation involves, and help you plan the project from measurement to final walkthrough. Learn what a professional flooring consultation includes before you book.

    Frequently Asked Questions

    How much does flooring installation cost in South Texas?

    Flooring installation cost depends on the material, room size, subfloor condition, and whether old flooring needs removal. Carpet, laminate, and vinyl usually sit at the lower end, while hardwood, porcelain tile, and natural stone cost more because of labor and prep work. Ask for an itemized on-site estimate that separates materials, labor, removal, and subfloor preparation so you can compare quotes fairly.

    How long does professional flooring installation take?

    The flooring installation timeline varies by material and square footage. A single carpeted bedroom can be finished in a few hours, while a full-home tile or hardwood project may run several days to a week or more. Moisture testing, subfloor prep, and acclimation of wood or laminate add time. Ask your installer for a written schedule before work begins.

    What should I look for when choosing a flooring installer?

    Check for a physical showroom, years in business, licensing where required, liability insurance, and a written workmanship warranty. Read customer reviews and ask for local references. A flooring contractor should measure on site, explain subfloor conditions, and give you a detailed written estimate. Avoid anyone who quotes a firm price over the phone without seeing the space.

    What flooring works well in humid climates?

    Porcelain tile, luxury vinyl plank (LVP), and laminate with water-resistant cores handle humidity better than solid hardwood. Engineered hardwood performs well when properly acclimated and installed with the right underlayment. Carpet with moisture-resistant backing works in bedrooms. In South Texas, always ask about moisture testing before installation, since slab humidity can affect glue-down and wood products.


    Finding expert flooring installation services south in Texas comes down to asking better questions and demanding a complete scope in writing. Viva Floors & More brings three decades of local experience, a vast in-stock selection, and hands-on guidance for homeowners, builders, and contractors across the Rio Grande Valley. Get started with Viva Floors & More and request an estimate for your next flooring project.

  • Best Transition Materials for Luxury Vinyl Plank

    Best Transition Materials for Luxury Vinyl Plank

    Last Updated: October 23, 2026

    Quick Summary

    The best transition materials for luxury vinyl plank are vinyl and composite profiles, which match plank colors and handle moisture, with rubber or aluminum for entries and stairs. Choose the profile by height difference: T-molding under 3 mm, a reducer for 3 to 12 mm, and a deeper reducer or ramp over 12 mm.

    • Measure the height gap at three points along the seam and use the tallest number.
    • A transition must never be screwed or nailed through the floating LVP plank.
    • Use a track system that lets the molding slide so the floor stays unpinned.
    • Keep the finished lip at or below about 1/4 in. to avoid a trip hazard.
    • Tuck the carpet edge under the profile lip instead of butting it against the strip.

    Table of Contents

    Why LVP Transitions Matter (and How to Pick the Right One)

    A transition strip covers the seam where luxury vinyl plank meets another surface.

    Luxury vinyl plank is a floating floor that expands and contracts, so every manufacturer requires a gap at walls and fixed objects.

    That constraint eliminates half the options on a typical store shelf. Below: which profiles work, which materials hold up, and how to measure before you buy.

    Measuring Floor Height Differences

    Height difference decides the profile, so measure first. Lay a straightedge across the seam and measure the vertical gap from the top of the lower floor to the top of the LVP in millimeters.

    • Under 3 mm: a T-molding or a flat seam binder works.
    • 3 to 12 mm: a reducer is the right call.
    • Over 12 mm: you need a reducer with a deeper leg or a threshold ramp.

    Measure at three points along the seam, older subfloors are rarely level, and the tallest gap is the number that matters. Write it down and bring it to the showroom with a plank sample.

    Pro Tip
    Bring a scrap of your actual LVP to the store, not just the SKU number. Color names vary between dye lots, and matching the transition to the plank in your hand beats matching it to a photo on a screen.

    Types of LVP Transition Molding: T-Molding, Reducers, End Caps, and Stair Noses

    Four profiles cover nearly every residential junction: T-molding, reducer, end cap, and stair nose. Each solves a different height and edge problem, and choosing the wrong one is the most common installation mistake we see.

    T-Molding for Same-Height Floors

    T-molding joins two floors of equal height with a flat top and a hidden leg that drops into the gap. Use it where LVP meets another floating floor, or where a doorway separates two rooms at the same level.

    The profile floats with the floor rather than being screwed down: fastening a T-molding through a floating LVP locks the plank in place and can cause buckling at the seam over time.

    Reducers for Uneven Floor Heights

    A reducer slopes from the taller floor down to the shorter one, giving a gentle ramp instead of a step. It is the standard choice where LVP meets thinner carpet, older hardwood, or a concrete slab.

    Pick the reducer by the height difference you measured, not the profile width. Too shallow leaves a lip; too deep sits proud and becomes a trip hazard.

    Choosing the Best Material: Vinyl, Rubber, Wood, and Aluminum

    Material Durability Appearance Match to LVP Moisture Performance Best Use Case Main Trade-off
    Vinyl (PVC) High, resists dents and scuffs Best, sold in matching color lines Excellent; impervious to standing water Kitchens, baths, laundry, pet households Can look flatter than textured plank
    Rubber Very high, absorbs impact Poor, limited colors, matte only Excellent Exterior doors, mudrooms, rentals Narrow palette; hard to color-match
    Wood (oak, maple, walnut) Moderate, dents and swells Good if stained to match Poor unless sealed Living rooms, visible feature seams Needs re-sealing; swells at edges in wet areas
    Aluminum Very high, resists rolling loads Fair, metallic finishes only Excellent Stair noses, thresholds under carts or wheelchairs Cold underfoot; scratches show on dark anodized finishes
    Composite (WPC/SPC-core) High, dimensionally stable Good, often color-matched to LVP lines Excellent Whole-home transitions where color match matters Slightly more expensive than basic vinyl

    Vinyl remains the default for most homes because it is the only material sold in color lines that match LVP plank finishes.

    Rubber is the right answer at exterior doors and in rentals where durability beats appearance: it absorbs impact, grips underfoot, and shrugs off standing water.

    Wood transitions suit visible, decorative seams in living and dining spaces.

    Aluminum is the pick for stair noses and anywhere a cart, walker, or wheelchair rolls: strong, low-profile, and dimensionally stable.

    Matching the Material to the Room

    The room, not the plank, should drive the material choice. A few rules of thumb:

    • Kitchen, bath, laundry: vinyl or composite. Wood is out unless fully sealed and kept away from the tub and shower.
    • Entryways and mudrooms: rubber or aluminum. These take grit, water, and impact that vinyl will eventually show.
    • Living and dining rooms: wood or composite where the seam is visible and decorative.

    The Floating-Floor Constraint

    One rule overrides material preference: the transition must not pin the floating LVP. The profile should either float with the plank (a track system that lets the molding slide) or be fastened only to the subfloor or the adjacent fixed floor, never screwed or nailed through the LVP itself. A wood transition screwed through the plank looks fine on day one and buckles by the first seasonal swing.

    Watch Out
    Skipping the moisture-resistant option in a bathroom or laundry room is a common mistake. A wood transition in a wet room can swell and lift within a season, and replacing it means pulling trim and redoing the seam.

    Vinyl Plank Flooring to Carpet Transition: What Works Best

    A reducer or a T-molding handles most vinyl plank flooring to carpet transitions, depending on pile height.

    The trick is the carpet’s compressed height, not its loft: measure with a straightedge pressed down, not fluffed up.

    For a clean finish, tuck the carpet edge under the profile lip rather than butting it against the strip. That hides fraying and keeps the carpet from working loose at the doorway.

    Request Estimate →

    LVP to Tile Transition: Matching Heights and Materials

    Tile transitions come down to height and hardness.

    If the tile and LVP sit at the same height, a T-molding works, but choose one with a slight flex so the floating LVP can move independently.

    A common mistake is grouting right up to the transition. Leave a small gap at the tile edge and let the profile bridge it, so expansion has somewhere to go.

    LVP Transition Molding Installation: Step-by-Step

    Most installation guides treat a transition strip like any other piece of trim: cut it, fasten it, done. With luxury vinyl plank that fails, because the floor underneath is floating and has to keep moving. The method below secures a transition without pinning the plank, preserves the expansion gap, and checks the finished seam for trip hazards.

    Before You Cut: Measure the Height Difference

    Height difference decides the profile, so measure before you buy: lay a straightedge across the seam and measure the vertical gap from the top of the lower floor to the top of the LVP.

    • Under 1/8 in. (about 3 mm): a T-molding or flat seam binder.
    • 1/8 to 1/2 in. (about 3 to 12 mm): a reducer.
    • Over 1/2 in. (about 12 mm): a reducer with a deeper leg or a threshold ramp.

    Write the number down and bring it, plus a plank scrap, to the store. Color names vary between dye lots, and matching to the plank in your hand beats matching to a photo on a screen.

    Track System vs. Adhesive: Pick the Fastening Method First

    Two common methods secure a transition over a floating floor, and the choice affects every step that follows.

    • Track system (floating): A base track is fastened to the subfloor, and the molding snaps or slides into it. The molding can move slightly with the plank, so the floor is never pinned. This is the safer choice over LVP and the one most manufacturers recommend.
    • Adhesive: The profile is bonded to the subfloor or to the adjacent fixed floor with construction adhesive. It works, but only if the adhesive never bridges the LVP’s expansion gap. A bead of adhesive that grabs the plank edge will lock the floor and cause buckling at the seam.

    If your profile came with a track, use it. If it did not, confirm with the manufacturer whether adhesive is approved over a floating floor before you open the tube.

    Tools and Materials

    Tape measure, utility knife, miter saw or hacksaw with a fine-tooth blade, tapping block, mallet, drill with a bit sized for the track screws, vacuum, and the track or adhesive specified for your profile. A scrap of the LVP is useful for test-fitting the profile height before you cut to length.

    Step-by-Step

    1. Clean the seam. Vacuum out grit and scrape any dried adhesive so the profile sits flat. Grit under a track is the most common cause of a rocking molding.
    2. Dry-fit the molding. Cut it to length with a small gap at each wall, then set it in place and check the height against your measurement. Do not fasten anything yet.
    3. Cut and fasten the track. Cut the track to length and fasten it to the subfloor, not through the planks. Keep the screws at least the width of the required expansion gap away from the LVP edge so the plank can still move.
    4. Set the profile. Snap or slide the molding into the track. If your profile uses adhesive, apply it to the subfloor or the fixed adjacent floor only, never bridging the expansion gap.
    5. Tap it home. Use a tapping block and mallet to seat the profile without denting the finish. Work along the length in small increments rather than striking one spot.
    6. Check the gap and the trip hazard. Confirm the floating floor still has room to move under the profile, then run a straightedge across the finished seam. A lip taller than about 1/4 in. is a trip hazard in a doorway; if you find one, the profile is the wrong height and should be exchanged before the trim goes back on.
    A homeowner kneeling on a luxury vinyl plank floor using a tapping block and mallet to seat a transition strip at a carpeted doorway, with a miter saw and molding offcuts nearby in warm afternoon light
    A homeowner kneeling on a luxury vinyl plank floor using a tapping block and mallet to seat a transition strip at a carpeted doorway, with a miter saw and molding offcuts nearby in warm afternoon light

    Accessibility and Trip-Hazard Checks

    Transition height, slope, and edge shape affect safe passage, especially for older adults, people using walkers or wheelchairs, and anyone carrying loads through a doorway. A few practical checks after installation:

    • Height: keep the finished lip at or below about 1/4 in. where possible; anything taller should be ramped with a reducer rather than left as a step.
    • Slope: a reducer should ramp gradually. A steep reducer is harder to roll over than a gentle one, even at the same height.
    • Edge shape: beveled or rounded edges are more forgiving underfoot and under wheels than square edges.
    Key Takeaway
    The most important step is dry-fitting, and the most important rule is never fasten through the floating plank. A profile that fits without force and floats with the floor will stay put; one you have to muscle into place, or screw through the LVP, will lift at the edges within months.

    Alternatives to Transition Strips: When You Can Skip the Molding

    Sometimes you can skip the strip entirely. Alternatives to transition strips include flush seams, a glued-down plank at the junction, or a simple caulk line where the gap is tiny and hidden.

    A flush seam works when two floors meet at exactly the same height and the manufacturer allows it. It looks clean, but it leaves the expansion gap exposed, so it is best where the seam sits under a door or against a wall.

    For a small gap against a fixed object, a color-matched flexible filler can close the seam without a profile.

    Where the junction is genuinely flat and hidden, doing nothing is a legitimate choice. Where it is visible or underfoot, a profile is the safer call.

    Conclusion

    The right transition comes down to three numbers: the height difference, the room’s moisture exposure, and how much traffic the seam will take. Measure carefully, match the material to the room, and let the floating floor move.

    If you are sorting through options for a renovation in the Rio Grande Valley, our team at Viva Floors & More can help you match a profile to your plank and your subfloor. We have served homeowners, builders, and contractors since 1992, with two showroom locations and a deep inventory of trusted brands.

    Request an estimate and get the transition sorted before the planks go down.

    Frequently Asked Questions

    Does LVP need transition pieces?

    Yes, in most installations. LVP is a floating floor that expands and contracts with temperature and humidity, so transition pieces cover the required expansion gap at room edges and doorways. They also protect the exposed edge of the planks and create a finished look where LVP meets carpet, tile, or another flooring material. Skipping transitions can lead to buckling or gaps.

    What is the best transition for LVP to tile?

    A reducer or a T-molding works best for LVP to tile transitions, depending on the height difference. If the tile and LVP are nearly level, use a T-molding. If the tile is thicker, a reducer bridges the gap. Choose a vinyl or rubber transition that complements both materials and accounts for the tile’s grout line and the LVP’s expansion gap.

    Can you install LVP without a transition strip?

    In some cases, yes. A flush transition can be achieved by undercutting door jambs and weaving the planks through, or by using a borderless installation if both floors are the same height and the expansion gap is hidden under baseboards. However, for room-to-room transitions and where flooring heights differ, a transition strip is still recommended to cover gaps and prevent tripping.

    How do you choose a transition strip for uneven floor heights?

    Measure the height difference between the two floors. For differences up to about 1/4 inch, a T-molding often works. For larger differences, use a reducer that slopes from the higher floor to the lower one. If the drop exceeds 1/2 inch, consider a stair nose or a custom milled profile. Always leave the required expansion gap and secure the strip to the subfloor, not the floating planks.

  • Best Waterproof Flooring for Renovations: 2026 Guide

    Best Waterproof Flooring for Renovations: 2026 Guide

    Table of Contents

    Last Updated: October 20, 2026

    Waterproof Flooring for Renovations: What Actually Matters

    Waterproof flooring is a floor covering engineered so that surface water cannot pass through the wear layer and core to reach the subfloor. For a renovation, that distinction decides which rooms you can protect and which ones you can only slow down. This guide from Viva Floors & More walks through the materials that hold up, the ones that fail, and the costs nobody quotes you upfront.

    Here’s what most renovation guides get wrong: they treat “waterproof” as a single feature. It isn’t. A floor can be waterproof at the surface and still trap moisture underneath, which is the exact problem you were trying to solve.

    Waterproof vs. Water-Resistant: Know the Difference

    Water-resistant flooring tolerates spills long enough for you to wipe them up. Waterproof flooring tolerates standing water for hours without the core swelling or the seams lifting.

    That difference matters most in three places: bathrooms, kitchens, and basements. A water-resistant floor in a half-bath is fine. The same floor next to a tub that overflows twice a year is a future tear-out.

    The FTC guidance on home improvement claims is clear that product performance claims should be substantiated, so ask for the manufacturer’s test documentation rather than trusting a label.

    Watch Out
    The most common renovation mistake is installing a water-resistant product in a laundry room or basement and sealing it badly at the perimeter. Water finds the gap, wicks under the plank, and the mold problem starts where you can’t see it.

    The 2026 Waterproof Flooring Comparison Table

    Material Water Protection Best Rooms Comfort Underfoot Repairability
    Luxury vinyl plank (SPC core) Fully waterproof Kitchen, bath, basement Firm, slightly warm Single-plank swap
    Luxury vinyl tile Fully waterproof Bath, laundry, entry Firm Single-tile swap
    Waterproof laminate Waterproof core, sealed seams Kitchen, living, mudroom Warmer than vinyl Harder, glued joints
    Porcelain tile Fully waterproof Bath, kitchen, entry Cold, hard Chip-and-replace
    Sheet vinyl Fully waterproof Bath, laundry Soft Patch only
    Engineered wood Water-resistant at best Bedroom, living Warmest Sand and refinish

    The table is the short version. The rest of this guide explains where each one breaks down.

    Best Waterproof Vinyl Plank Flooring for Busy Homes

    For households with kids and dogs, luxury vinyl plank with a rigid SPC core is the most practical waterproof flooring you can install.

    Homeowner touching wood-look waterproof flooring with a dog and toy in a bright living room
    Homeowner touching wood-look waterproof flooring with a dog and toy in a bright living room

    What separates a good plank from a cheap one is the wear layer thickness, not the pattern. Thin wear layers look fine in the showroom and show every scuff within a year.

    A common mistake is judging planks by the photo on the box. Wood-look flooring varies enormously in undertone, and lighting changes everything. Bring a sample home and look at it in your own room at night.

    Pro Tip
    Order one extra box beyond your square footage calculation. Dye lots shift between production runs, and a spare box from the same lot is the difference between an invisible repair and a mismatched patch two years later.

    Waterproof Laminate Flooring: Where It Works and Where It Fails

    Waterproof laminate flooring works well in kitchens, mudrooms, and living areas where the risk is a spilled glass rather than a flooded floor. The core is treated to resist swelling, and the locking joints are sealed.

    It fails at the perimeter. Laminate still needs an expansion gap, and that gap is where water gets in during a real flood event. If your renovation includes a basement with any history of seepage, laminate is the wrong bet.

    Where laminate wins is comfort and price relative to tile. It feels warmer underfoot than vinyl, and it installs over most existing hard surfaces without a tear-out.

    The honest limitation: laminate cannot be refinished. Once the surface wears through, the floor is replaced, not repaired.

    Vinyl Plank vs. Tile Flooring: Cost, Comfort, and Wear

    Vinyl plank vs. tile flooring comes down to three trade-offs, and the answer depends on which room you’re renovating. Most guides stop at comfort and durability. The renovation-specific angle they miss is that the two materials fail differently during a remodel, and the failure mode drives the real cost.

    • Comfort: Vinyl plank is warmer and softer underfoot. Porcelain tile is cold and hard, which matters in a bathroom you use at 6 a.m. Tile also transmits sound, so a second-floor bathroom needs an uncoupling membrane and often a sound underlayment to avoid a hollow click in the room below.
    • Wear: Porcelain wins on scratch and stain resistance over decades. Quality vinyl wins on impact resistance because it flexes instead of cracking. A dropped cast-iron pan dents vinyl and chips tile; a shifting subfloor cracks tile and rides with vinyl.
    • Repair: A chipped tile means chiseling out and resetting, often with a spare tile you hopefully kept. A damaged vinyl plank lifts out and clicks back in. That repairability gap widens over a 15-year horizon, because tile grout lines stain and need resealing while vinyl seams stay closed.

    The renovation cost mechanics nobody quotes

    Sticker price per square foot hides the two numbers that actually decide a renovation budget: subfloor preparation and demolition.

    • Subfloor prep: Tile needs a flat, deflection-free substrate. A typical renovation adds a cement backer board or uncoupling membrane, plus thinset and fasteners, before the first tile goes down. Vinyl plank with a rigid core can often float over an existing hard surface if it is flat within the manufacturer’s tolerance, which can eliminate an entire prep day.
    • Demolition: Removing tile means chipping, hauling, and patching the subfloor. Removing floating vinyl is a matter of pulling up planks and rolling them out the door. In a whole-home renovation, that difference shows up in the labor line, not the material line.
    • Transitions and trim: Tile-to-carpet and tile-to-wood transitions need reducers and often a height change. Vinyl plank sits lower and transitions more cleanly to adjacent rooms, which matters when you are matching floors across a hallway.

    Where each one belongs in a renovation

    For a full-home renovation, many homeowners mix the two: tile in the wet rooms, vinyl plank everywhere else. That combination gives you water protection where it counts and comfort where you live. The split usually follows the plumbing: tile in bathrooms, laundry, and the kitchen perimeter; vinyl plank in bedrooms, living areas, and hallways.

    Request Estimate →

    Pricing for either depends on the product line, room size, and subfloor condition, so we quote each project rather than publishing a blanket number. When we quote, we break the estimate into material, underlayment or membrane, subfloor prep, demolition and haul-away, trim and transitions, and labor, so you can see which line is driving the total before you commit.

    Mold Under Vinyl Plank Flooring: Causes and Prevention

    Mold under vinyl plank flooring almost always traces back to moisture that got trapped below the plank and had nowhere to escape. The floor itself is waterproof. The assembly underneath is not.

    Three causes account for most cases:

    1. A concrete slab with no vapor barrier. Moisture wicks up from below and sits against the plank backing.
    2. A flood that wasn’t dried properly. Water entered at the perimeter, the surface dried, and the subfloor stayed damp.
    3. A plumbing leak behind a wall. Slow drips run under the floor for months before anyone notices the smell.

    Prevention is straightforward. Test the slab for moisture before installation, use a vapor barrier where the manufacturer requires one, and pull up a plank to check the subfloor after any significant water event rather than assuming it dried.

    The EPA guidance on mold and moisture control is worth reading before any renovation that touches a basement or crawl space, because controlling the moisture source is the only real fix.

    Total Installed Cost and Lifecycle Trade-Offs

    The sticker price per square foot is the least useful number in a renovation budget. Total installed cost includes the material, the underlayment, subfloor prep, trim, and labor, and those extras often rival the material cost itself. Competitors compare product prices; the renovation-specific comparison is the installed assembly, because that is the number that hits your budget.

    What goes into the installed number

    Every waterproof floor is really four costs stacked on top of each other:

    1. Material: the planks, tiles, or sheet goods, plus a waste factor. Order 10 percent extra for cuts and future repairs; dye lots shift between production runs.
    2. Underlayment or membrane: foam or cork underlayment for floating vinyl, a cement backer board or uncoupling membrane for tile, and a vapor barrier where the manufacturer requires one over concrete.
    3. Subfloor preparation: moisture testing, leveling compound, patching, and sometimes a plywood overlay. This line is where renovation budgets surprise people, because an uneven or damp subfloor has to be fixed before any waterproof surface goes down.
    4. Labor and removal: demolition, haul-away, installation, trim, and transitions to adjacent rooms. Tile labor runs higher than floating vinyl labor because of thinset, grout, and layout time.

    Lifecycle and repairability

    Lifecycle matters just as much as the install. Porcelain tile costs more to install but can outlast the house and is repaired tile by tile. Vinyl plank costs less upfront and gives you a replaceable floor for a decade or more, with single-plank swaps that do not disturb the rest of the room. Laminate sits in between: warmer than vinyl, but glued joints make spot repair harder and the surface cannot be refinished.

    The renovation question is not which floor lasts longest. It is which floor you can live with, repair, and afford to replace when the room changes. A basement that floods once may justify tile; a bedroom above a garage may justify vinyl plank; a living room you plan to refinish in 15 years may justify engineered wood.

    Four criteria we weigh before recommending anything

    For renovation-specific selection, we weigh four criteria before recommending anything:

    • Does the room see standing water or only spills?
    • What is the subfloor, and has it been moisture-tested?
    • How much floor will be visible under your actual lighting?
    • Do you want to repair a section or replace the whole room later?

    Answer those four and the material choice usually makes itself. The cost conversation then becomes a matter of pricing the assembly you have already chosen, rather than comparing sticker prices across materials that were never interchangeable in the first place.

    Frequently Asked Questions

    What is the best waterproof flooring for a renovation?

    For most renovations, luxury vinyl plank with a rigid SPC core is the safest pick. It handles moisture, stands up to scratches and stains, and installs over most existing hard surfaces, which cuts labor on a remodel. Porcelain tile wins in kitchens and bathrooms where standing water is routine. Waterproof laminate is a solid budget option for dry rooms, but it will not survive a flood. Match the material to the room and the subfloor, not to a single overall winner.

    Can mold grow under vinyl plank flooring?

    Yes. The plank itself does not feed mold, but trapped moisture underneath does. If a slab stays damp, a leak goes unnoticed, or the floor is installed over a wet subfloor, mold can grow in the gap between the plank and the slab. Prevent it by testing subfloor moisture before installation, sealing basement slabs, and drying any flood within 24 to 48 hours. Pull up and replace affected planks rather than covering the problem.

    Is waterproof laminate flooring a good choice for a remodel?

    It can be, as long as you keep expectations realistic. Waterproof laminate uses a treated core and tight locking joints that resist spills and damp mopping, which is enough for kitchens, hallways, and living rooms. It still swells if water sits on it or gets underneath, so it is a poor fit for basements, laundry rooms, and bathrooms with frequent standing water. Compare the wear layer and warranty before you commit.

    What should I check before installing waterproof flooring over an existing floor?

    Check three things first. Test the subfloor for moisture, especially on concrete slabs, since a waterproof surface can trap vapor and cause mold. Confirm the existing floor is flat within the manufacturer’s tolerance, usually about 3/16 inch over 10 feet. Make sure the old floor is sound and clean, with no loose tiles or soft spots. Most vinyl plank and laminate can go over hard surfaces, but never over carpet or a spongy subfloor.


    A renovation floor has to survive real life, not a showroom. If you’re weighing waterproof flooring options for a project in the Rio Grande Valley, Viva Floors & More has served homeowners, builders, and contractors since 1992 with one of the largest flooring selections in South Texas. Our team helps you compare materials in person, check stock before you commit, and match the right floor to each room. Request an estimate and take the guesswork out of the selection.