
Last Updated: November 1, 2026
Quick Summary
When flooring planks start separating in winter, first measure the gap width and indoor humidity, since dry heated air causes most seasonal shrinkage. Stabilize humidity in the manufacturer’s middle range before deciding on any repair, and wait for gaps to close, because flooring planks separating from seasonal dryness often resolve on their own.
- Measure gaps at several spots and log indoor humidity at floor level for three to five days.
- Hold indoor humidity steady in the flooring manufacturer’s recommended range rather than chasing the highest reading.
- Give the floor two to four weeks at stable humidity before judging whether gaps are closing.
- Do not fill laminate or hybrid gaps with caulk or putty, since it interferes with floating movement.
- Contact your installer or warranty provider if gaps are wide, growing, or if boards move underfoot.
Table of Contents
- Why Flooring Planks Separate in Winter
- What Causes Gaps in Hardwood Floors Beyond Seasonal Change
- Step 1: Measure Your Gaps and Indoor Humidity
- Ideal Indoor Humidity for Wood Floors and How to Reach It
- Step 2 to 4: How to Fix Gaps Between Floor Planks Safely
- Why Floor Planks Moving When Walking Signals a Bigger Problem
- When to Contact Your Installer or Warranty Provider
- Scheduling Your Flooring Assessment With Viva Floors & More
- Frequently Asked Questions
Why Flooring Planks Separate in Winter
Flooring planks often separate in winter because indoor air gets dry, and flooring planks separating is the most common result of that shrinkage.
Seasonal gaps are common and usually harmless, though flooring planks separating in a single area can still signal a problem worth checking.
Flooring separation is the visible gap that forms between boards when they shrink. It happens most often in hardwood, engineered wood, and laminate flooring during heating season.
How low indoor humidity affects wood and laminate
Wood is hygroscopic. That means it takes in and gives off moisture as the air around it changes. In dry winter air, boards release moisture and shrink across their width. Laminate and engineered wood can react the same way, though their cores often limit how much movement you see.
Watch out: do not assume a gap is cosmetic until you have checked the humidity. Repeated drying can stress the boards and the joints between them.
What Causes Gaps in Hardwood Floors Beyond Seasonal Change
Seasonal shrinkage is the most common cause, but it is not the only one. Gaps can also come from:
- Poor installation, such as missing expansion space at the walls
- Subfloor movement or uneven support underneath
- Boards that were not acclimated before installation
If gaps appear suddenly, appear in only one area, or keep growing, look beyond the weather. Those patterns point to a structural or installation issue.
Step 1: Measure Your Gaps and Indoor Humidity
Before you fix anything, measure what you have. Two numbers matter most: the gap width and the indoor relative humidity.
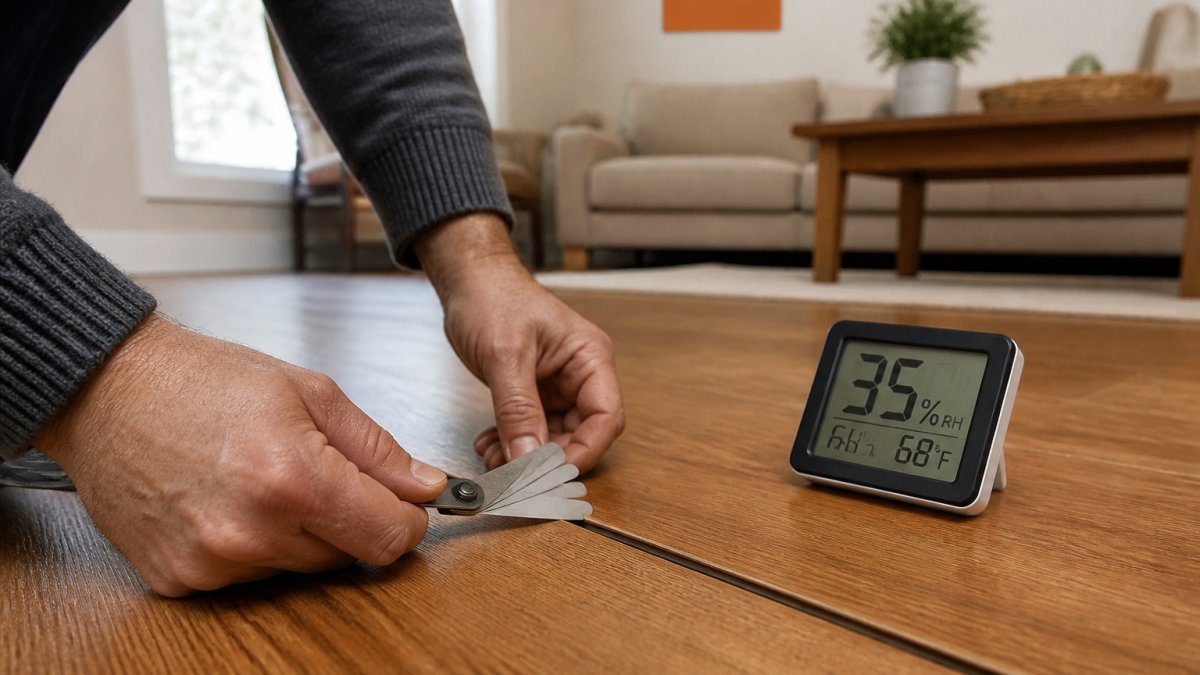
- Use a feeler gauge or a thin ruler to measure the gap at several spots
- Place a hygrometer in the room at floor level, away from vents and heaters
- Record readings over a few days so you see the pattern
Normal seasonal gaps versus problematic separation
A thin seasonal gap that closes when humidity rises is usually normal. A gap that stays wide year-round, grows over time, or lifts board edges needs a closer look. Note whether the gap closes in spring and summer. That tells you a lot about the cause.
Before choosing a fix, compare the key measurements and the most common causes so you know what to check.
| Item | Check | Why it matters |
|---|---|---|
| Gap width | Measure at several spots | Thin, even gaps are usually seasonal |
| Humidity reading | Hygrometer at floor level | Shows whether air is too dry |
| Reading pattern | Log for 3 to 5 days | Reveals daily swings |
| Gap behavior | Does it close in spring? | Points to seasonal cause |
| Gap pattern | Even or clustered? | Clusters suggest localized causes |
| Board condition | Cupping, lifting, rocking | Signals moisture or structural issues |
Ideal Indoor Humidity for Wood Floors and How to Reach It
Wood flooring generally performs best when indoor relative humidity stays in a steady middle range through the year. Flooring manufacturers publish their own humidity targets, so check the guidance for your specific product because targets vary. The number matters less than the stability: a floor held at 40% all winter moves far less than one that swings between 25% and 50%.
Measure before you humidify
A humidifier without a target is guesswork. Do this first:
- Get a hygrometer. A digital indoor hygrometer is an inexpensive tool available at most hardware stores and home centers. Calibrate it if the instructions allow, or cross-check it against a second meter.
- Place it at floor level. Relative humidity stratifies, air near the ceiling can read several points drier or wetter than air at the boards. Set the meter on the floor in the room with the gaps, away from exterior doors, supply vents, and direct sun.
- Log readings for 3 to 5 days. Record morning and evening numbers so you see the daily swing, not a single snapshot. A floor that reads 28% at night and 45% by afternoon is being cycled, and cycling drives movement.
Write your readings down with the date and time. If you later contact your installer or manufacturer, a humidity log is far more persuasive than a description.
Raise humidity gradually and hold it
Once you know your baseline, close the gap to the target range over one to two weeks rather than all at once:
- Whole-home humidifier: A furnace-mounted bypass or fan-powered humidifier is the most consistent option for a whole house. Adjust the humidistat in small increments while watching the hygrometer, and stay within your flooring manufacturer’s range. Follow the unit’s manual for the correct setpoint at outdoor temperatures, most manufacturers publish a table that lowers the indoor setpoint as it gets colder outside to prevent window condensation.
- Portable humidifier: Size it to the room, not the house. Portable humidifiers are rated for specific room sizes, so choose one sized to the room you are treating. Refill with distilled or filtered water if hard-water mineral dust is a concern.
- Keep the thermostat steady: Large temperature setbacks overnight or while you are away let humidity fall and then spike when heat returns. A steady setpoint reduces the swing.
Monitor the hygrometer after each change and give the floor two to four weeks at a stable reading before you judge whether gaps are closing. Wood responds slowly; a gap that looks unchanged after three days may still be recovering.
Do not chase the highest possible humidity reading. Pushing indoor relative humidity above your flooring manufacturer’s upper limit in cold weather can cause condensation on windows and cold surfaces, and sustained high humidity can swell boards and cause cupping. The goal is the middle of the range, held steady.
Step 2 to 4: How to Fix Gaps Between Floor Planks Safely
Once you have measured and stabilized humidity, work through these steps in order. The sequence matters: repairing before the floor has stabilized can mean filling a gap that would have closed on its own, or locking a board in place while it is still moving.
Step 2: Inspect the floor and room conditions
Before touching a gap, walk the floor and note what you find:
- Gap pattern: Are gaps evenly distributed across the room, concentrated along one wall, or clustered near a doorway or vent? Even distribution points to seasonal shrinkage; a single cluster points to a localized cause.
- Board condition: Look for cupped edges (edges higher than the center), crowned centers, lifted ends, or boards that rock underfoot. Cupping and crowning are moisture-related and are not fixed by filling gaps.
- Fasteners and joints: Squeaks, movement underfoot, or visible loose boards suggest a subfloor or fastener problem rather than seasonal shrinkage.
Step 3: Match the fix to the flooring type
Repair options differ by product, and using the wrong one can damage the floor or void a warranty. Use this as a general guide and confirm against your manufacturer’s instructions:
- Solid hardwood: Solid boards move the most across their width. Small seasonal gaps are usually left alone. If a gap persists after humidity is stable, a flooring professional may recommend sliver filling or a flexible filler matched to the finish; rigid epoxy or hard wax fillers can crack or be pushed out as the floor moves.
- Engineered wood: The cross-ply core limits movement, so gaps tend to be smaller. Persistent gaps often trace to installation or subfloor issues rather than humidity alone. Filler must be compatible with the wear layer and finish; check the manufacturer’s guidance before filling.
- Laminate: Laminate is a floating floor and moves as a unit. Gaps at plank ends or along a wall often mean the floor is binding against a wall, cabinet, or transition strip, or that the expansion space was undercut. Filling laminate gaps with caulk or putty is generally not recommended because it interferes with the floating movement; the better fix is usually to relieve the binding point.
If you are unsure of your flooring type or its warranty terms, stop before filling. A photo of the gap and a call to the manufacturer’s technical line is cheaper than a repair that voids coverage.
Step 4: Decide whether to fill, wait, or escalate
Use this decision order:
- Wait if the gap is small and seasonal. If the gap is narrow, even, and appeared during heating season, hold humidity in the target range for several weeks and reassess. Many gaps close on their own.
- Fill only if the gap persists and the flooring type allows it. Use a product approved for your specific flooring and follow the manufacturer’s instructions exactly. Test in an inconspicuous spot first.
- Escalate if any warning sign is present. Wide or growing gaps, cupped or buckled boards, movement underfoot, or gaps that appear shortly after installation should be inspected before any repair.
When not to fill a gap yourself
Do not fill a gap yourself if:
- The gap is wide, growing, or appears across the whole floor
- Boards are cupped, buckled, or lifting
- The floor is a floating laminate or hybrid product and the gap may be a binding or expansion issue
In those cases, stop and contact a professional. Filling the wrong gap can hide a problem that gets worse, and rigid fillers can crack or be forced out when the floor moves back in spring.
Why Floor Planks Moving When Walking Signals a Bigger Problem
Boards that shift or creak under foot often point to a loose subfloor, fasteners that have worked loose, or joints that are no longer locked together. Seasonal shrinkage alone rarely causes boards to move underfoot. Treat movement as a warning sign and have the floor inspected before it spreads.
When to Contact Your Installer or Warranty Provider
Contact your installer or the flooring manufacturer’s warranty provider if you see any of the following:
- Gaps wider than the manufacturer’s guidance allows
- Boards that move, lift, or make noise when walked on
- Gaps that appear shortly after installation
Keep your purchase records, installation paperwork, and photos of the gaps. These help the installer or warranty provider evaluate the claim quickly.
Scheduling Your Flooring Assessment With Viva Floors & More
If the gaps persist after you have stabilized humidity, or if you see warning signs, a professional assessment can sort out the cause. Our team at Viva Floors & More can help you decide whether the issue is seasonal, installation-related, or something that needs repair. Request an estimate to get started, and bring your humidity readings and photos so we can review them with you.
Frequently Asked Questions
Is it normal for hardwood floor gaps to appear in winter?
Yes, small seasonal gaps are normal. Wood shrinks slightly when indoor air is dry, usually during heating season, and planks often return closer together in spring or summer. Gaps that are narrow, even, and disappear as humidity rises are generally harmless. Gaps that stay wide all year, grow steadily, or come with cupping, squeaking, or loose boards point to a different cause and deserve a professional inspection.
Can low humidity cause laminate flooring to separate?
Yes. Laminate and engineered wood are built from wood-based cores that respond to moisture changes, so dry indoor air in winter can pull seams apart. Keeping relative humidity in a stable range helps limit this movement. Use a hygrometer to check conditions, and run a humidifier if readings stay low for long stretches of the heating season.
Should I fill floor gaps that appear in winter?
Usually no. Seasonal gaps normally close as humidity returns, and filling them with wood filler or caulk can trap the planks, causing buckling when the wood expands in summer. Filling is only worth considering when a gap is permanent and the flooring manufacturer approves a specific method. Check your warranty first, since some repairs performed without authorization can void coverage.
How do I fix gaps between floor planks that stay open?
Start by confirming the cause: measure the gap, check humidity, and make sure the floor is not moving over an uneven subfloor. Then raise indoor humidity and monitor for a few weeks. If the gap remains, ask a flooring professional to assess whether the boards need re-securing, re-acclimating, or a manufacturer-approved repair. Avoid DIY fixes on floating floors without guidance, as they can cause further damage.
