Category: Blog

  • How to Seal Natural Stone Countertops: Step-by-Step

    How to Seal Natural Stone Countertops: Step-by-Step

    Table of Contents

    Last Updated: October 18, 2026

    Do Natural Stone Countertops Need Sealing?

    Not every natural stone countertop needs sealing. At Viva Floors & More, we tell customers: learn how to seal natural stone countertops only after you know whether your stone needs it.

    Porosity decides it: porous stone pulls liquid into capillaries; dense stone leaves it on top.

    Here is the short version:

    • Granite is usually low to medium porosity. Many slabs need sealing, some barely do.
    • Marble is softer and more absorbent. It also etches from acids, so sealing helps but does not fix everything.
    • Quartzite is dense and hard. Most quartzite resists stains well, though some varieties still benefit from a sealer.

    “Granite” covers hundreds of varieties, and two slabs from the same quarry can absorb at different rates.

    Which Stones Absorb and Which Resist

    • High absorption: marble, limestone, travertine, onyx
    • Medium absorption: many granites, some quartzites
    • Low absorption: dense granite, soapstone, slate

    Absorption is the real test: a stone that soaks up water will soak up red wine, oil, and lemon juice.

    A polished finish closes the surface a bit; a honed finish or leathered finish leaves it more open, so those stones want sealer more often.

    Pro Tip
    Ask your stone supplier which specific slab you are buying, not just the stone type. The finish matters as much as the mineral content when you decide whether to seal.

    How to Test if Granite Needs Sealing

    The water test answers this in about 15 minutes and costs nothing. Learning how to test if granite needs sealing is the most useful skill in countertop care.

    1. Clean the countertop and let it dry completely.
    2. Place a few water drops in an out-of-the-way spot.
    3. Wait 15 to 30 minutes.
    4. Watch what the water does.

    Read the result:

    • Water beads up and sits on top: the stone is resisting. You can wait on sealing.
    • Water spreads and darkens the stone: the surface is absorbing. Time to seal.
    • Water disappears into the stone: high porosity. Seal soon.

    Darkening around the drop is the key signal: that dark patch is moisture inside the stone.

    Test two or three spots, not one. A kitchen countertop gets uneven wear, and the area by the sink usually tells the truth first.

    Watch Out
    Do not run this test with oil or vinegar. Oil can leave a permanent mark on unsealed stone, and acid can etch marble. Water only.

    Choosing the Best Sealer for Natural Stone Countertops

    The best sealer for natural stone countertops is a penetrating sealer matched to your stone’s porosity and finish, not the cheapest bottle on the shelf. Match it and you get years of protection; mismatch it and you get a cloudy mess or a sealer that never bonds.

    How to Properly Seal Granite

    SCI – Stone Care International

    Most guides stop at “penetrating versus topical.” That is the first decision, not the last: next comes which penetrating sealer family fits your slab, then whether the finish changes the answer.

    Penetrating vs. Topical Sealers

    Penetrating sealer soaks into the stone and lines the capillaries from the inside, leaving no film so the stone still looks and feels like stone. Most kitchen countertops want this type.

    Topical sealer sits on top like a clear finish and can change the sheen. It works on floors and some tiles, but on a kitchen counter it scratches, peels, and traps moisture when it fails.

    For a countertop, choose penetrating. Every time.

    The Penetrating Sealer Families You Will Actually See

    Penetrating products are not interchangeable; they differ in chemistry, carrier, and behavior on a given stone.

    • Solvent-based penetrating sealers. The active ingredient rides a fast-flashing solvent. They penetrate dense, polished stone well and dry fast, but fumes are strong and need serious ventilation. Many fabricators favor them for granite and quartzite.
    • Water-based penetrating sealers. Lower odor, easier cleanup, longer working time. Common for marble, limestone, and travertine, and for homeowners avoiding fumes. Some need a longer cure before food contact.
    • Solvent-free or low-VOC impregnators. Formulated for indoor air-quality concerns. They often need a longer dwell time and a second coat on porous stone.

    Generally, solvent-based products suit dense, polished granite and quartzite; water-based products suit softer, absorbent stones and indoor spaces where fumes are a concern. Confirm the stone type on the label and technical data sheet.

    Match the Product to the Stone and the Finish

    Sealer choice follows porosity and finish, not just the stone name.

    • Polished granite and quartzite. The polish closes the surface, so a solvent-based penetrating sealer with a short dwell time is often enough. Wipe off excess thoroughly; dense stone absorbs little.
    • Honed or leathered granite. The open finish drinks more product. Expect a longer dwell time and possibly a second coat.
    • Marble, limestone, and travertine. Softer and more absorbent, and they etch from acids. Choose a penetrating sealer rated for calcareous stone; sealing slows staining but does not stop etching.

    What to Look For on the Label

    • Food-safe or food-contact rated. Important for any counter where food is prepared.
    • Impregnating sealer. Another name for penetrating.
    • Stone-specific rating. Granite sealer for granite, marble sealer for marble, and calcareous-stone ratings for limestone and travertine.

    Avoid anything labeled “enhancer” or “wet look” unless you want the stone to darken permanently. Those products add color, not just protection.

    Key Takeaway
    Penetrating sealer protects from the inside without changing the surface. Topical sealer sits on top and can peel. Within penetrating products, match the chemistry and carrier to your stone and finish, and read the dwell and cure times before you start.
    Watch Out
    Never mix brands or layer a topical product over a penetrating sealer on a countertop. The layers can bond poorly, trap moisture, or haze the stone. Pick one product family and follow its instructions.

    Step 1: Prep the Countertop Before You Apply

    Prep decides the outcome. Sealer bonds to clean stone and fails on dirty stone.

    1. Clear the counter and remove everything from the surface.
    2. Clean with a stone-safe cleaner or a few drops of mild dish soap in water.
    3. Scrub gently with a soft cloth. Skip anything abrasive.
    4. Rinse with clean water and wipe dry.
    5. Let the surface dry fully, at least a few hours, ideally overnight.

    A dry surface is non-negotiable. Sealer over trapped moisture gets locked out and cannot penetrate.

    Request Estimate →

    Check the seams and edges too.

    Ventilate before you open the bottle: most sealers carry fumes.

    If you are sealing a brand-new install, wait until the fabricator says the stone is ready.

    Watch Out
    Never seal over a wet countertop. Trapped moisture under a sealer can cloud the stone and leave a haze you cannot wipe away.

    Step 2: Apply Sealer in Small Sections

    Work in small sections, roughly 2 to 3 square feet at a time. This is where most DIY jobs go wrong.

    1. Pour a small amount onto the counter or onto your applicator.
    2. Spread it with a clean cloth, a soft brush, or a sealer applicator pad.
    3. Keep the coat thin and even.
    4. Move to the next small section and repeat.

    A thin layer beats a heavy pour. Extra product does not add protection. It just makes a sticky film you have to scrub off.
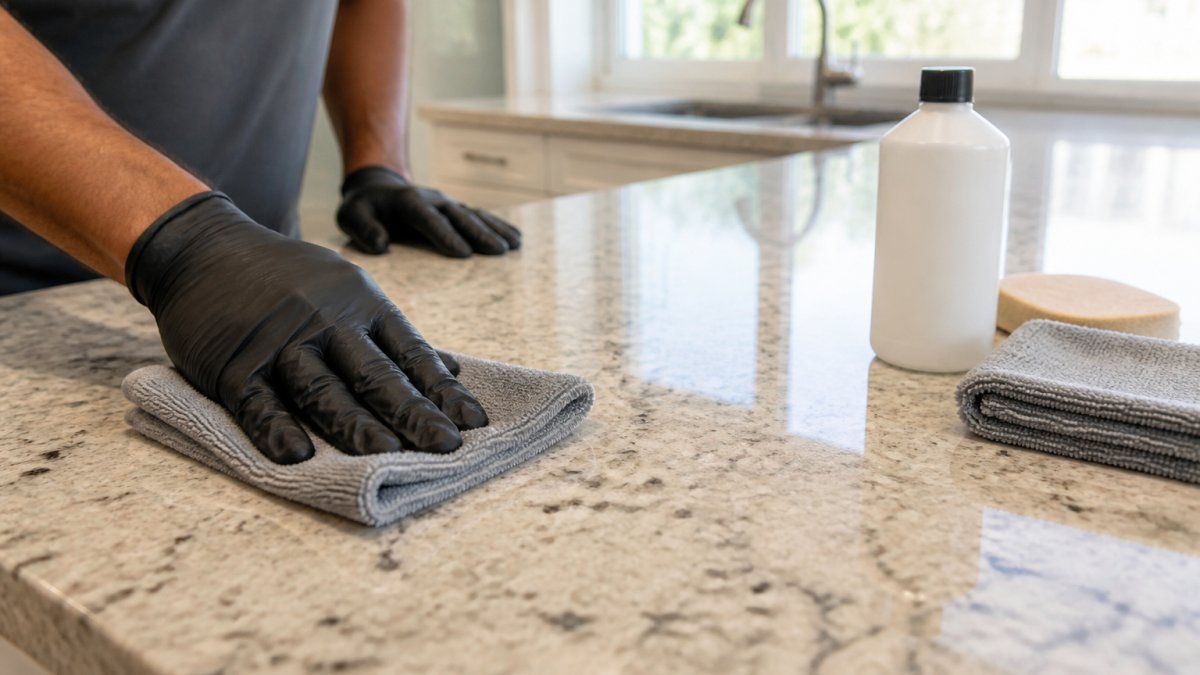
    Close-up of a homeowner's gloved hands wiping sealer onto a light granite kitchen countertop with a folded microfiber cloth, working one small section at a time, bright natural light from a window
    Close-up of a homeowner’s gloved hands wiping sealer onto a light granite kitchen countertop with a folded microfiber cloth, working one small section at a time, bright natural light from a window

    Keep a dry cloth nearby for drips. Wipe them immediately, not later.

    Let It Penetrate, Then Wipe Off the Excess

    Watch the surface after you spread the sealer: the stone looks wet, then starts to dull as it absorbs.

    Most products want 5 to 15 minutes of contact time.

    Then wipe off the excess. Use a clean, dry cloth and buff the surface until it feels dry to the touch.

    Do not let excess sealer dry on the stone.

    Some dense stones absorb almost nothing, so you will wipe off nearly everything you applied.

    Pro Tip
    If the sealer starts to feel tacky under your cloth, you waited too long. Wipe it off now and buff hard. Tacky sealer that dries becomes a haze.

    How Often to Seal Natural Stone Countertops

    Most stone countertops need resealing every 6 to 12 months, but that range is a starting point, not a schedule. Busy kitchens, porous stones, and honed finishes push toward 6 months; dense stone in a light-use kitchen can stretch to a year or more. The reliable answer comes from the stone, not the calendar.

    A Repeatable Resealing Decision Method

    The water-drop test is the standard field check, but most guides skip the details that make it repeatable. Follow this protocol so results are comparable each time.

    1. Pick fixed test spots. Choose two or three out-of-the-way locations and mark them mentally or with a small piece of painter’s tape nearby. The area near the sink and the area near the cooktop usually wear fastest.
    2. Clean and dry the spot. Wipe with a stone-safe cleaner and let it dry fully. Residual cleaner or moisture skews the result.
    3. Place three water drops about the size of a dime, spaced an inch apart.
    4. Start a timer and observe at 5, 10, 15, and 30 minutes. Note what each drop does at each interval.
    5. Record the result in a phone note with the date. Comparing this month’s result to last quarter’s is what turns a single test into a trend.

    Reading the Result

    • Water beads and sits on top for 30 minutes. The sealer is intact. Recheck in 2 to 3 months.
    • Water spreads slowly and darkens the stone within 10 to 15 minutes. The sealer is thinning. Plan to reseal within a few weeks.
    • Water darkens the stone within 5 minutes or soaks in fast. The sealer is failing or absent. Reseal this week.

    Why Results Vary by Stone and Finish

    Two counters sealed on the same day can need resealing months apart. The variables:

    • Porosity. Marble, limestone, and travertine absorb faster than dense granite, soapstone, and slate, so they usually need resealing sooner.
    • Finish. A polished surface sheds water longer than a honed or leathered surface of the same stone.
    • Use. A kitchen with daily cooking, citrus, and oil exposure wears sealer faster than a bathroom vanity or a butler’s pantry.

    Stone-Specific Starting Intervals

    Use these as starting points, then let the water test adjust them:

    • Marble, limestone, travertine, onyx: check every 3 to 6 months; reseal when the test darkens within 15 minutes.
    • Many granites and some quartzites: check every 6 to 12 months.
    • Dense granite, soapstone, slate: check every 12 months; many will not need sealer at all.

    Habits That Extend the Interval

    • Wipe spills promptly, especially wine, oil, and citrus.
    • Use a stone-safe cleaner, not vinegar or bleach.
    • Use trivets and cutting boards.
    Pro Tip
    Photograph the water drops at the 15-minute mark each time you test. Side-by-side photos from six months apart make the resealing decision obvious and take the guesswork out of how often to seal natural stone countertops.
    Watch Out
    Do not reseal on a calendar alone, and do not seal stone that does not need it. Over-sealing builds residue, and repeated coats on dense stone just sit on the surface.

    Stone Countertop Sealing Mistakes to Avoid

    These stone countertop sealing mistakes show up in almost every failed DIY job we hear about. Each one is easy to prevent.

    • Sealing a dirty counter. Dirt and grease block the sealer from bonding. Clean first, always.
    • Sealing a wet counter. Trapped moisture clouds the stone.
    • Flooding the surface. More product is not more protection. Thin coats win.
    Watch Out
    If your stone is already stained or etched, sealing will lock the problem in. Address stains and etching before you seal, or call a stone professional.

    If you are unsure which product fits your slab, bring a photo and your stone name to a showroom. Our team at Viva Floors & More helps homeowners and contractors match sealers to the stone they actually bought, not the label on a sample chip.


    Sealing a natural stone countertop is a weekend job anyone can handle, as long as you test first, prep properly, and work in small sections. Viva Floors & More stocks countertop solutions from trusted brands like MSI and offers expert consultation at our Pharr and Brownsville showrooms, so you can confirm your stone type before you start.

    Frequently Asked Questions

    What is a good sealer for natural stone countertops?

    A penetrating sealer is the usual choice for granite, marble, and quartzite because it soaks into the capillaries below the surface instead of sitting on top. Look for a solvent-based or water-based impregnating sealer labeled for the specific stone you own, and check whether it is food-safe for kitchen use. Topical sealers form a film that can scratch or peel, so they suit floors more than countertops. When in doubt, test a small hidden spot first.

    How do you test whether a stone countertop needs sealing?

    Place a few water drops on the surface and leave them for 15 to 30 minutes, then wipe them away. If the stone darkens under the drops or the water soaks in instead of beading, the surface is absorbing and needs sealer. If the drops sit on top and wipe off cleanly, the existing sealer is still working. Repeat the water test every few months, especially on high-use areas near the sink and cooktop.

    How long should stone sealer sit before you wipe it off?

    Most penetrating sealers need 5 to 15 minutes of dwell time so the product can soak into the capillaries. Read the stone-specific instructions on the label, because porous stones may want a second coat while dense stones need less. Wipe off excess sealer before it dries, or it can leave a sticky film that is hard to remove. Full cure typically takes 24 to 72 hours, so keep water off the countertop during that window.

    How many coats of sealer should you apply to a stone countertop?

    Start with one thin coat and let it penetrate fully. If the water test still shows absorption after the first coat cures, apply a second thin layer. Two coats is typical for porous stones like some granites, while dense quartzite may only need one. More coats is not better: too much product sits on the surface and creates haze. Always follow the manufacturer’s stone-specific instructions rather than adding extra layers.

  • Benefits of Professional Flooring Consultation

    Benefits of Professional Flooring Consultation

    Table of Contents

    Last Updated: October 17, 2026

    Why a Professional Flooring Consultation Saves You Money

    A professional flooring consultation is a guided assessment where a specialist evaluates your space, household, and budget before you buy a single plank.

    Most people shop backwards: they pick a color, order it, then discover the subfloor is uneven or the material will not survive three kids and two dogs. A flooring consultation flips the sequence, assess first, choose second, buy third.

    Expert Guidance That Prevents Costly Mistakes

    The most common mistake we see is buying flooring that fights the room it lives in. A specialist catches problems before they become returns, restocking fees, or a second purchase.

    • Wrong material for moisture. Bathrooms, laundry rooms, and slab-on-grade floors need moisture-tolerant options. Solid hardwood in those spaces often fails.
    • Wrong finish for traffic. A high-gloss floor in a busy hallway shows every scuff. A textured surface hides it.
    • Wrong quantity. Over-ordering wastes money; under-ordering means a second dye lot that may not match.

    Expert guidance is not upselling. It is matching product knowledge to your actual conditions so you buy once.

    Accurate Measurements and Less Material Waste

    Accurate measurements are the quiet money-saver in every renovation. A consultant measures each room, accounts for doorways, closets, and angles, then adds the correct waste allowance for the layout. Complex rooms with many cuts need more overage than a simple rectangle. Getting this right reduces waste and prevents running short near the end of an install.

    Pro Tip
    Ask your consultant to note the waste allowance on the estimate. A simple room might need a modest overage, while a diagonal or herringbone layout needs noticeably more. Knowing why the number is what it is keeps you from overpaying for boxes you will never open.

    Choosing the Right Flooring Material for Every Room

    Choosing the right flooring material comes down to matching product to room requirements, not to a trend board. The best flooring for a bedroom is rarely the best for a mudroom. Here is how we group the decision:

    1. Define the room’s job. Is it wet, dry, high-traffic, or quiet?
    2. Set the lifestyle filter. Pets, kids, mobility needs, and allergies all narrow the field.
    3. Confirm the subfloor. Some materials demand a flat, dry substrate.
    4. Compare durability and lifespan. A longer flooring lifespan spreads the cost over more years.
    5. Check the warranty. Warranty protection depends on correct installation and use.

    Vinyl plank, for example, earns its popularity in busy family homes because it handles moisture and daily abuse well. Hardwood wins on long-term value and refinishability. Tile suits wet areas. The consultation exists to sort these trade-offs against your real life.

    Matching Flooring to Lifestyle Needs

    Lifestyle needs are where showroom browsing and real life collide. If a customer has pets and young kids, we steer toward stain-resistant, low-maintenance options with strong wear layers.

    We also ask about sunlight. A room with strong afternoon light can shift how a color reads, which is why we never let a customer commit to a shade without seeing it in their own space.

    What to Expect During an In-Home Flooring Consultation

    An in-home flooring consultation is a site assessment at your property, where a specialist measures rooms, inspects the subfloor, and reviews samples under your own lighting.

    A flooring consultant and homeowner kneeling in a bright living room, comparing flooring samples spread on the floor near a large window with natural afternoon light
    A flooring consultant and homeowner kneeling in a bright living room, comparing flooring samples spread on the floor near a large window with natural afternoon light

    What to Have Ready Before the Consultant Arrives

    A little prep makes the visit far more useful. Have these ready:

    • Room measurements you already know (even rough ones) so the consultant can sanity-check against their own.
    • A budget range, including whether it is a hard ceiling or a target, this shapes material recommendations more than any other input.
    • Photos of any known problem areas, a soft spot near a tub, a squeaky hallway, a crack in the slab.

    The Typical Flow

    • Walkthrough. You discuss goals, budget, and timeline room by room.
    • Measurements. The specialist records exact dimensions, notes doorways, closets, angles, and transitions between rooms and to other flooring.
    • Subfloor check. They look for unevenness, moisture, and issues with the existing covering.

    What You Should Leave With

    This is where a real consultation separates itself from a sales pitch. By the end of the visit you should have, in writing:

    1. A room-by-room material recommendation with the reason for each pick, not just a product name.
    2. Measured quantities and a stated waste allowance for each room.
    3. A subfloor assessment noting any prep work needed and whether it is included in the quote.
    4. A line-item estimate separating material, labor, prep, trim and transitions, removal and disposal, and any contingency.
    5. A projected timeline with the order of rooms and any cure or acclimation time for the material.
    6. Warranty terms for both the product and the installation, and who honors each.

    If a visit ends with a product brochure and a lump-sum number, you did not get a consultation. You got a quote.

    Pro Tip
    Ask the consultant to leave the measurements and waste allowance on the written estimate. That single document lets you compare competing quotes line by line instead of guessing why one total is lower than another.

    A shop-at-home service like this removes the guesswork: you see the product in the room it will live in and get questions answered on the spot. The durable value, though, is the written plan you carry away.

    Request Estimate →

    How Flooring Samples for Home Use Prevent Costly Surprises

    Flooring samples for home are small cut pieces of the actual product you take home to view under your own lighting before buying, the single best defense against the “it looked different in the store” problem. A warm-toned floor near a north-facing window reads cooler than under a showroom’s bright overheads, so seeing a sample in your room at different times of day tells you the truth.

    Watch Out
    Never approve a large order from a photo or a tiny swatch alone. Dye lots vary between production runs, and screen colors are unreliable. Confirm the sample against the batch you will actually receive, or you risk a floor that clashes with your cabinets and a return fight you cannot win.

    Take samples home. Live with them for a few days. Compare them against your paint, your furniture, and your countertops.

    Getting a Reliable Flooring Installation Cost Estimate

    A reliable flooring installation cost estimate separates material from labor and lists what is included, so you can compare quotes fairly. Vague lump-sum numbers are where budgets quietly break. Your estimate should break out:

    Line Item What It Should Tell You
    Material Product, coverage, and waste allowance
    Installation Labor scope and any prep work
    Subfloor prep Leveling, patching, or moisture treatment
    Extras Trim, transitions, removal, and disposal
    Contingency A buffer for surprises found on site

    Pricing depends on the material, the room’s complexity, and the condition of the subfloor, so we quote each project individually rather than publishing a flat rate. Request a written estimate and read the scope line by line. Two quotes with the same total can cover very different work.

    Key Takeaway
    The cheapest quote is rarely the cheapest project. Compare what each estimate includes, especially subfloor preparation and disposal, because those are the costs that appear later as “extras.”

    Key Questions to Ask a Flooring Contractor Before You Commit

    The right questions to ask a flooring contractor reveal whether you are dealing with a true flooring specialist or a salesperson. Ask before you sign anything.

    • How long have you been in business, and can you show local references?
    • Who performs the installation, and are they insured?
    • What does the estimate include, and what could add cost later?

    Red flags to watch for: pressure to sign today, no written scope, evasive answers about insurance, and quotes far below everyone else. Those gaps usually get filled by you later.

    Best For
    Homeowners comparing multiple quotes who want an objective way to judge each proposal before committing to a contractor.

    Subfloor Inspection and Installation Planning: What a Consultant Checks

    Subfloor inspection is the step that decides whether your new floor lasts. A consultant checks for uneven subfloors, moisture, and surface preparation needs before installation planning begins, then translates each finding into a material recommendation and a line item on your estimate. Here is what gets examined and what it typically changes:

    1. Flatness. Low or high spots cause squeaks, gaps, and premature wear. Most resilient and tile products specify a flatness tolerance over a given span; a consultant measures the worst spots rather than eyeballing the room. Out-of-tolerance areas usually mean self-leveling compound or patching, a prep cost that belongs on the estimate, not a surprise invoice.
    2. Moisture. Excess moisture under a slab or in a crawlspace can ruin many materials. A consultant tests rather than guesses, a moisture meter reading or a plastic-sheet test over a slab tells you whether a moisture barrier or a moisture-tolerant product is required. This check is the most likely to change which material is safe to install.
    3. Existing covering. Old adhesive, staples, damaged underlayment, or a second layer of flooring may need removal. Removal and disposal are real costs, and some materials cannot go over certain existing coverings at all. Knowing this before you buy prevents a product from being ruled out after it is ordered.
    4. Structure. Soft spots, deflection, or movement signal repairs before new flooring goes down. A floor that flexes underfoot will crack tile and pop plank seams regardless of how good the material is.
    5. Transitions and height. New flooring changes the height at doorways, at the top of stairs, and where it meets other rooms. A consultant notes each transition so the estimate includes the right trim and reducers instead of adding them later.

    How Findings Change the Plan

    A subfloor finding is not just a repair. It is a fork in the material decision:

    • A slab with elevated moisture may rule out solid hardwood and push the recommendation toward luxury vinyl plank or tile.
    • A floor that is flat but not level may be fine for some products and unacceptable for others.
    • A room with significant patching needs may make a thicker underlayment the cheaper path than extensive leveling.

    Addressing these during planning protects your installation quality and warranty protection. Most manufacturers tie warranty coverage to installation over a properly prepared substrate, so skipping prep is how a beautiful floor fails in a year, and how a warranty claim gets denied.

    Watch Out
    If a quote does not mention subfloor prep at all, ask specifically what was found and whether the price assumes a flat, dry substrate. That assumption is where budgets quietly break.
    Key Takeaway
    Ask for the subfloor findings in writing alongside the estimate. A consultant who documents flatness, moisture, and prep needs is giving you the information you need to compare quotes fairly, and the paper trail you want if a warranty question ever comes up.

    Conclusion

    The hardest part of a flooring renovation is not picking a color. It is avoiding the expensive surprises that show up after the boxes are open. A professional flooring consultation from Viva Floors & More takes the guesswork out of material selection, measurements, and subfloor preparation, backed by our family-owned experience since 1992 and one of the largest flooring selections in the region.

    Frequently Asked Questions

    What happens during a flooring consultation?

    A flooring consultation typically starts with a conversation about your rooms, lifestyle, and budget. The consultant then inspects your subfloor for uneven areas or moisture issues, takes precise measurements, and shows you flooring samples that fit your needs. You’ll leave with a clearer picture of material options, a project estimate, and an installation plan. In-home visits add the benefit of seeing your actual lighting and layout, which helps prevent color and fit surprises.

    Can a flooring consultation help me estimate installation costs?

    Yes. A professional consultation gives you a flooring installation cost estimate based on accurate square footage, subfloor condition, and the material you choose. The consultant factors in labor, underlayment, trim, and any prep work like leveling. Because the estimate is tied to real measurements and site conditions rather than guesswork, it’s far more reliable than online calculators. Ask for a written quote that breaks down materials and labor separately so you can compare options.

    Should I get flooring samples before making a decision?

    Always. Flooring samples for home use let you see how a material looks under your own lighting, next to your cabinets, and against your wall color. A sample that looks perfect in a showroom can read completely differently in a north-facing bedroom. Take samples home, leave them in the room for a few days, and view them at different times of day. This simple step prevents the most common flooring regret: a color that doesn’t match once installed.

    What questions should I ask a flooring contractor?

    Ask how long they’ve been in business, whether they handle subfloor preparation, and what their written estimate includes. Confirm the warranty terms for both materials and workmanship, and ask who handles punch-list fixes after installation. Also ask about lead times and whether the material is in stock. A good contractor welcomes these questions and answers them plainly. If any answer feels evasive, treat it as a red flag and get a second opinion before signing.

  • Professional Flooring Consultation vs Online Shopping

    Professional Flooring Consultation vs Online Shopping

    Table of Contents

    Last Updated: October 15, 2026

    The Real Difference Between a Flooring Consultation and Online Shopping

    Choosing between a professional flooring consultation and online shopping comes down to one question: who absorbs the risk when something goes wrong? Online retailers hand you a box and a tracking number. A flooring expert walks your rooms, measures your subfloor, and stands behind the material when it’s installed.

    Online shopping wins on browsing speed and upfront price. The Federal Trade Commission’s guidance on mail, internet, and telephone order merchandise is clear that sellers must ship by the date promised or offer a refund, but it says nothing about who pays when a pallet arrives with crushed edges or the dye lot doesn’t match your hallway.

    Below, we break down total cost, samples, contractor questions, quote comparison, and supplier selection so you can pick the right channel for your project.

    Online Shopping vs Local Flooring Store: A Total Cost Comparison

    The sticker price online is not the price you pay. A local flooring store quote bundles services that online sellers bill separately or leave to you, so a true total-cost comparison runs the whole project, line by line.

    The Cost Lines Most Buyers Forget

    A cart total and a showroom quote cover different scopes. Here is what a realistic project budget must account for:

    • Material price. Online listings are usually lower per square foot because there is no showroom, local inventory, or sales staff, the one line where online wins cleanly.
    • Freight and delivery. Online flooring is heavy. Freight is often quoted separately, and liftgate service plus inside placement are frequent add-ons or not offered. A local store typically quotes delivery as part of the job or includes it above a threshold.
    • Samples. Mail-order samples may be free or a few dollars each, but arrive as small chips that do not show a full plank’s grain. Showroom samples are usually free, take-home, and full-size.
    • Waste and overage. Every installation needs extra material for cuts, waste, and future repairs, commonly 5-10% for a simple rectangular room, more for angles or diagonal layouts. Order too little online and you pay a second freight charge plus the risk of a different dye lot.

    A Simple Way to Compare

    Do not compare the material price. Compare the delivered, installed, and returnable cost. Ask each channel for a written number covering material, freight, delivery placement, samples, waste allowance, consumables, installation, and the return policy. The lower material price is not always the lower total, the gap shows up in lines that were never quoted.

    Cost Factor Online Order Local Flooring Store
    Material price Lower upfront Higher upfront
    Freight and delivery Often added at checkout; liftgate and inside placement extra Quoted or included
    Samples Mail-order, small chips, may cost per sample In showroom, full-size, take-home
    Waste allowance You calculate it Supplier advises 5-10%+
    Consumables Separate purchase Often itemized in quote
    Subfloor prep Your responsibility Coordinated
    Damaged or missing material Claim process, you reorder Replaced through supplier
    Returns Unopened only, you pay freight, restocking fee common Handled at counter
    Dye-lot match on reorder Not guaranteed Often pulled from same lot
    Warranty support Call center Named contact
    Watch Out
    The most common mistake we see is ordering the exact square footage a room measures. Add 5-10% for cuts, waste, and future repairs. Running short mid-install means a second order, and a second order may come from a different dye lot.
    Key Takeaway
    Compare the delivered, installed, and returnable cost, not the sticker price. The channel that looks cheaper in the cart is often the more expensive one by the time the last plank is down.

    Why Flooring Samples Before Buying Matter More Than Photos

    Flooring samples before buying are not a formality. Screen calibration, studio lighting, and photo editing distort color, and a hardwood that reads warm on your phone can look gray in a north-facing bedroom.

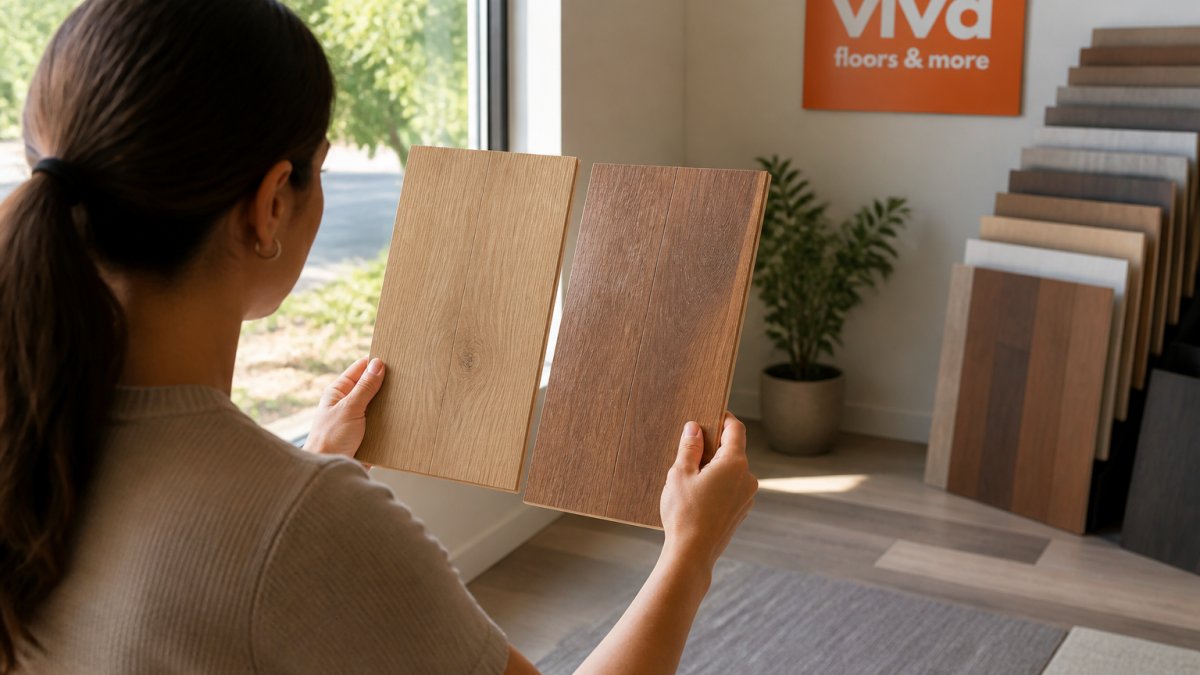
    A homeowner holding two flooring samples side by side near a sunlit window, comparing wood grain and color in natural room lighting
    A homeowner holding two flooring samples side by side near a sunlit window, comparing wood grain and color in natural room lighting

    Take samples home. Look at them at noon, at dusk, and under your actual lamps.

    Lighting changes a floor more than the finish does. A sample viewed only under showroom fluorescents tells you little about how the same plank behaves in a room with west-facing windows.

    Questions to Ask a Flooring Contractor Before You Commit

    The right questions to ask a flooring contractor separate a professional from a crew with a truck. Ask before you sign, not after demolition starts.

    • Who measures the rooms, and is that measurement guaranteed?
    • How will you handle subfloor prep, and is it in the written quote?
    • What is the acclimation time for this material in my home?
    • Who files the warranty claim if a plank fails in year two?

    The U.S. Environmental Protection Agency’s guidance on indoor air quality and flooring materials is worth a look if anyone in the household has asthma or chemical sensitivity, since adhesives and finishes vary widely in emission profiles.

    How to Compare Flooring Installation Quotes Without Getting Burned

    Comparing flooring installation quotes means comparing scope, not totals. Two quotes with the same bottom line can cover wildly different work.

    Demand an itemized quote listing material, underlayment, adhesive, transitions, removal and disposal of the old floor, subfloor prep, and labor as separate lines.

    Request Estimate →

    Then compare exclusions. A low quote often excludes subfloor leveling, the most common surprise charge on a renovation.

    Pro Tip
    Ask for the quote to name the exact product and dye lot, not just “luxury vinyl plank.” When the material is specified, you can verify it is the same product across every bid, and you have a paper trail if the wrong batch shows up on delivery day.

    How to Choose a Flooring Supplier for Your Project Type

    How to choose a flooring supplier depends on what you are building, and what is under the floor. A single-room refresh, a whole-home renovation, and a multi-unit build have different needs. The angle most guides skip is technical suitability: the product that looks perfect online can fail because of moisture, subfloor condition, or transitions. A supplier worth choosing helps you answer those questions before you buy.

    Match the Supplier to the Project

    • Single room, DIY. You want a supplier that sells to homeowners, stocks take-home samples, and answers installation questions. Ask whether they will review your subfloor photos before you order.
    • Whole-home renovation. Availability and coordination matter more than a friendly showroom. Confirm bulk stock, delivery timing, and whether the supplier can hold a single dye lot across the order.
    • New build or multi-unit. Volume and consistency drive the decision. Verify lead times and dye-lot matching in writing, because a backorder on one product can stall an entire schedule.
    • Rental or commercial. Durability and warranty coverage for high-traffic areas decide it. Ask about wear layer thickness and warranty exclusions.
    Project Type Priority What to Verify
    Single room, DIY Guidance and samples Take-home samples, install advice, subfloor review
    Whole-home renovation Availability and coordination Bulk stock, delivery timing, single dye lot
    New build or multi-unit Volume and consistency Dye lot matching, lead times
    Rental or commercial Durability and warranty Wear layer, warranty terms

    The Technical Questions a Good Supplier Will Ask You

    This is where a consultation earns its keep. Before recommending a product, a knowledgeable supplier should walk through the conditions that decide whether a floor will perform:

    • Moisture. Concrete slabs wick moisture from below, and a slab that looks dry can still be too damp for solid hardwood or glue-down installation. A supplier should ask whether the slab is on or below grade and whether a moisture test has been done. A calcium chloride or in-situ probe test gives the emission rate, and the product’s spec sheet states the maximum it tolerates.
    • Subfloor condition. Is the subfloor flat, level, and sound? Most manufacturers specify a flatness tolerance, commonly 1/8 inch in 6 feet or 3/16 inch in 10 feet, and a floor over a hump or dip will telegraph the defect. A supplier who asks for photos or a site visit is protecting you from a callback.
    • Transitions and height. A thick floor under a door can leave no clearance for the swing, and a transition strip to an adjacent room may need a specific height. Confirm door clearances and transition options before you commit.
    • Underlayment and compatibility. Some products require a specific underlayment, some have an attached pad, and some cannot be glued down. The wrong one can void the warranty. Ask what the manufacturer requires, not what is cheapest.

    A flooring supplier that carries trusted brands, holds real inventory, and asks these technical questions solves the problem most buyers underestimate: waiting weeks for a product that was “in stock” online, only to find it does not suit the room it was meant for.

    Pro Tip
    Before you buy, ask the supplier to confirm three things in writing: the moisture tolerance of the product, the subfloor flatness it requires, and the underlayment it needs. Those three answers prevent most installation failures, and most warranty disputes.

    When Online Shopping Makes Sense and When a Flooring Consultation Wins

    Online ordering makes sense for a small, simple job where you know the exact product, the room is a straightforward rectangle, and you are comfortable handling returns yourself.

    A flooring consultation wins almost everywhere else.

    Here is the decision framework we use:

    • Small, simple, known product → online ordering can work
    • Multiple rooms or unknown subfloor → get a consultation
    • Pets, kids, or heavy traffic → ask a flooring expert about wear layers and warranty terms
    • New build or contractor project → work with a supplier that holds bulk inventory
    • Any project on a deadline → prioritize material availability over the lowest unit price

    If you are weighing a professional flooring consultation against online shopping for anything larger than a single closet, the consultation almost always pays for itself in avoided reorders, delays, and replacement costs.


    Flooring decisions get expensive when they go wrong, and the wrong channel is usually the reason. Viva Floors & More has served homeowners, builders, and contractors across the Rio Grande Valley since 1992, and we built our process around the problems online orders create: take-home samples so you see the real color, expert consultation to measure and plan your rooms, and one of the largest in-stock selections in South Texas so your project does not wait on a backorder. Request an estimate from Viva Floors & More and let our team take the guesswork out of your next floor.

    Frequently Asked Questions

    What are the benefits of a professional flooring consultation?

    A professional flooring consultation gives you access to product knowledge that online listings rarely provide. A flooring expert can assess your subfloor, measure room dimensions, and recommend materials suited to your home’s humidity, foot traffic, and existing decor. You also get help with color matching, installation planning, and warranty coverage questions. For projects involving hardwood flooring or large material quantities, that guidance reduces the risk of ordering the wrong product or miscalculating how much you need.

    Can I accurately choose flooring from online photos?

    Online photos rarely capture how flooring materials look in your actual room lighting. Screens vary in color calibration, and texture, sheen, and grain patterns are hard to judge from a flat image. Ordering flooring samples before buying lets you see how a product looks in your space at different times of day. A local showroom takes that further by letting you compare multiple samples side by side under controlled lighting before committing to a purchase.

    How do I compare flooring installation quotes from different suppliers?

    Ask each supplier for an itemized quote that separates material cost, delivery or shipping costs, installation labor, and any removal or disposal fees. Check whether the quote includes subfloor preparation, trim work, and warranty coverage. Be wary of quotes that only list a single lump sum. When you compare flooring installation quotes, factor in material availability and lead times too, since a lower price often means a longer wait or a product that may go out of stock mid-project.

    Is it better to shop online or in a physical store for flooring?

    It depends on your project. Online ordering works well for simple, low-risk purchases where you already know the exact product and quantity. A physical store or showroom is better when you need to see samples, get measurements verified, or coordinate installation. For larger renovations with multiple rooms, a professional flooring consultation helps you avoid costly mistakes like ordering too little material or choosing a product that does not suit your subfloor. Many homeowners use both: research online, then finalize in person.